Enterprise Plan Feature: SAML Single Sign-On is available exclusively for workspaces on the Enterprise plan.
For Biqli Enterprise users, you can securely manage your team’s access to Biqli using Google Workspace SAML SSO.

Step 1: Create SAML Integration

In your Google Admin dashboard, navigate to Apps in the left sidebar and select Web and mobile apps from the list.
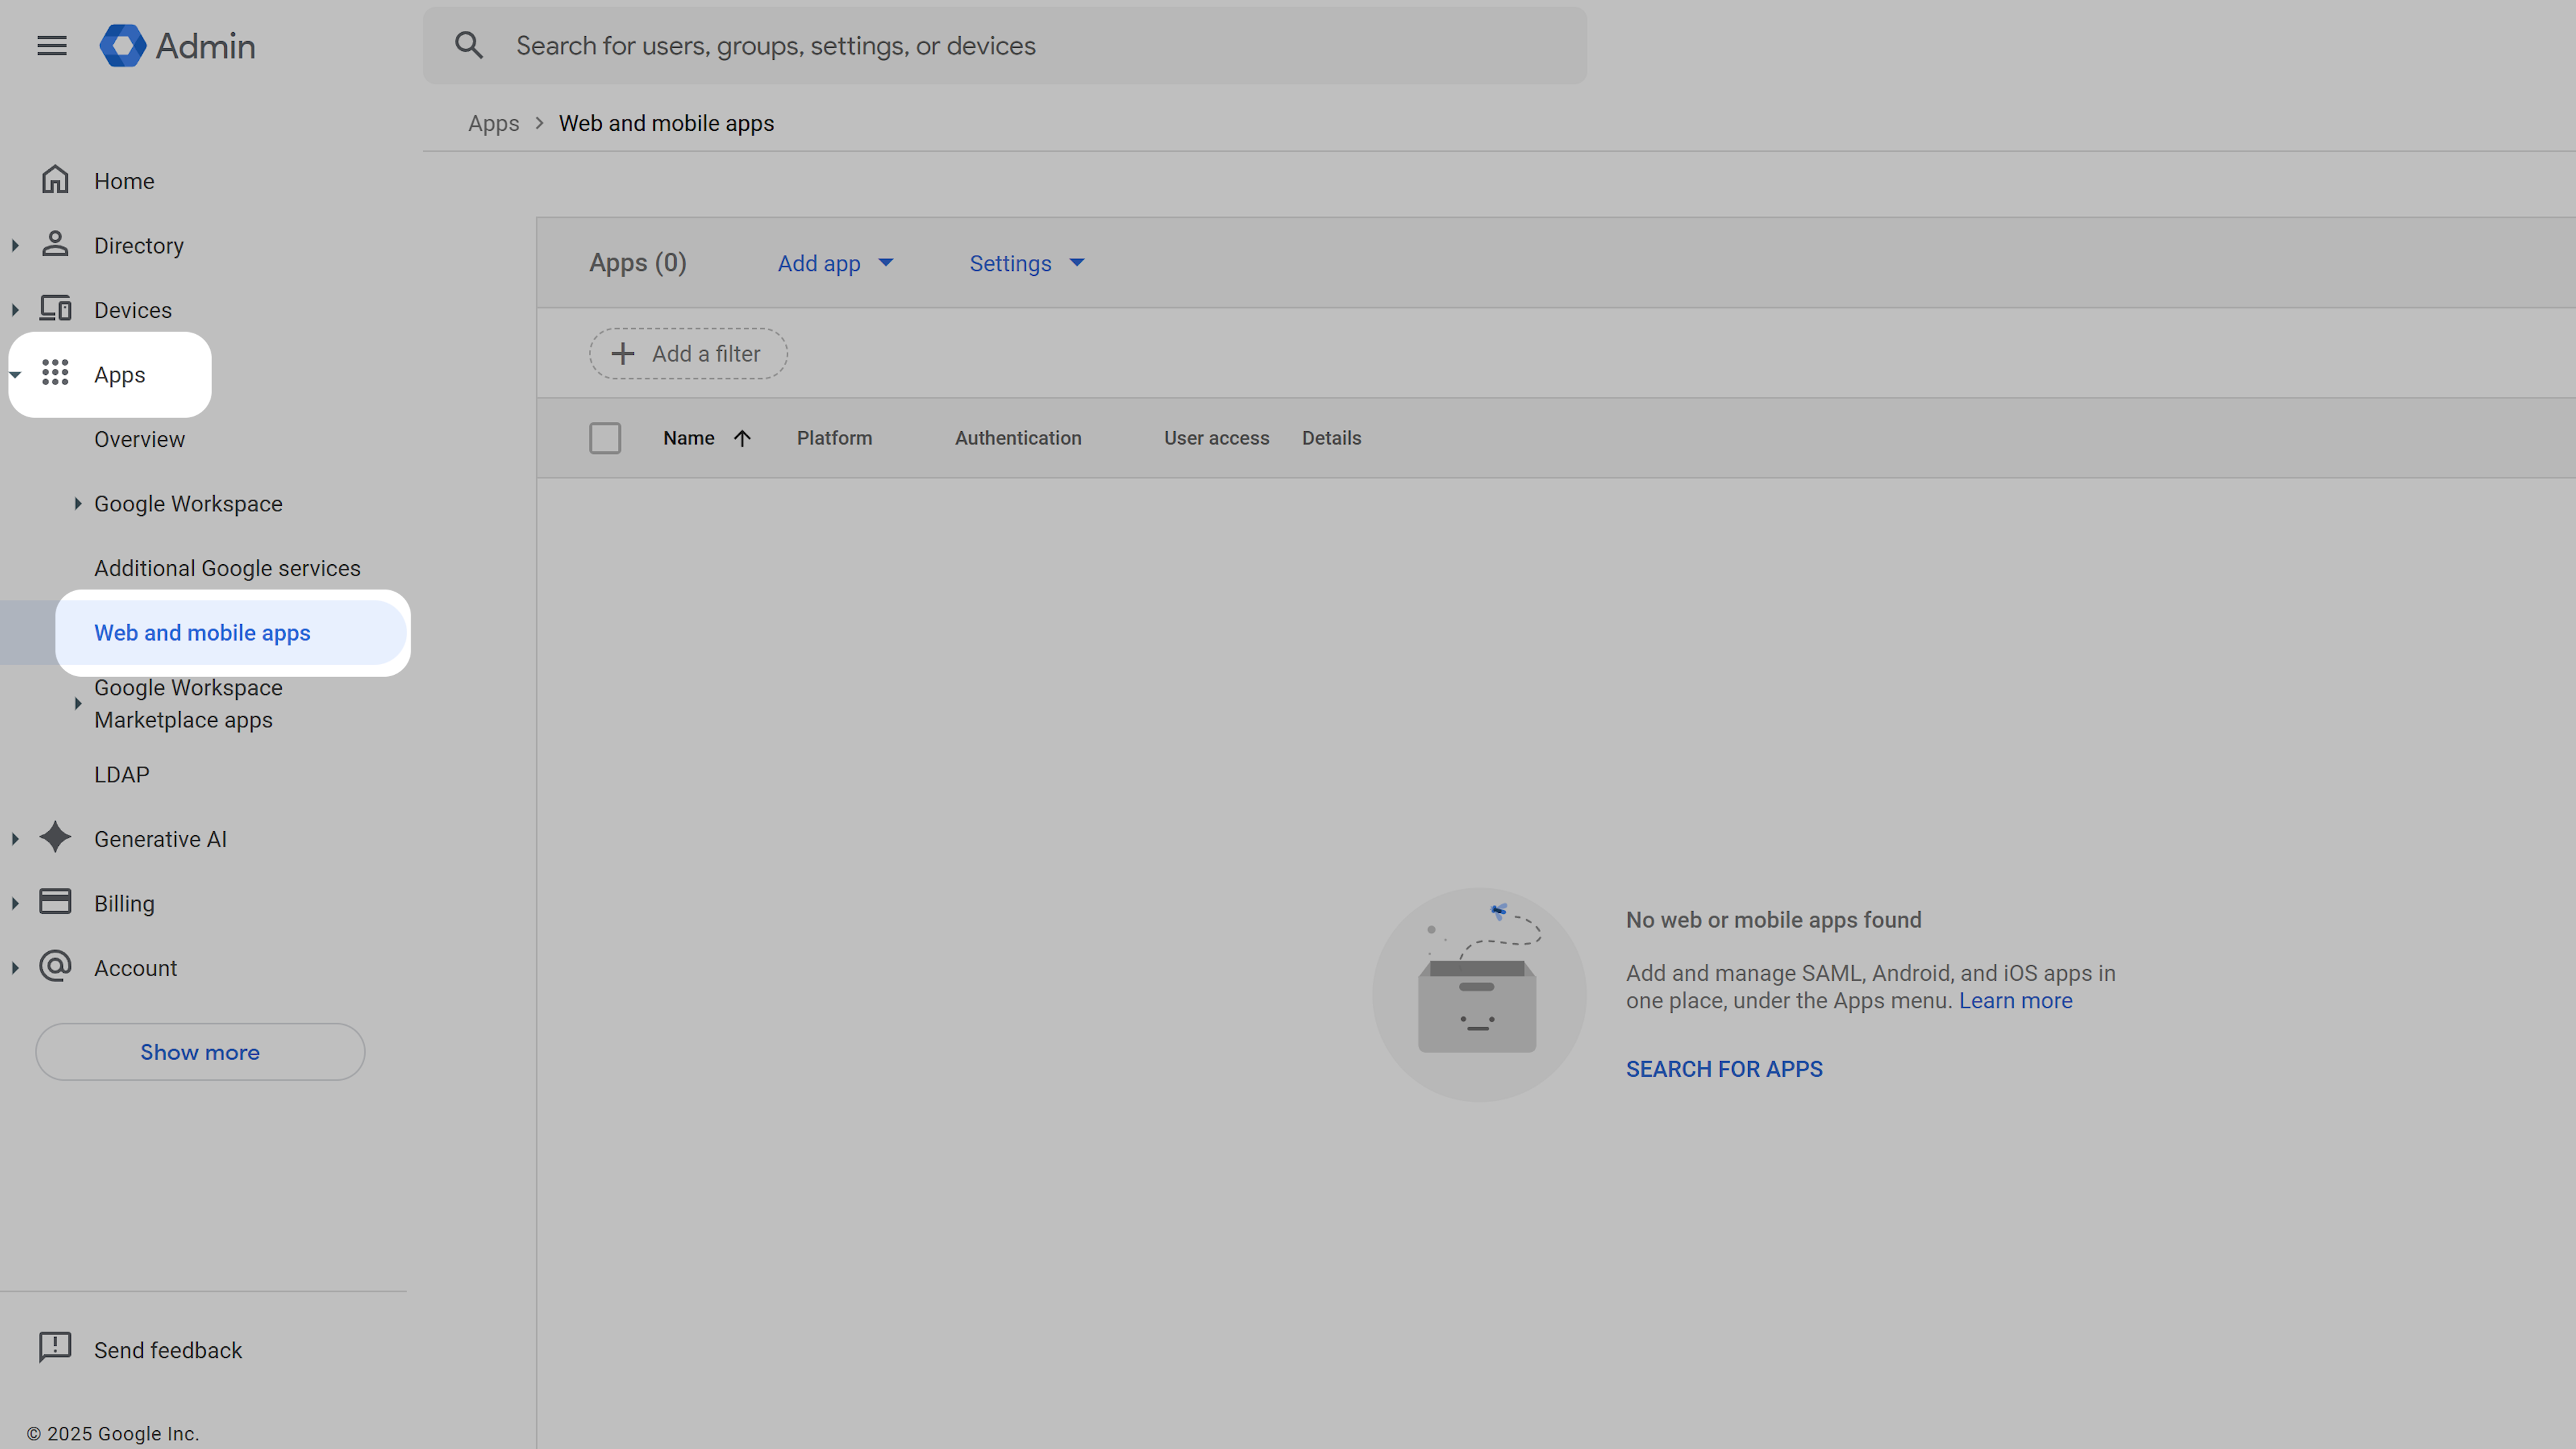
Navigate to Web and mobile apps
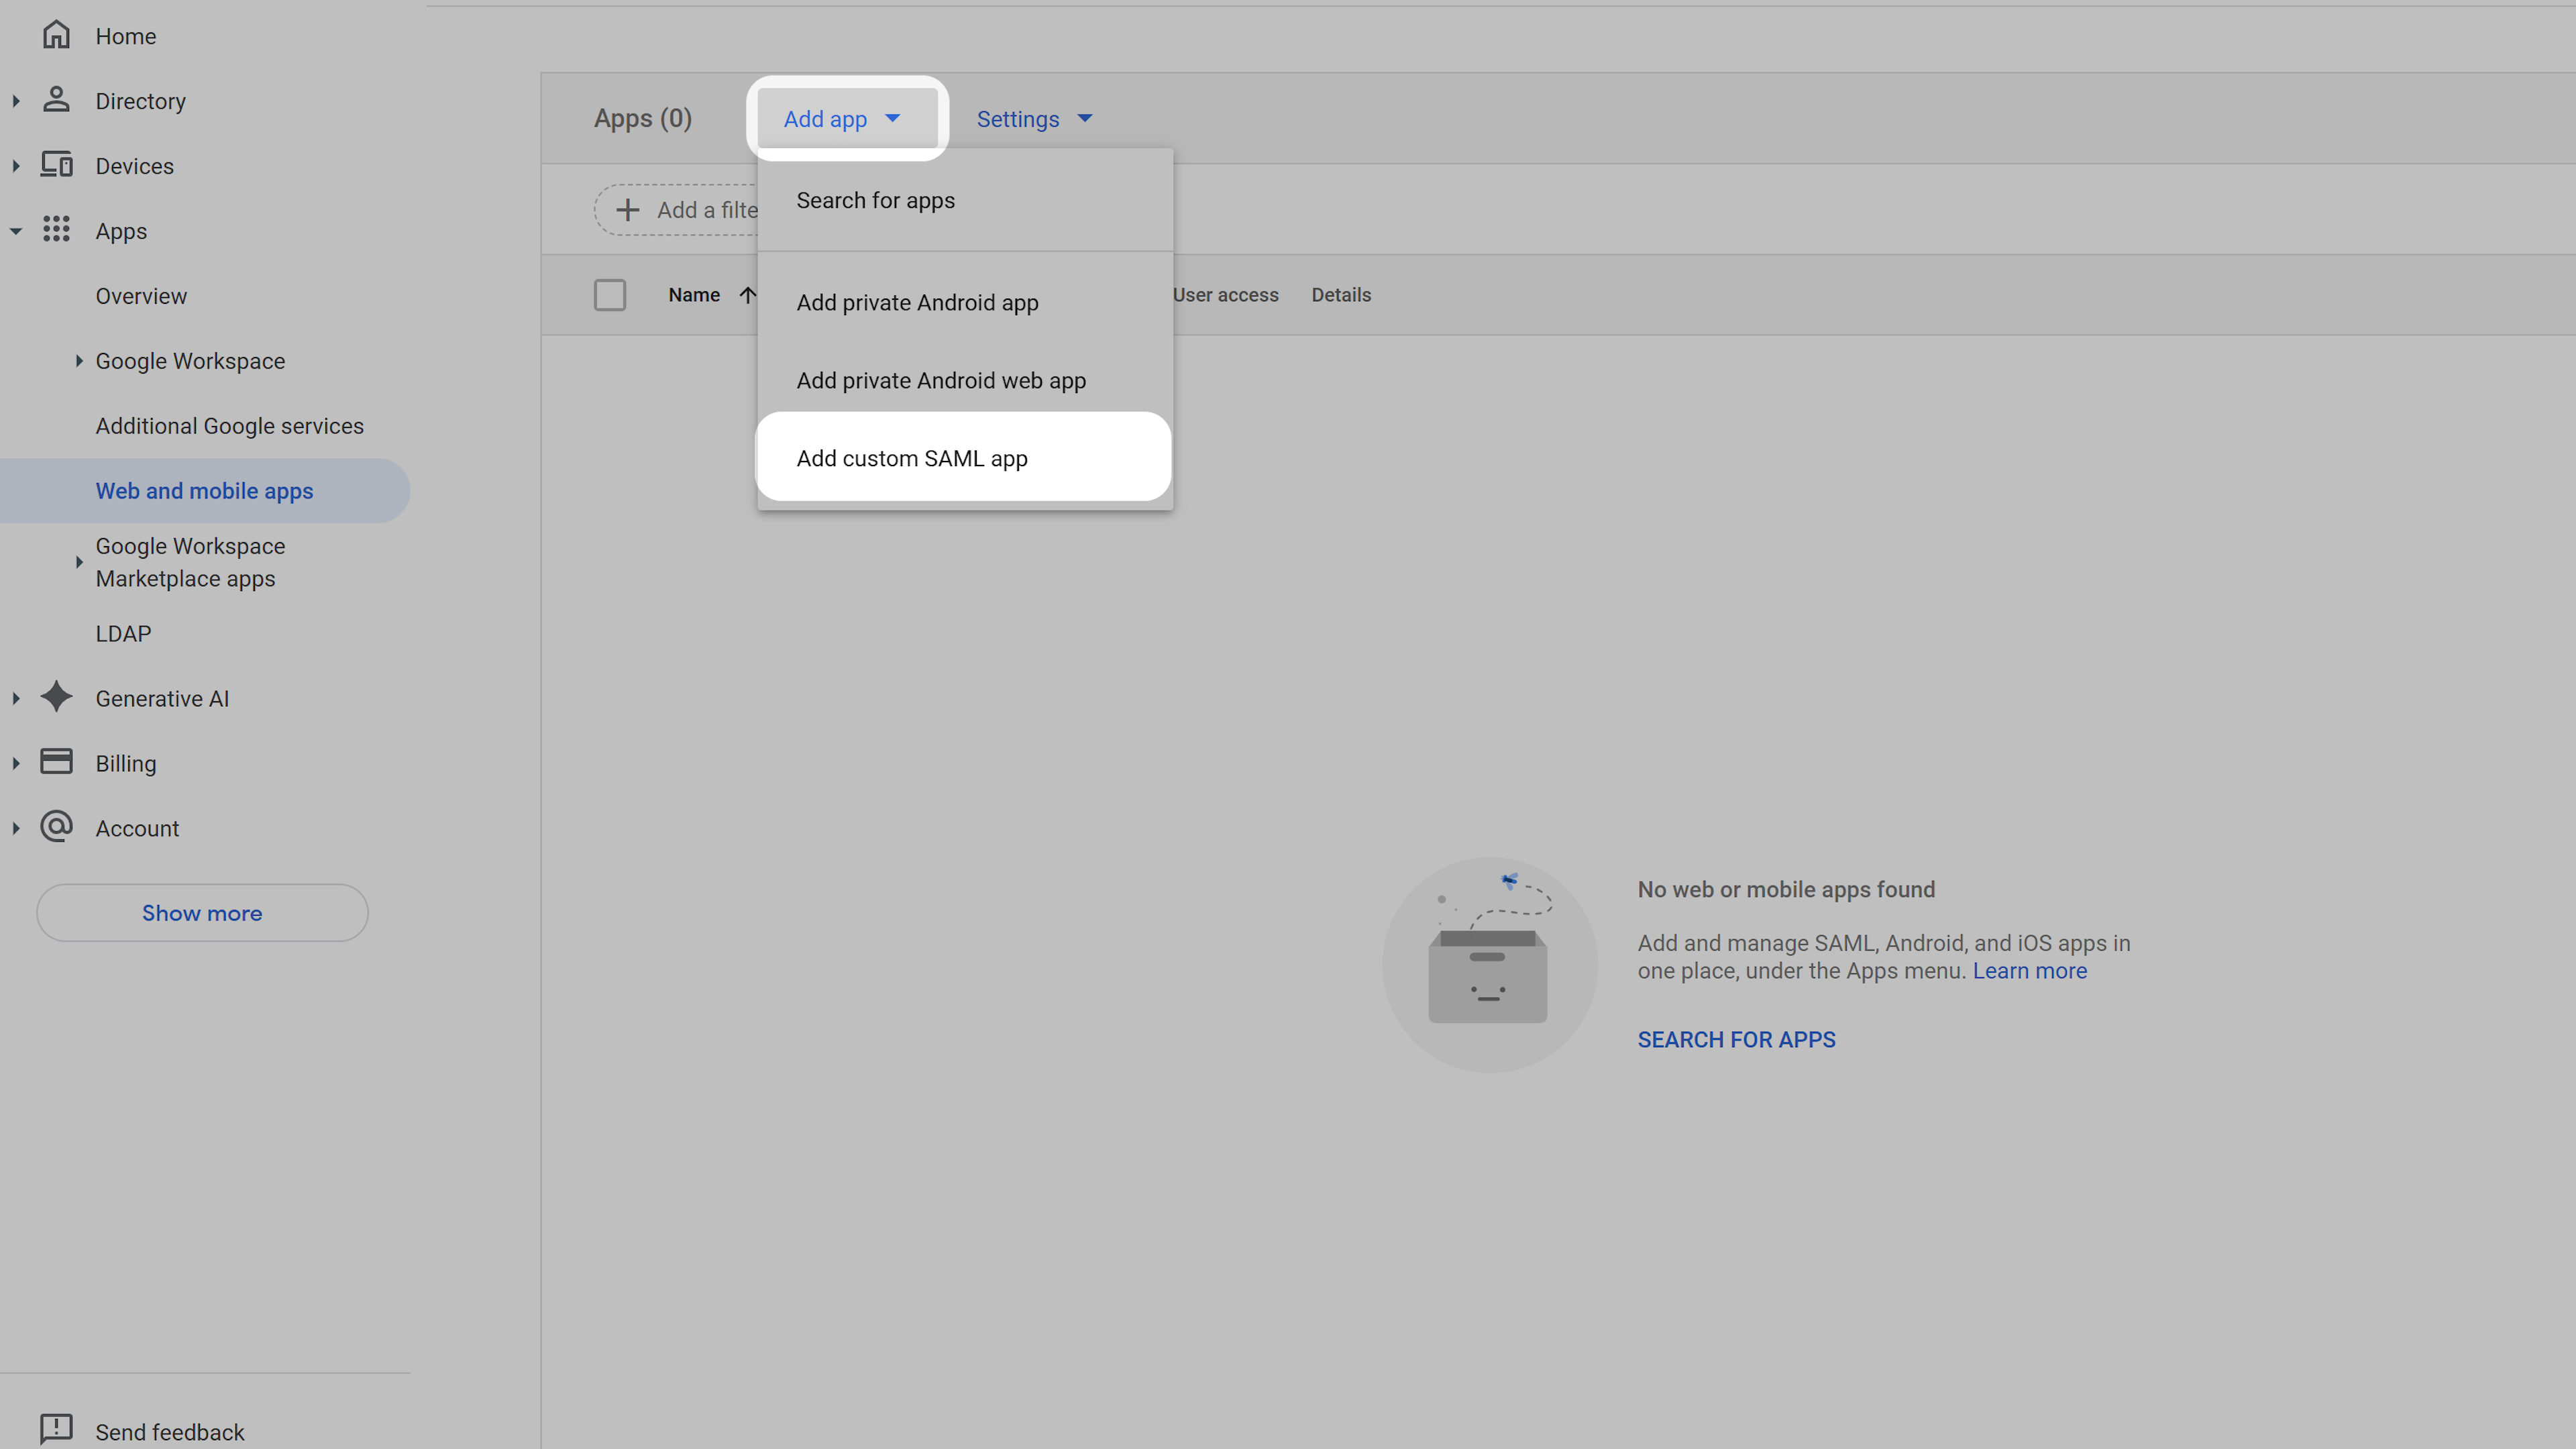
Click Add app and select Add custom SAML app from the dropdown menu.
Add Custom SAML App
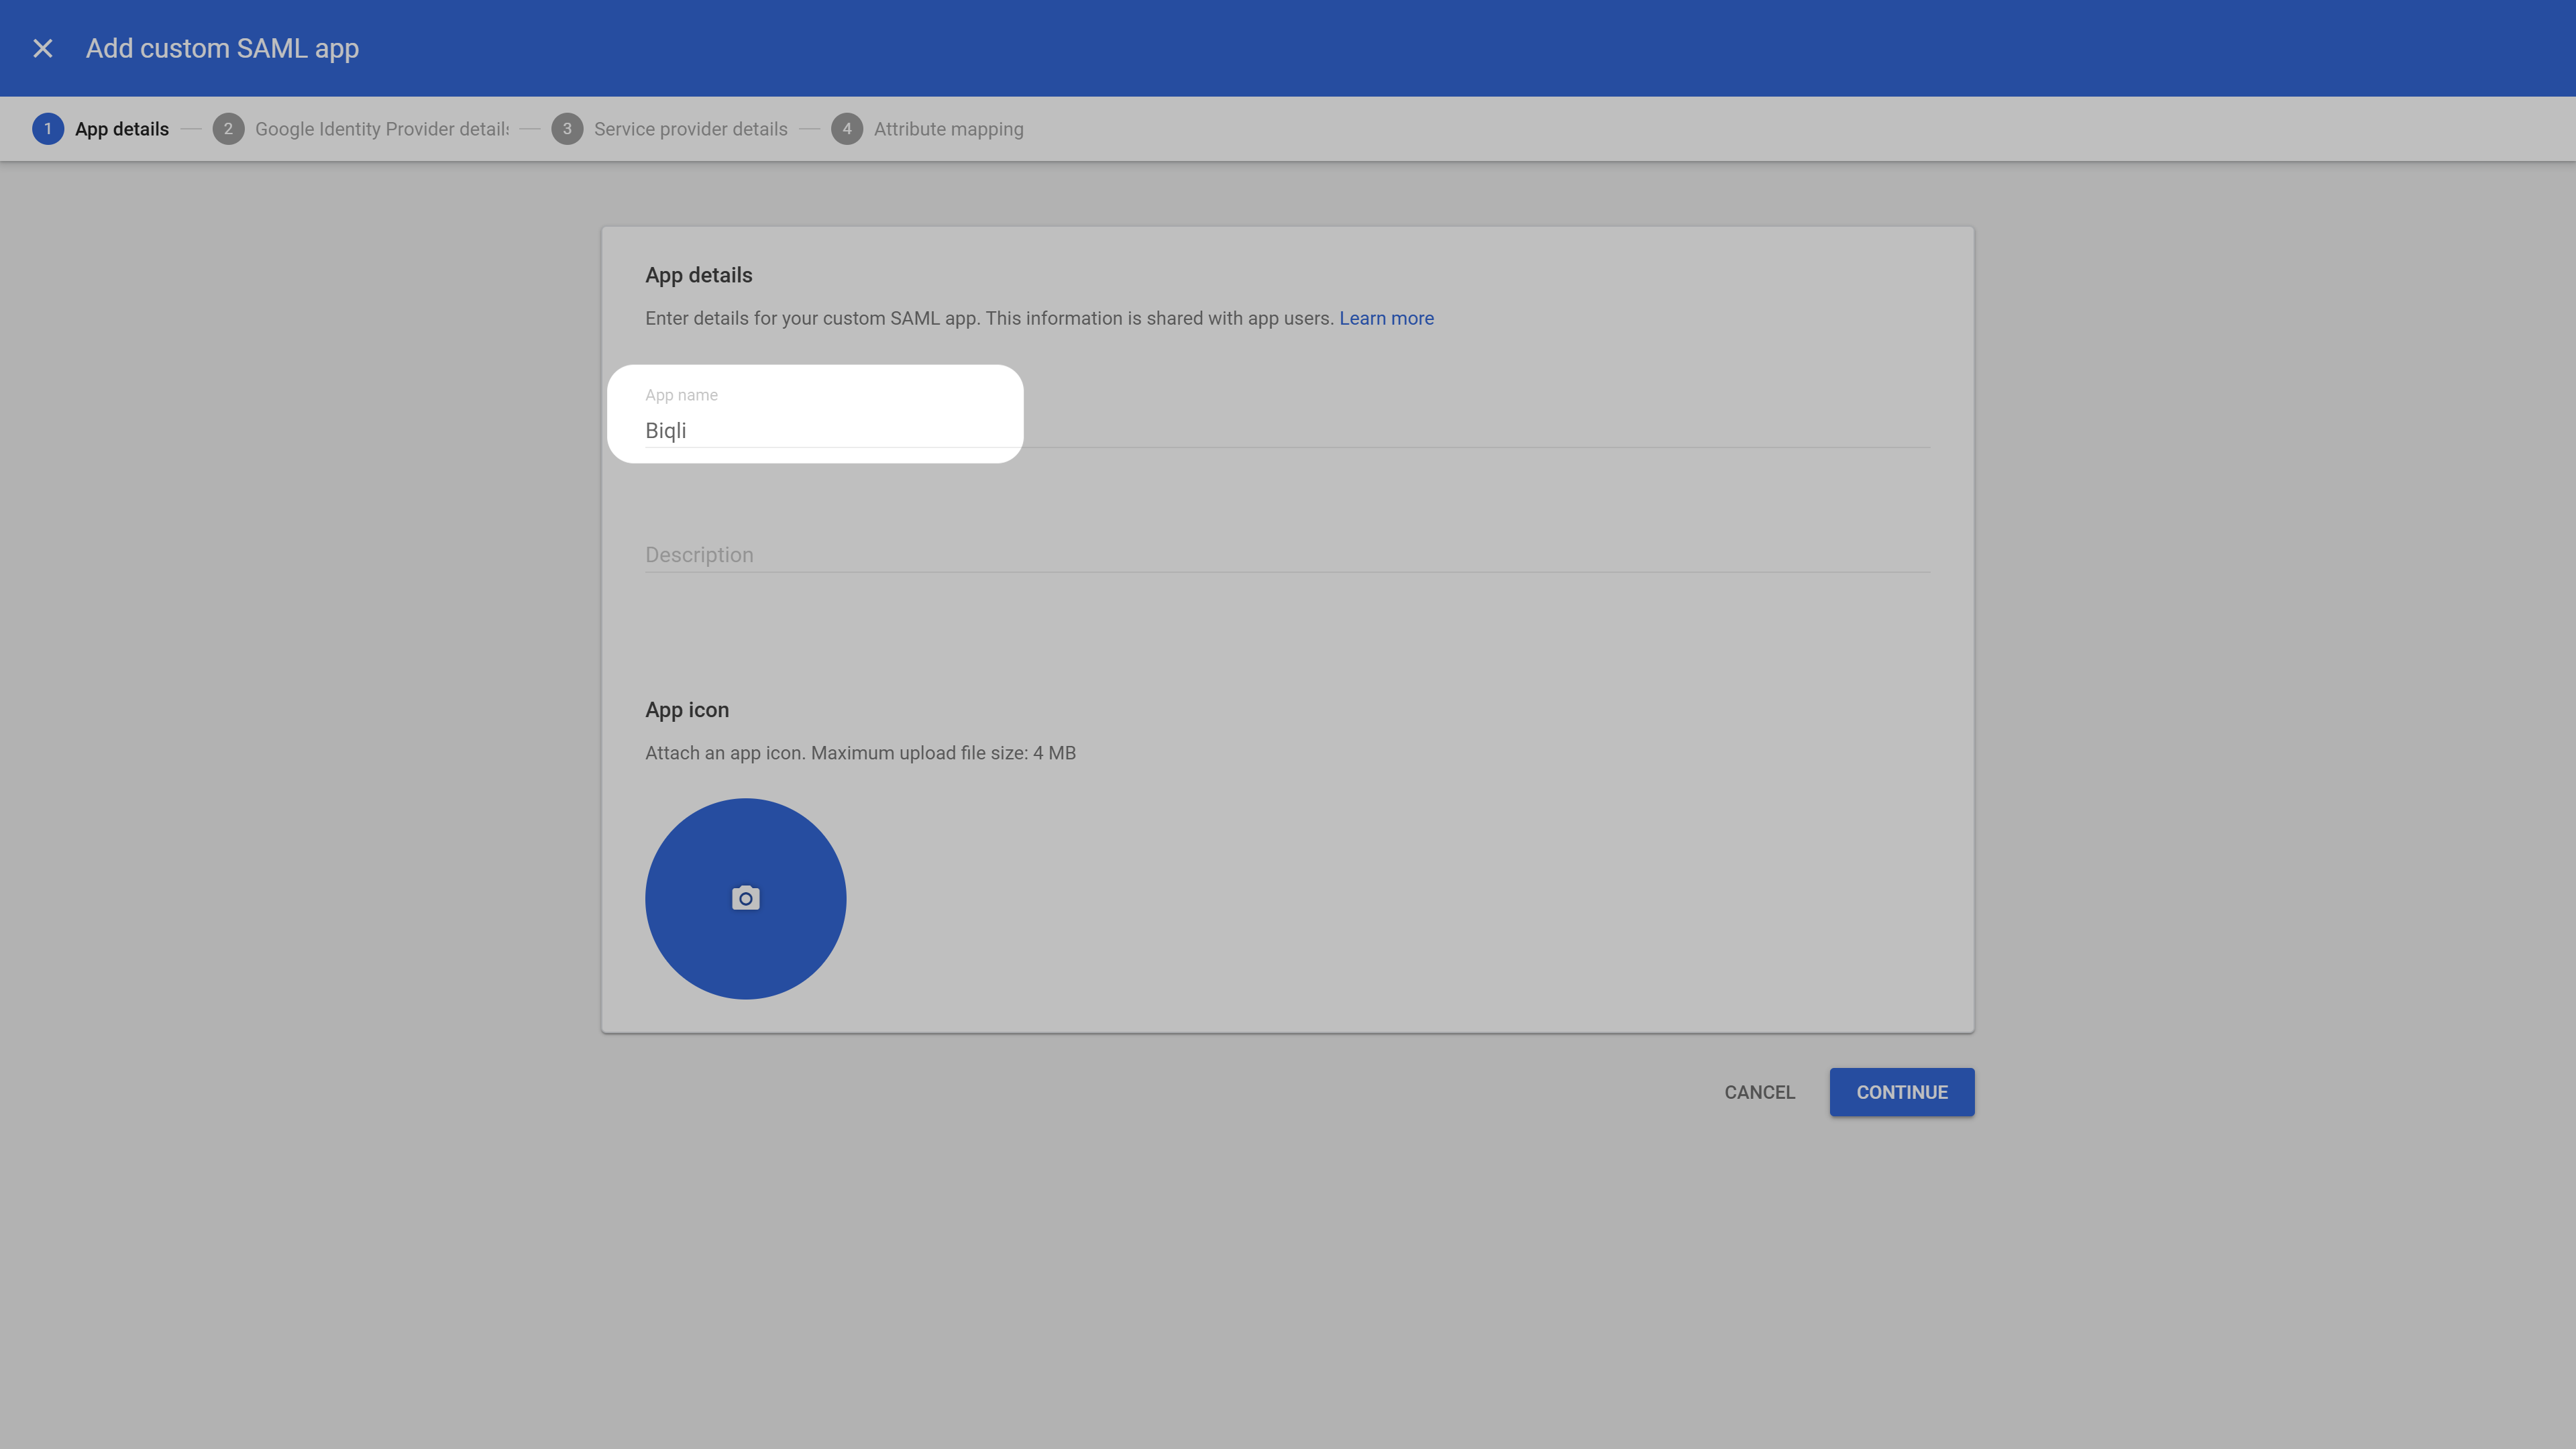
Enter the App name (e.g. Biqli) and click Continue.
General Settings - App Name
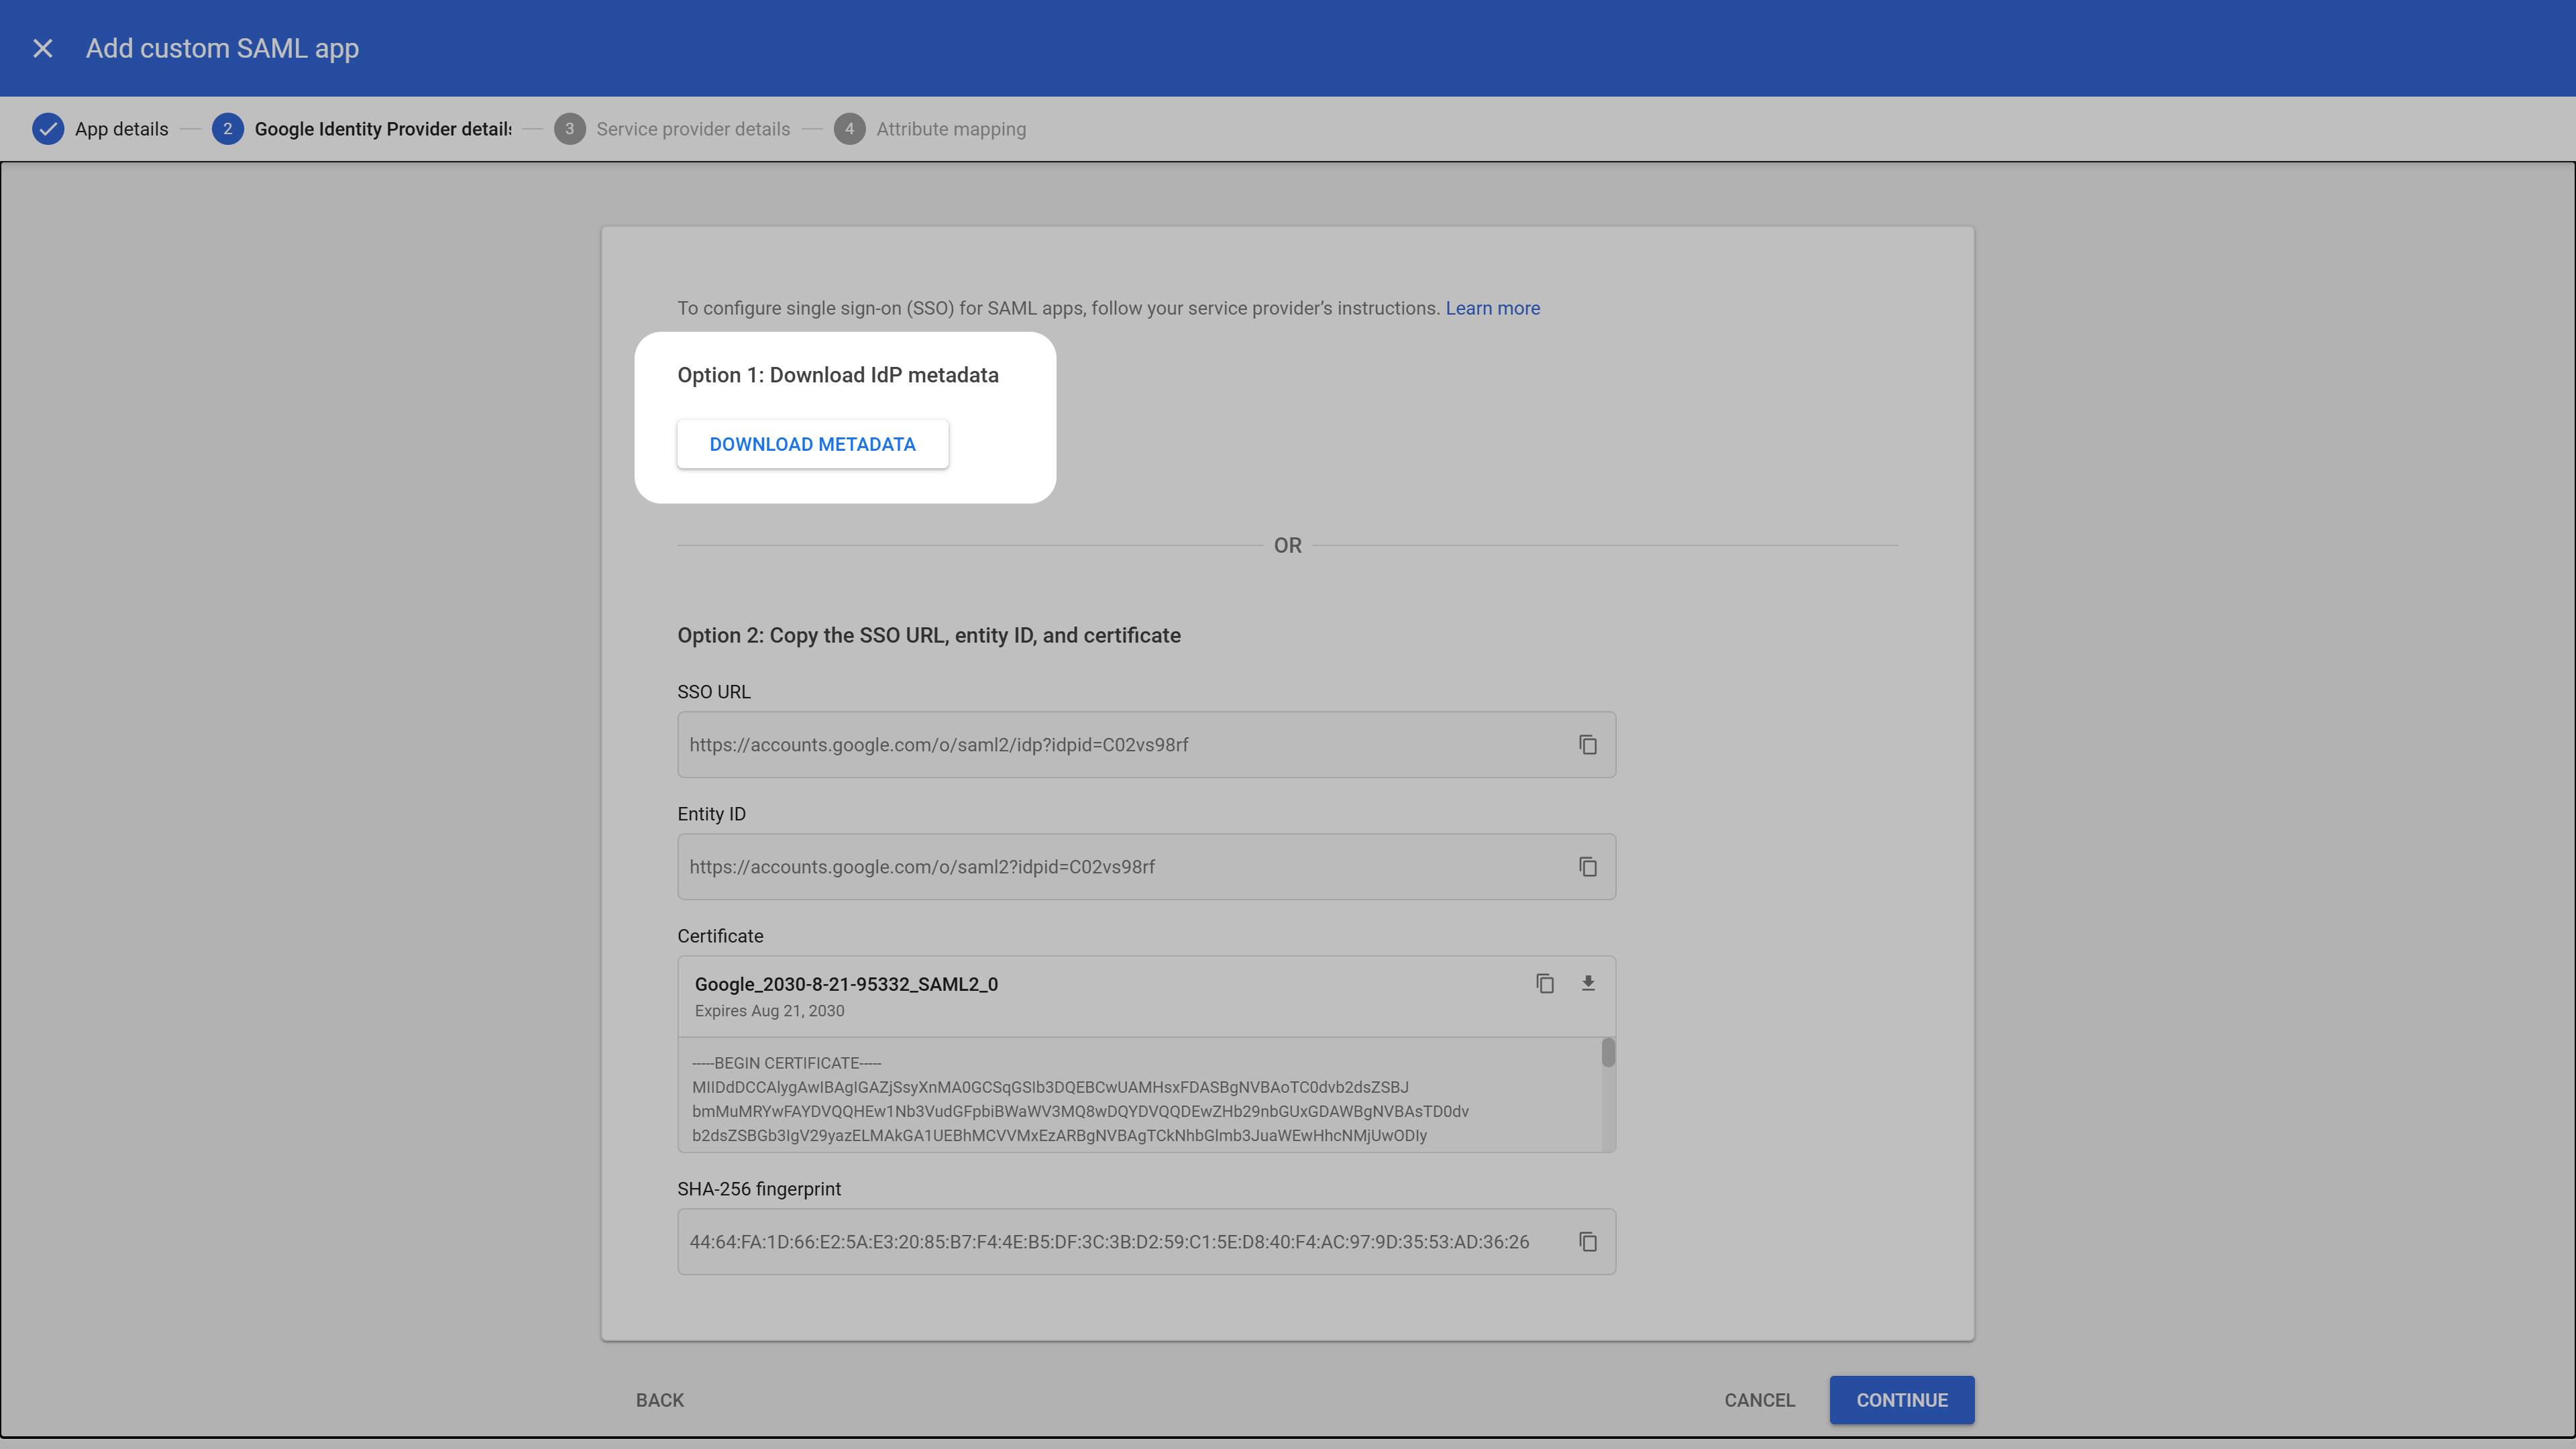
In the next screen, click Download Metadata to download the metadata XML file, then click Continue. You will need this file in Step 3.
Download Metadata XML
Under Service provider details, copy the following values and paste them into their respective fields:
ACS URL
https://biq.li/saml/acs
Entity ID
https://biq.li/workspaces/{WORKSPACE_SLUG}
Please ensure you replace {WORKSPACE_SLUG} with the slug of the specific workspace in which you are activating Google Workspace SAML SSO.
Under Name ID, set the Name ID format to Email and the Name ID mapping to Basic Information > Primary email.
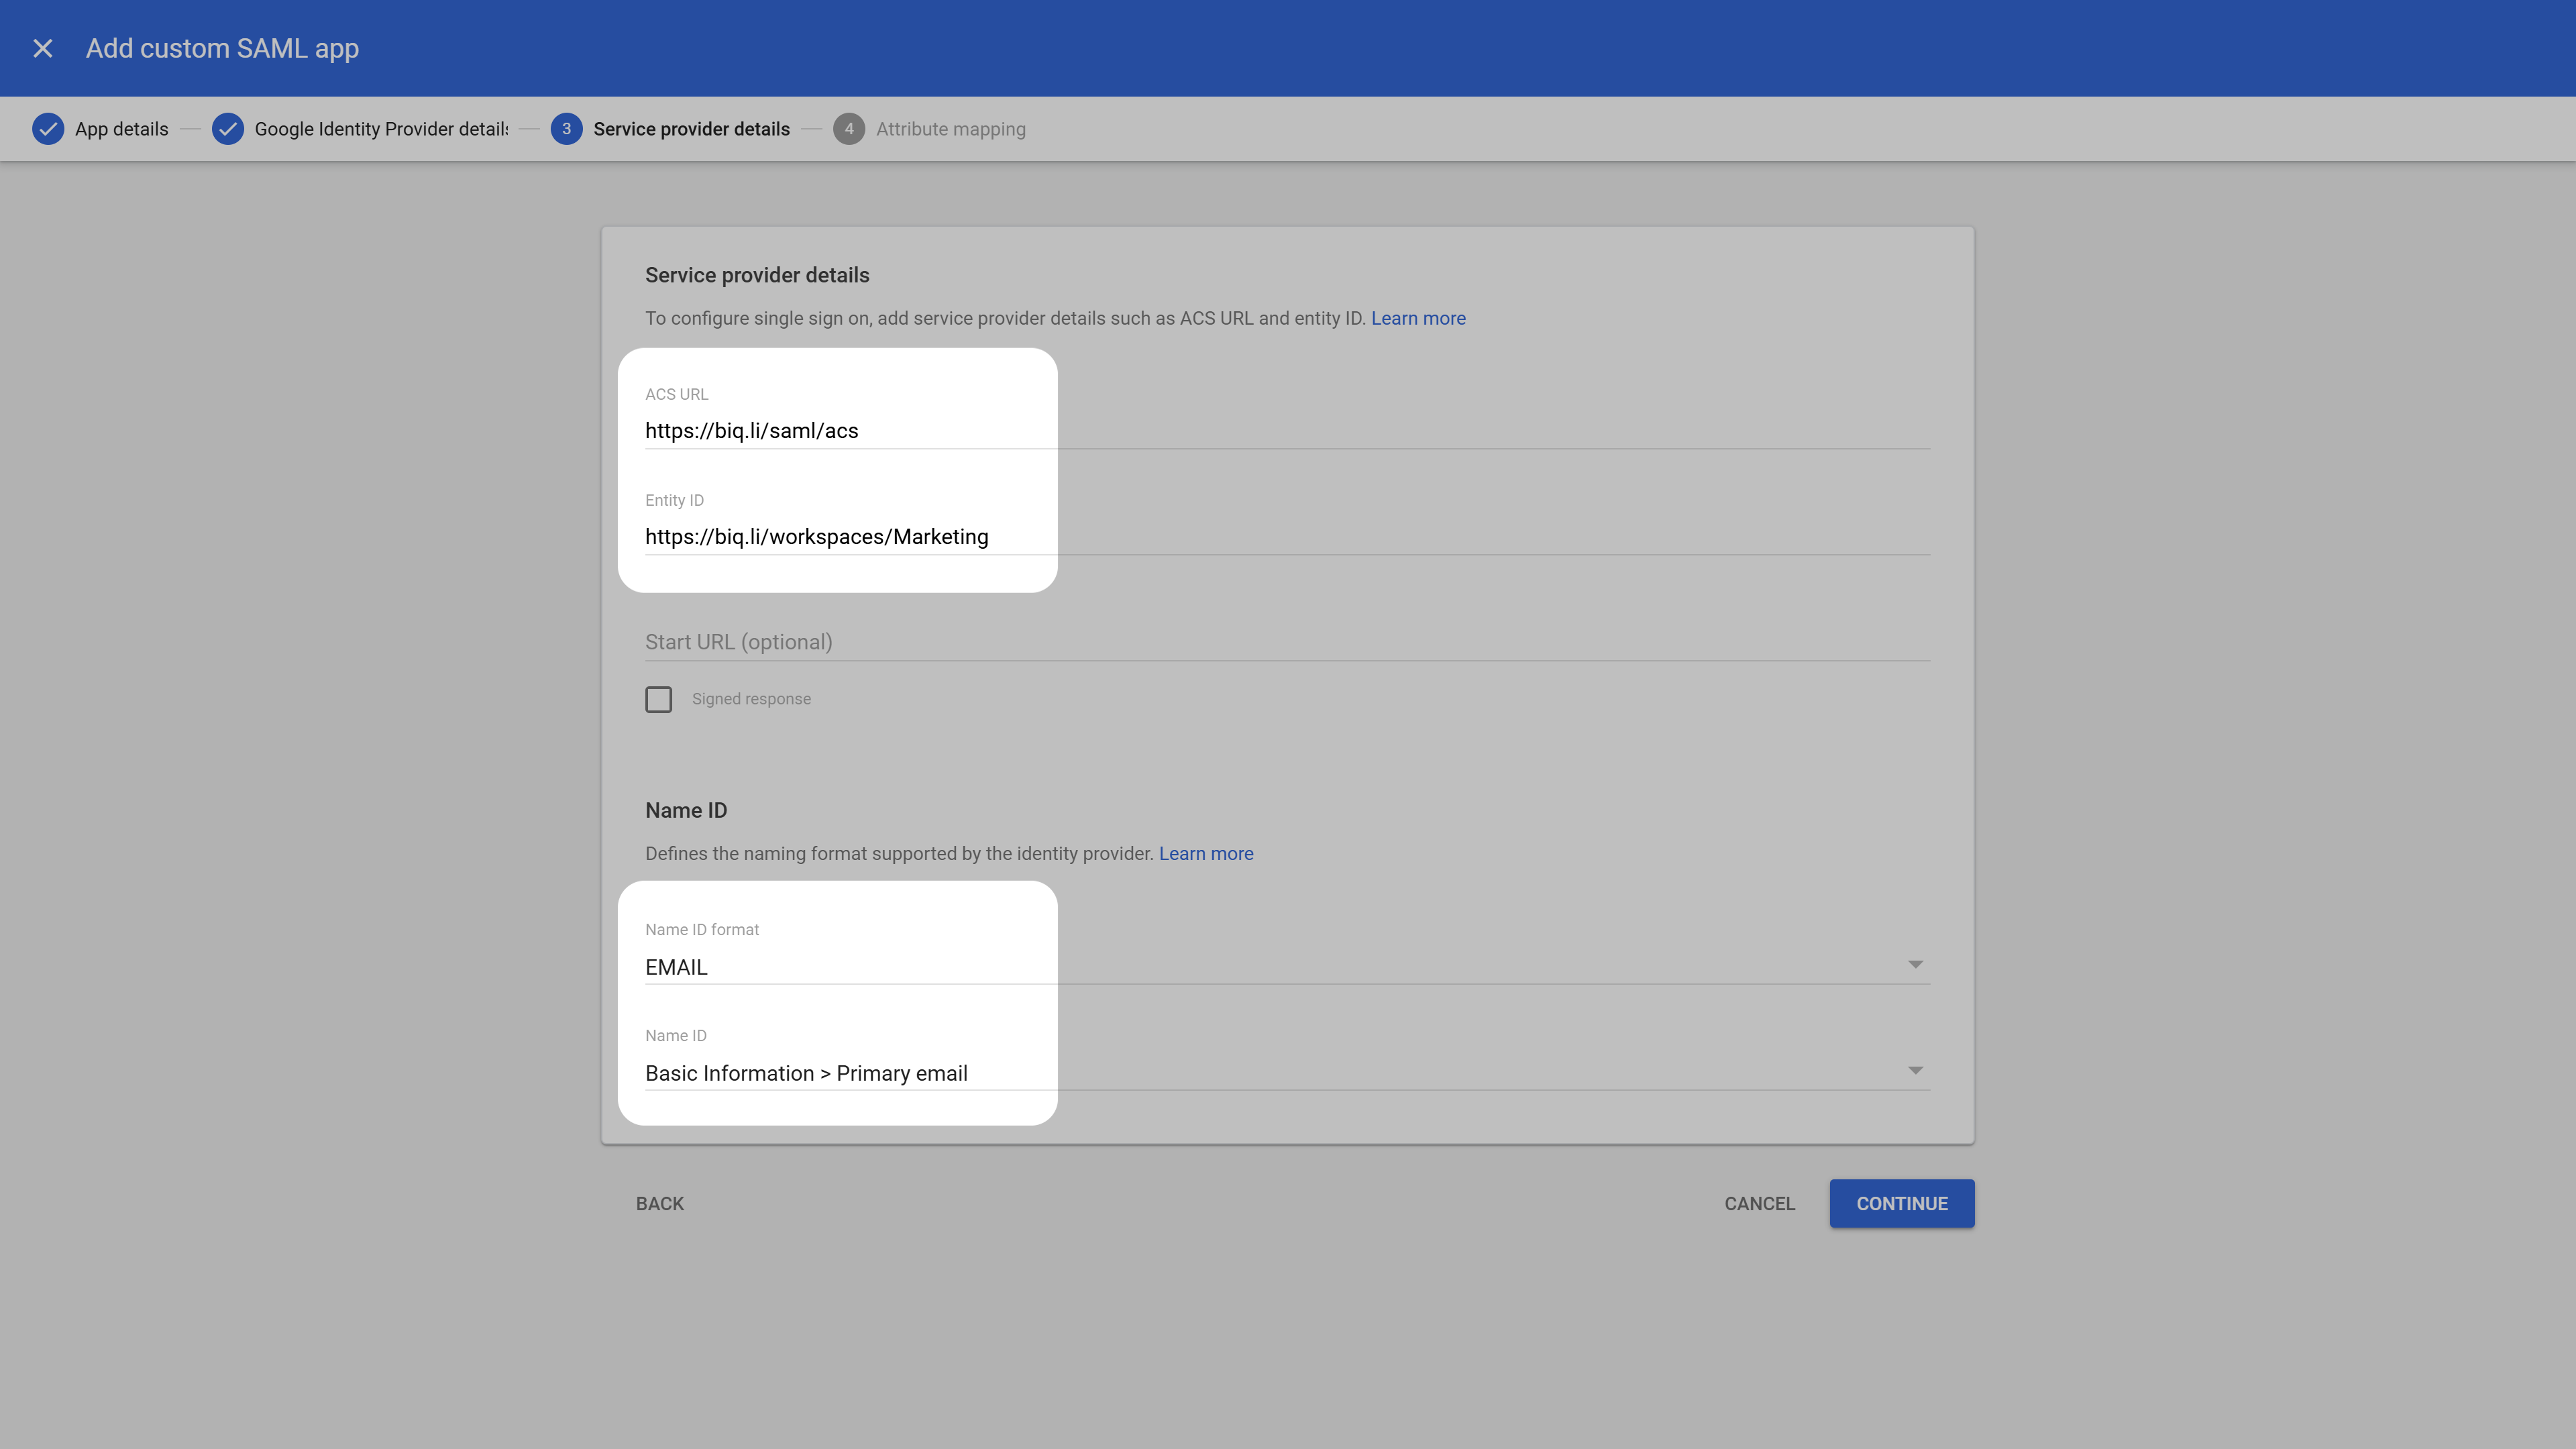
Service Provider Details
Click Continue to proceed to the next step.

Step 2: Configure Attribute Mapping

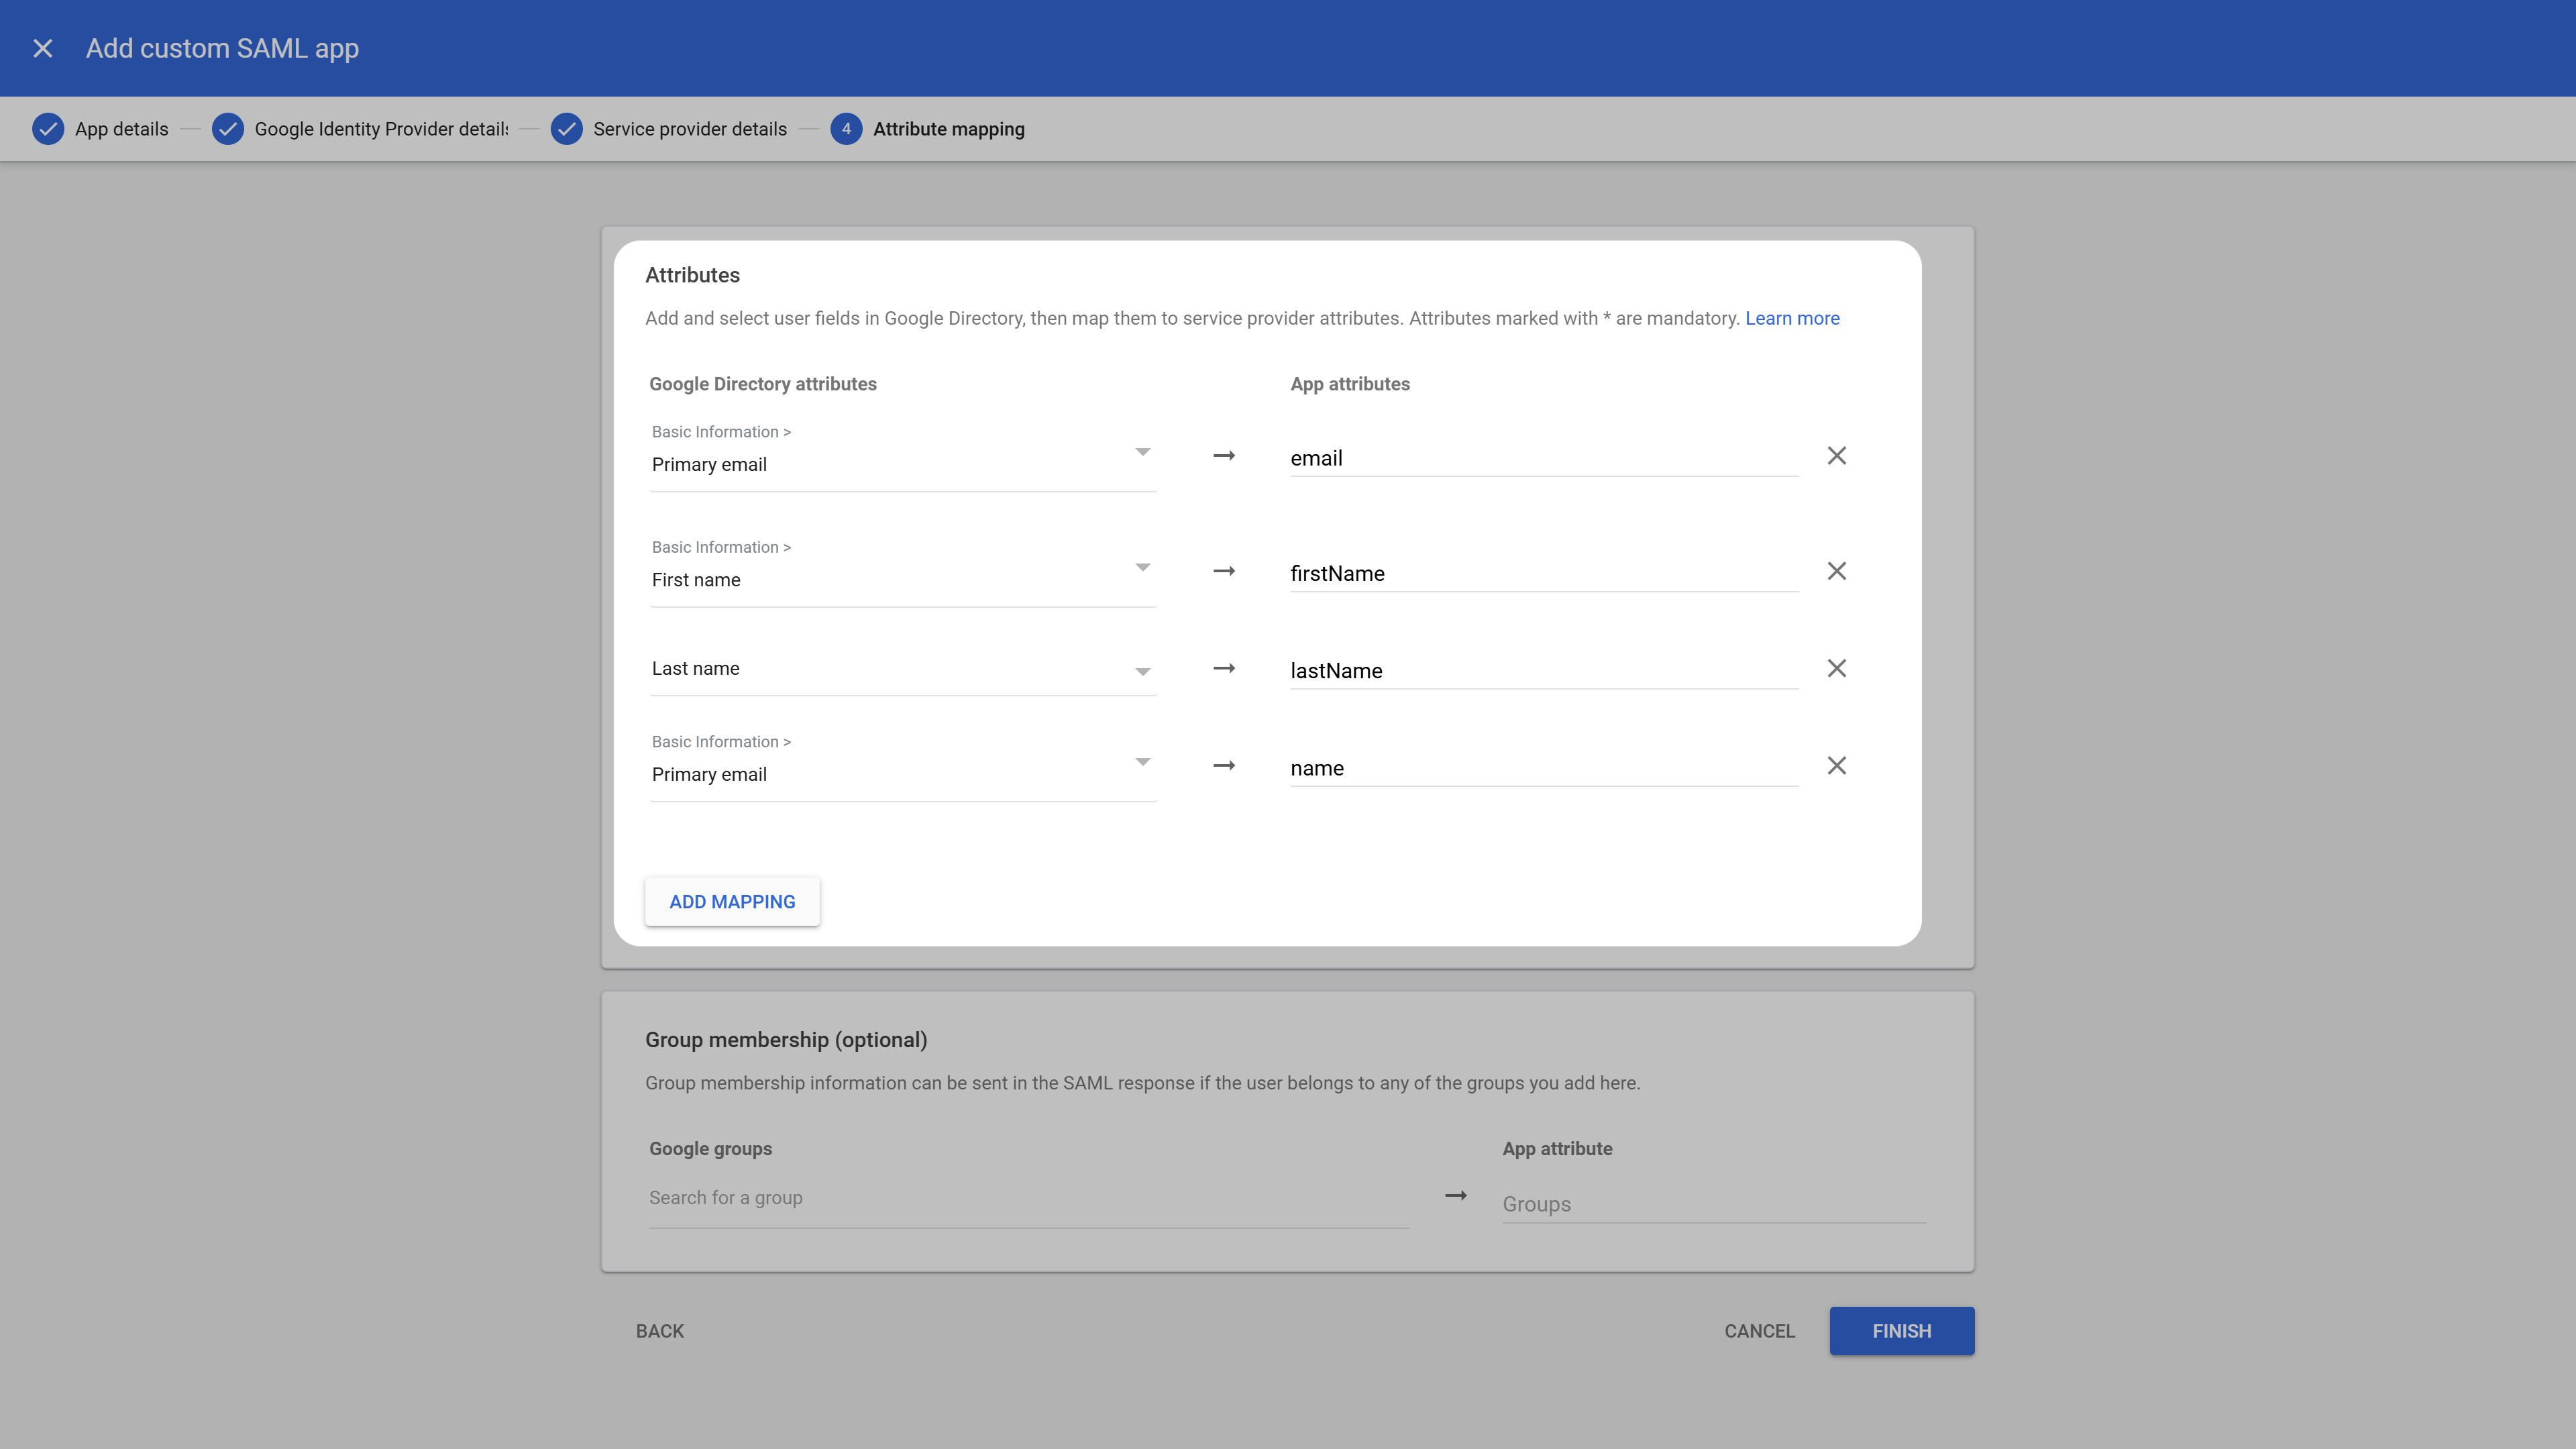
On the next screen under the Attributes section, click Add Mapping and configure the following attribute mappings:
Google Directory AttributeApp Attribute
Primary emailemail
First namefirstName
Last namelastName
Primary emailname
You can copy the App Attributes directly from below:
email
email
firstName
firstName
lastName
lastName
name
name
Configure Attribute Mapping
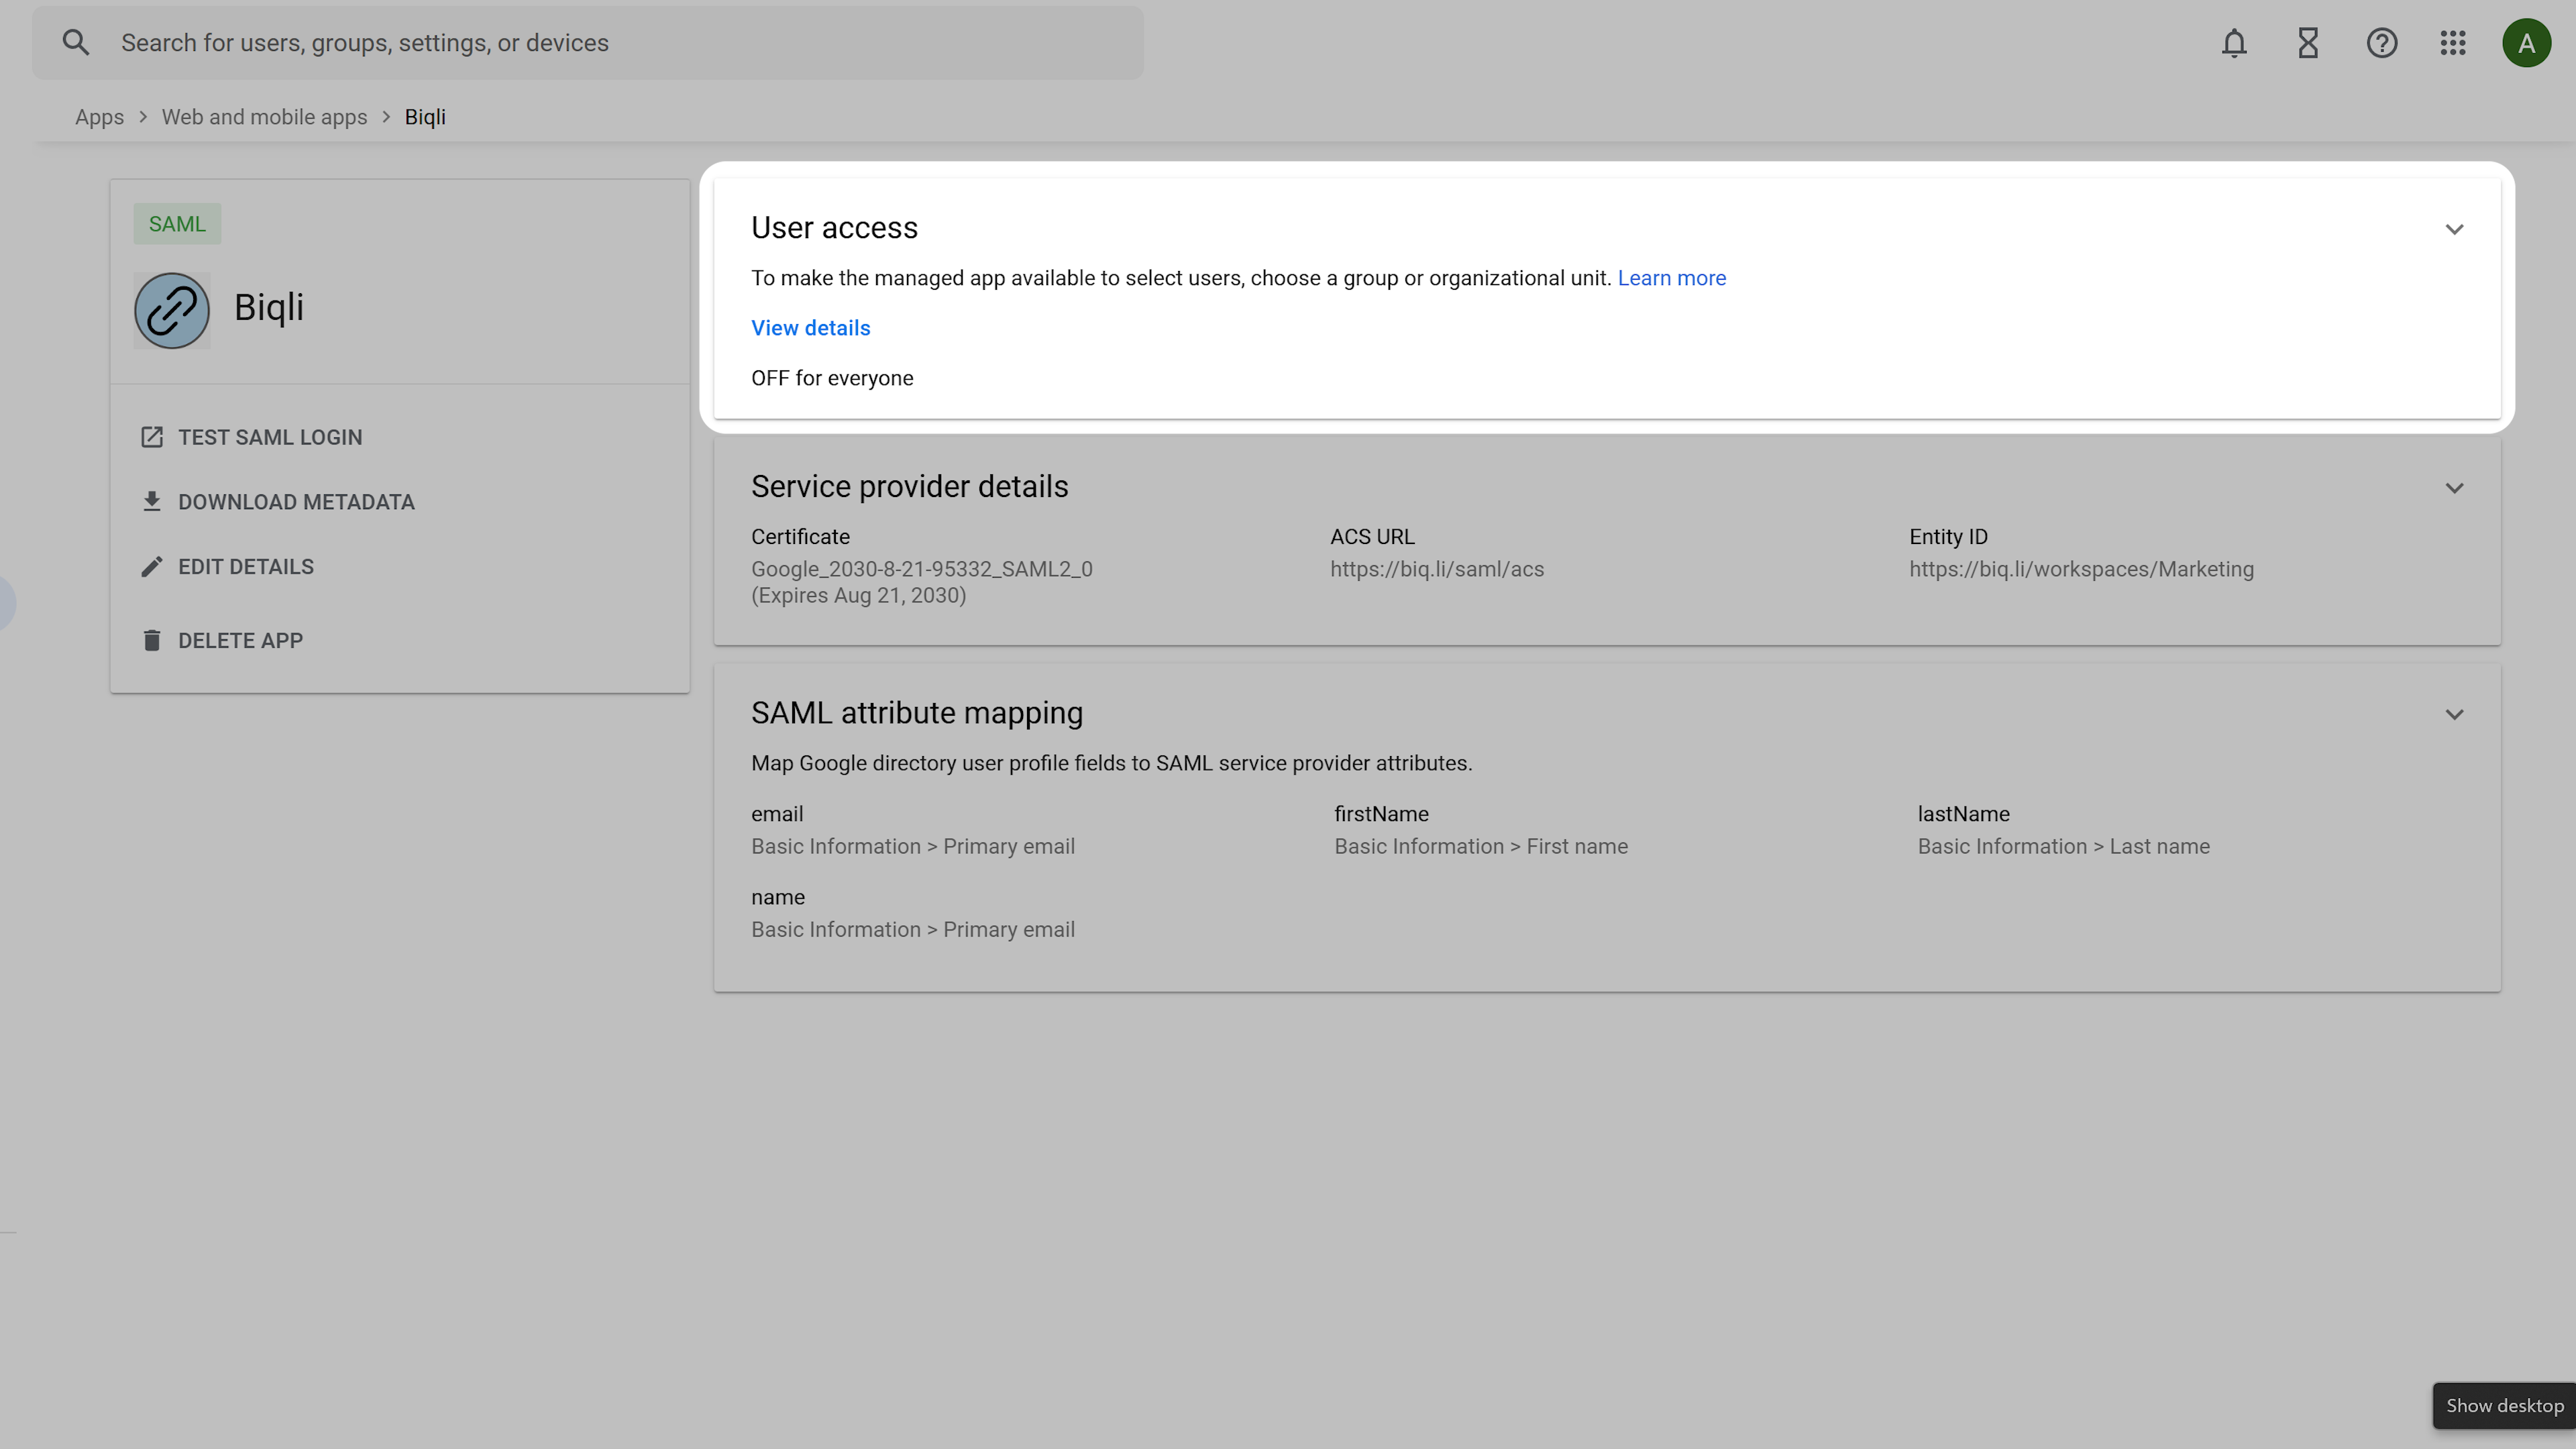
Click Finish to complete the SAML app setup. On the application overview screen, select User access to configure login permissions.
Select User Access Settings
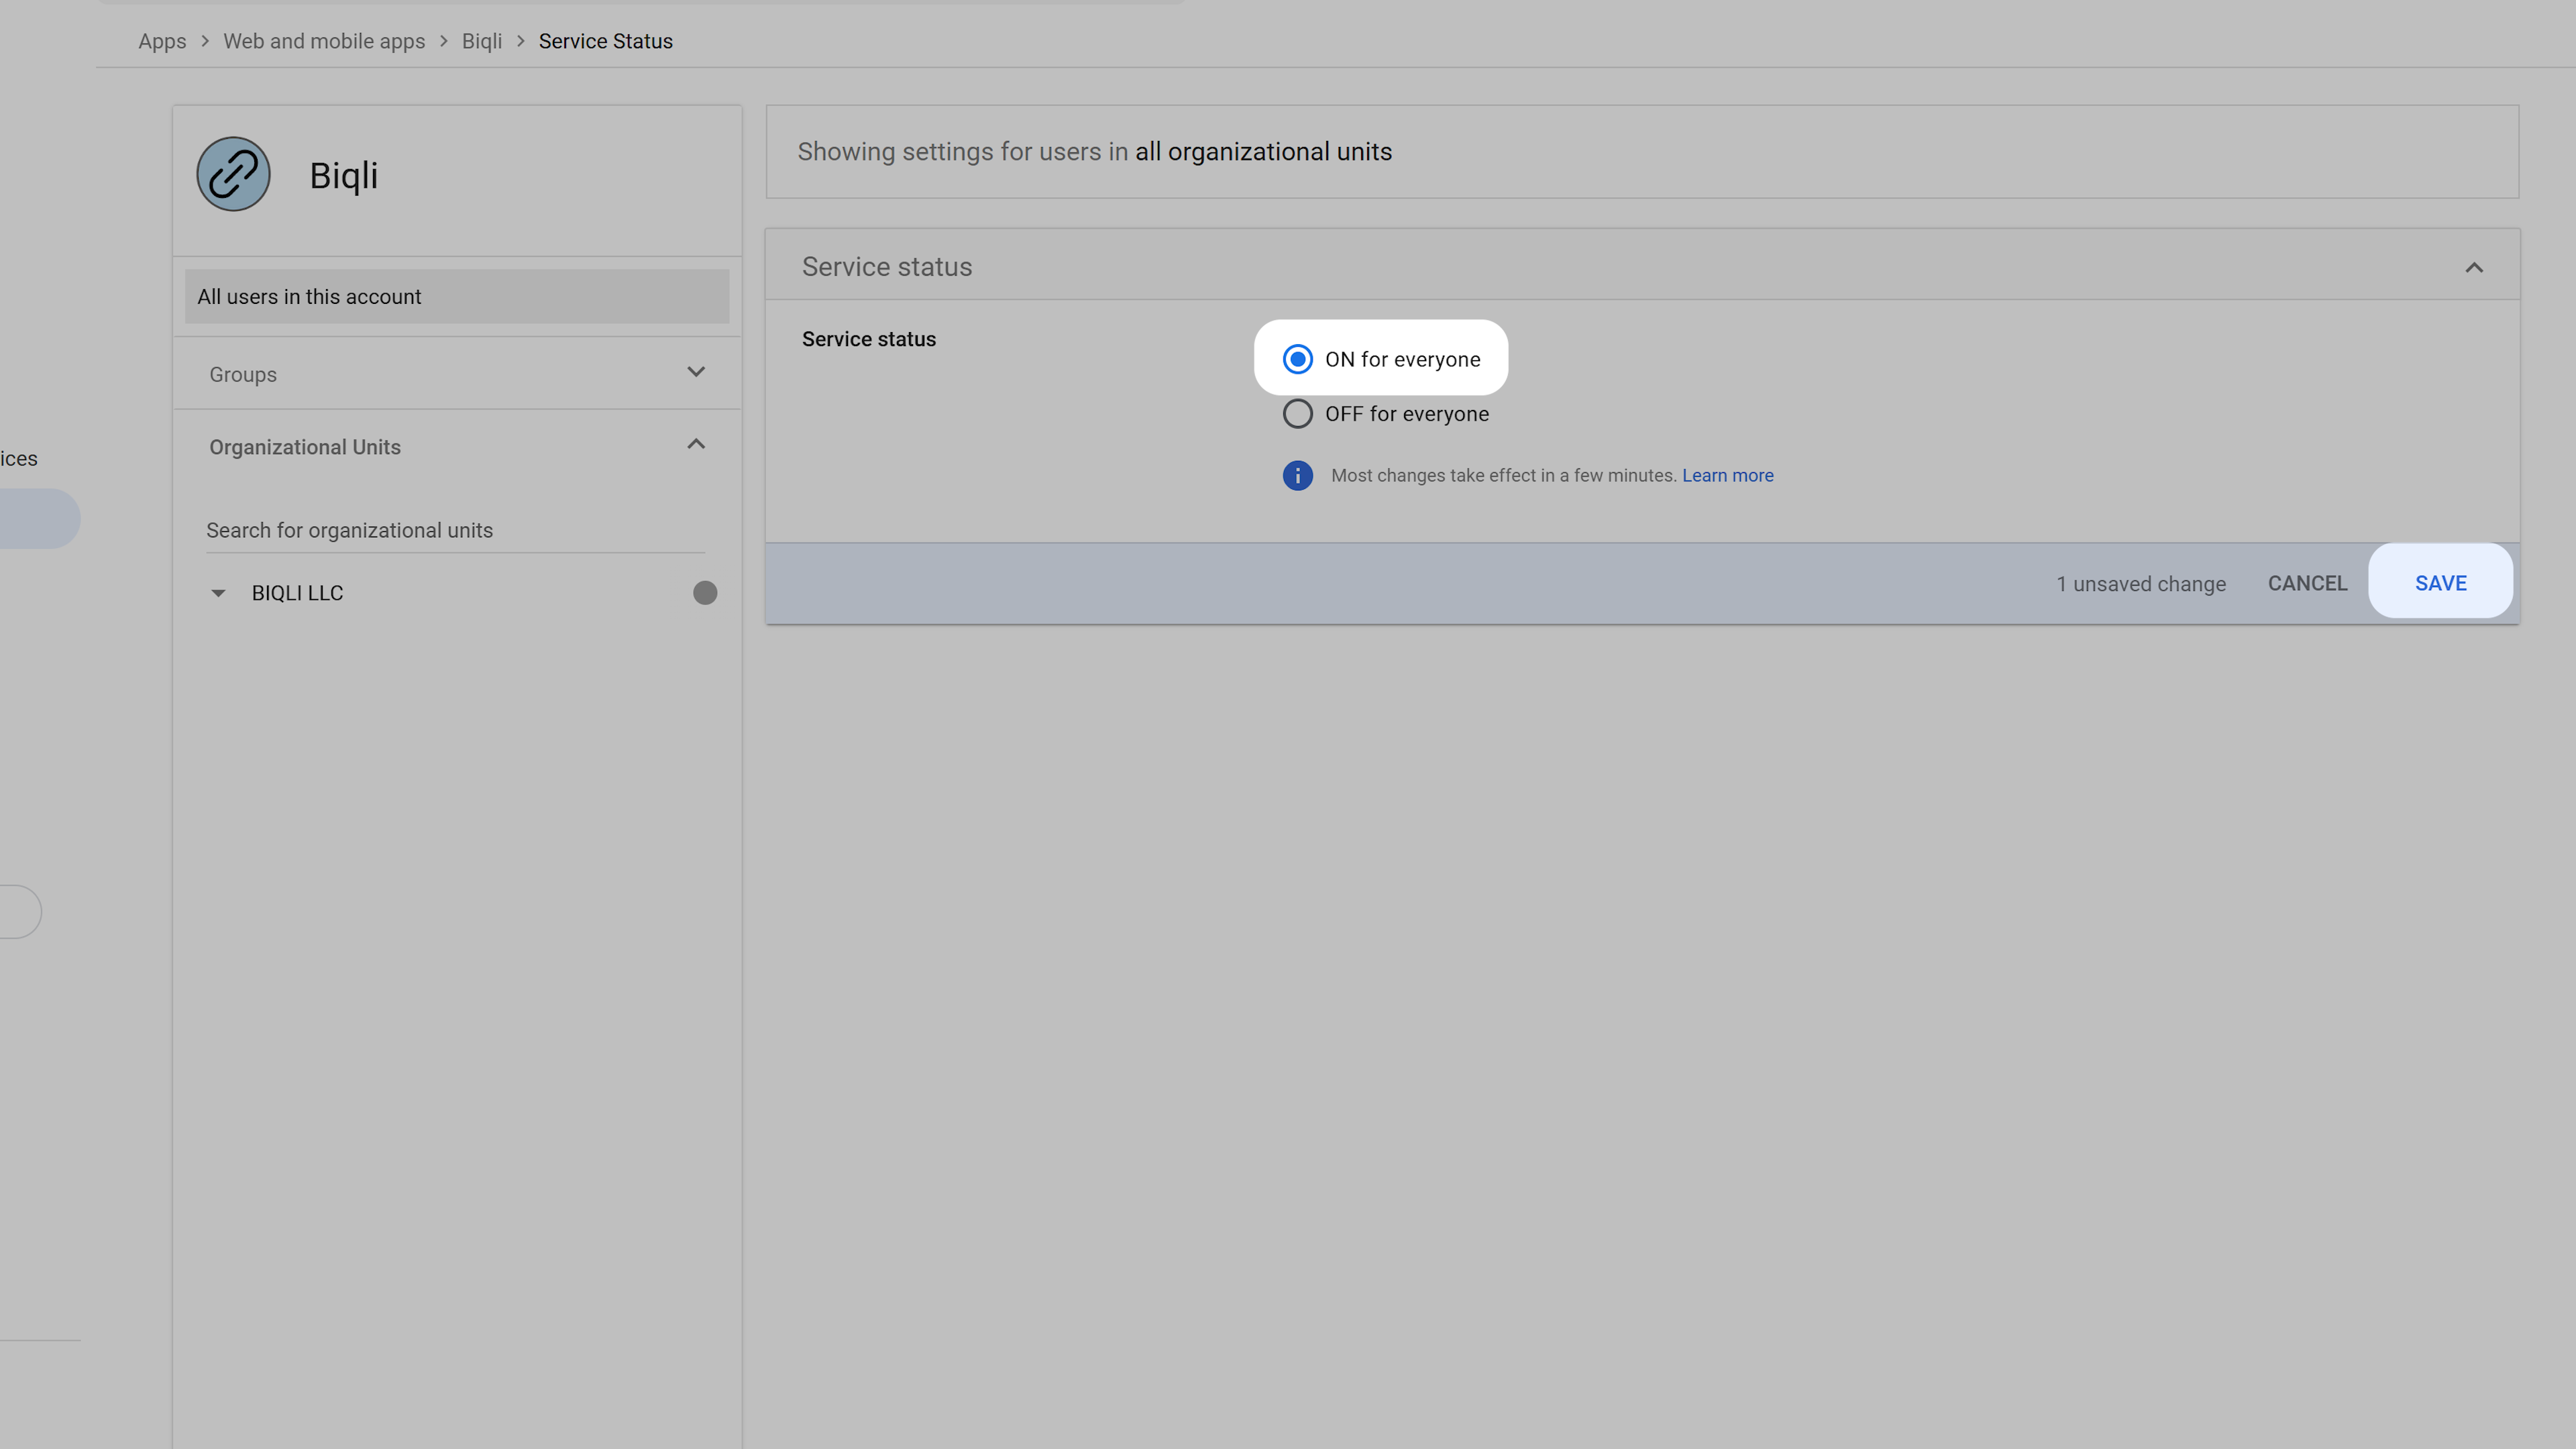
Select ON for everyone (or assign to specific groups) and click Save.
Enable ON for everyone
This enables your Google Workspace users to seamlessly sign in to Biqli using Google SAML SSO. Next, return to the Biqli dashboard to finish configuring the SAML SSO settings.

Step 3: Configure Biqli SAML SSO Settings

Navigate to your workspace Security Settings in Biqli. Under the SAML Single Sign-On section, click Configure SAML Single Sign-On.
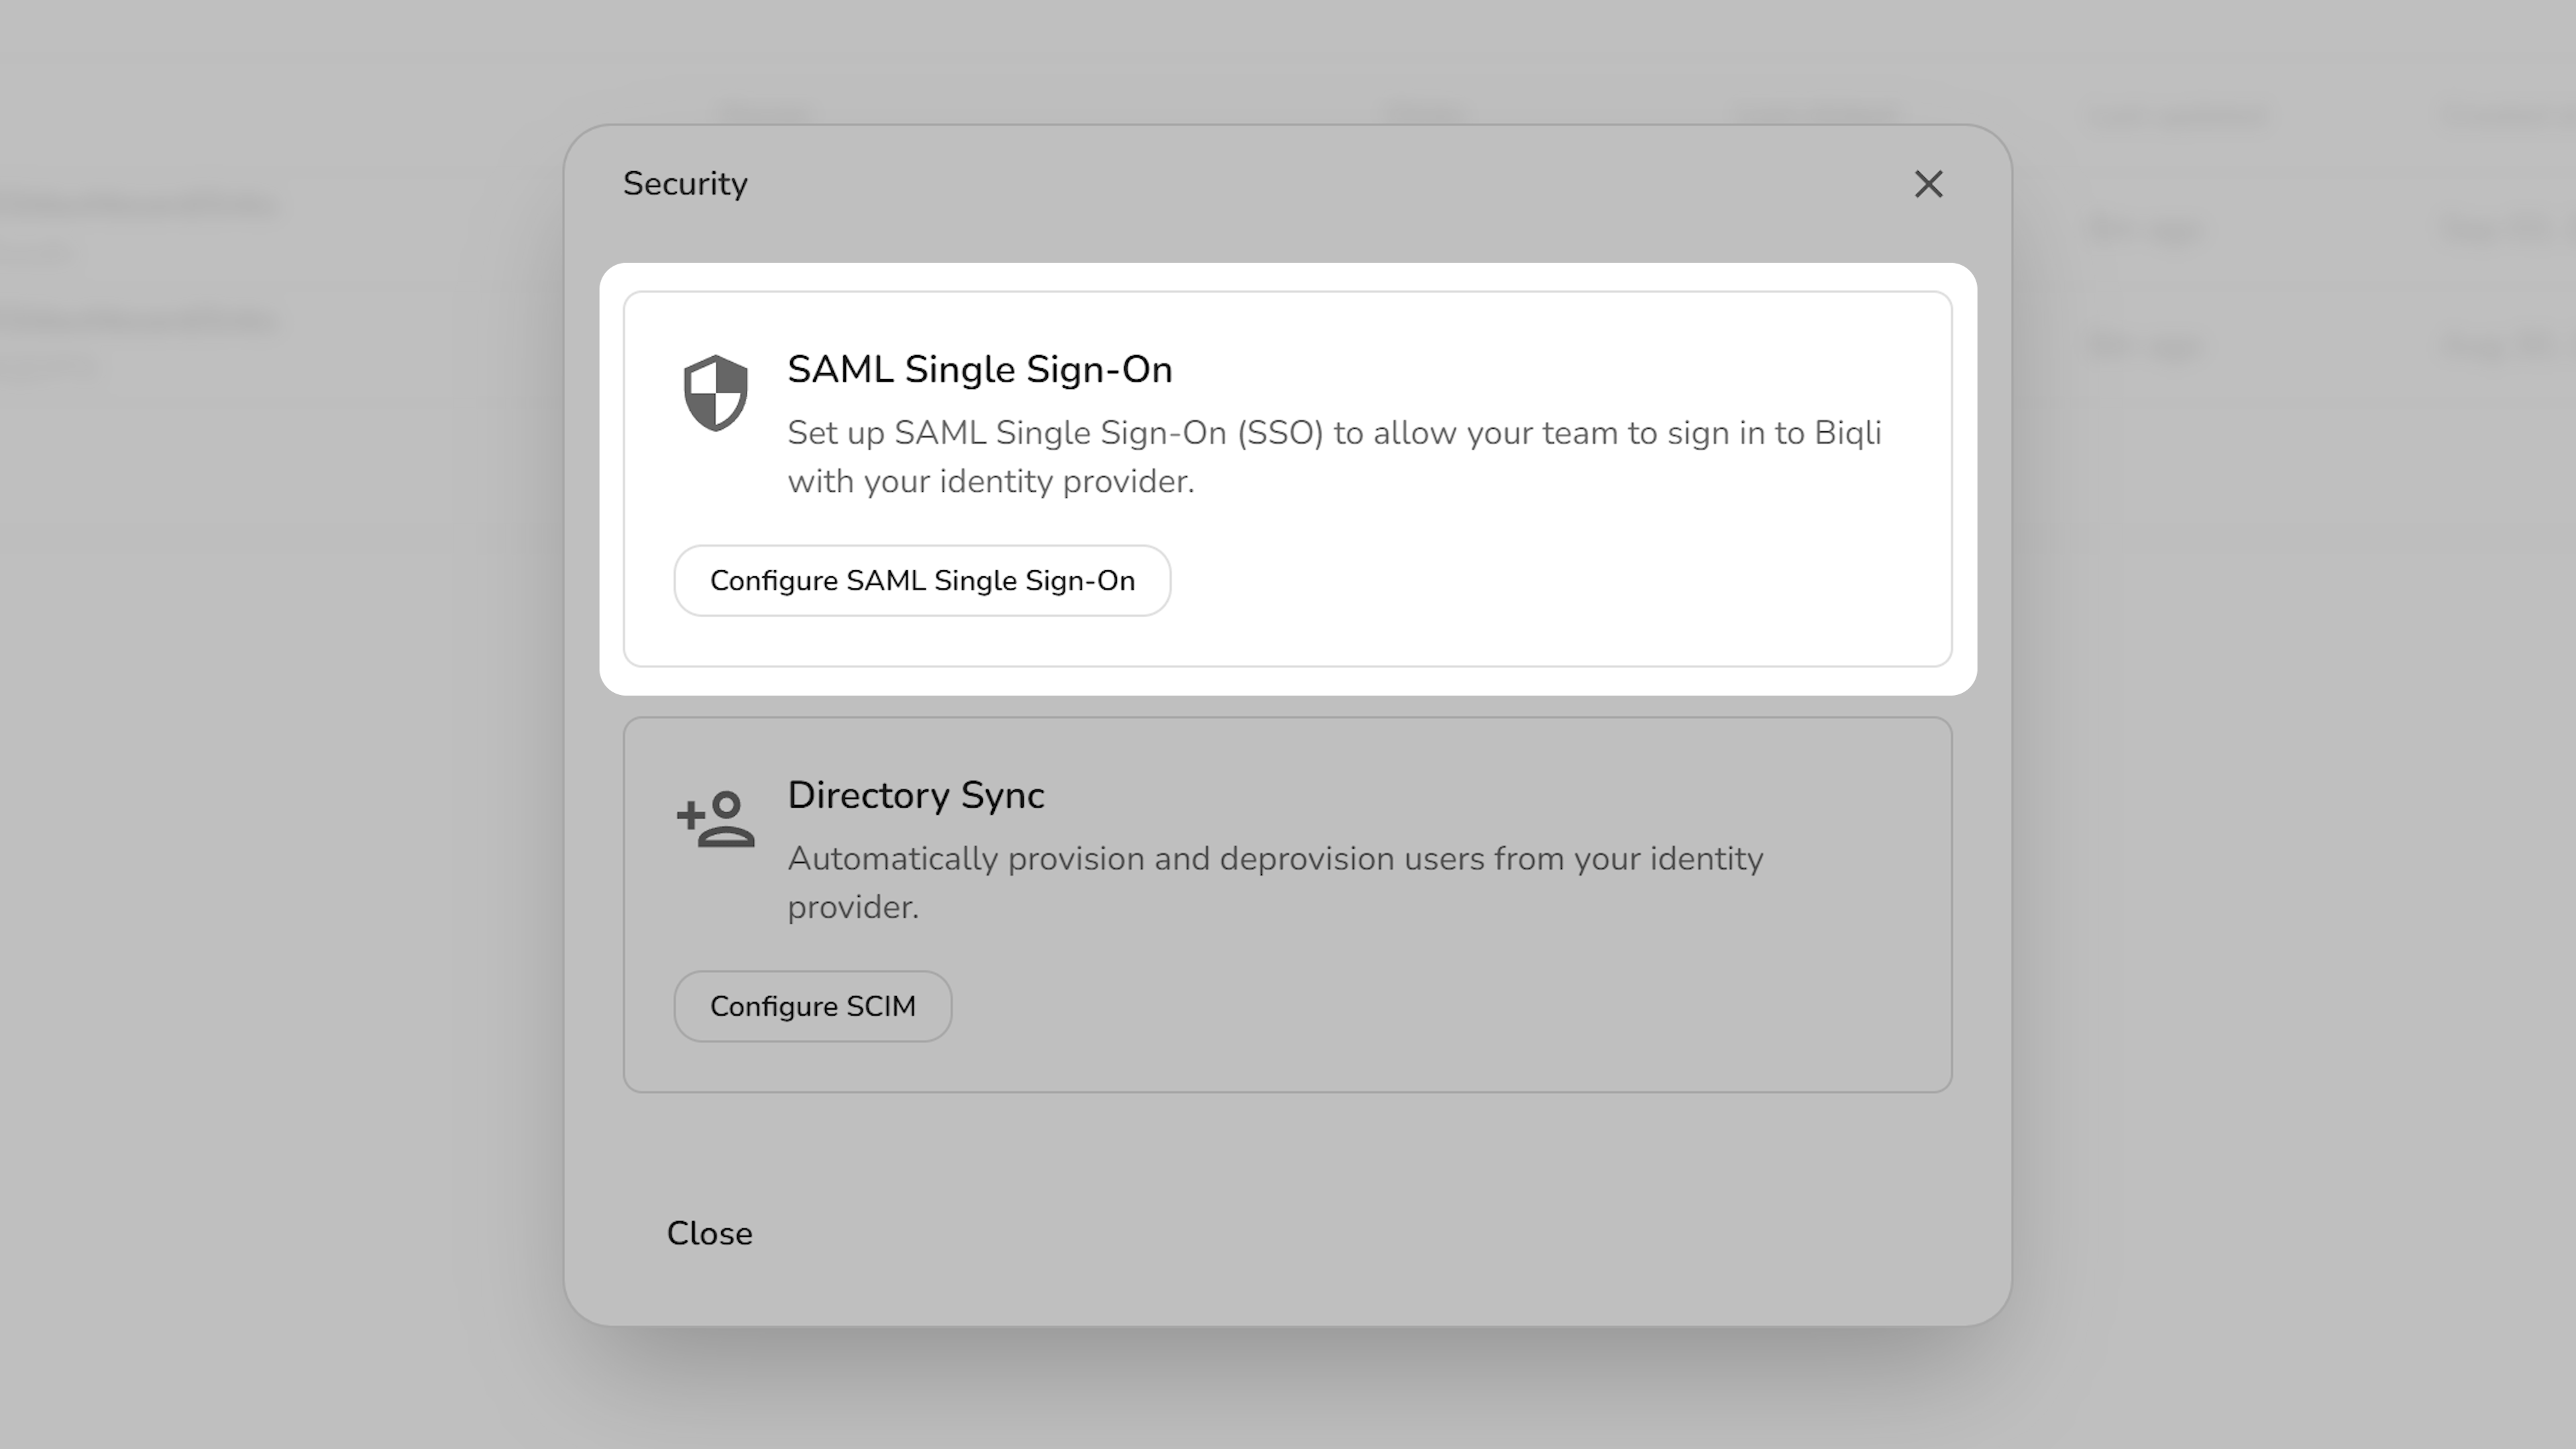
Biqli Security Settings
In the configuration modal:
  1. Select Identity Provider: Choose Google as your SAML provider.
  2. Upload Metadata: Upload the Metadata XML file you downloaded in Step 1.
  3. Test Connection: Verify the configuration.
  4. Activate SAML: Toggle on SAML authentication for your workspace.
  5. Save Changes: Click Save changes to complete the setup on Biqli.
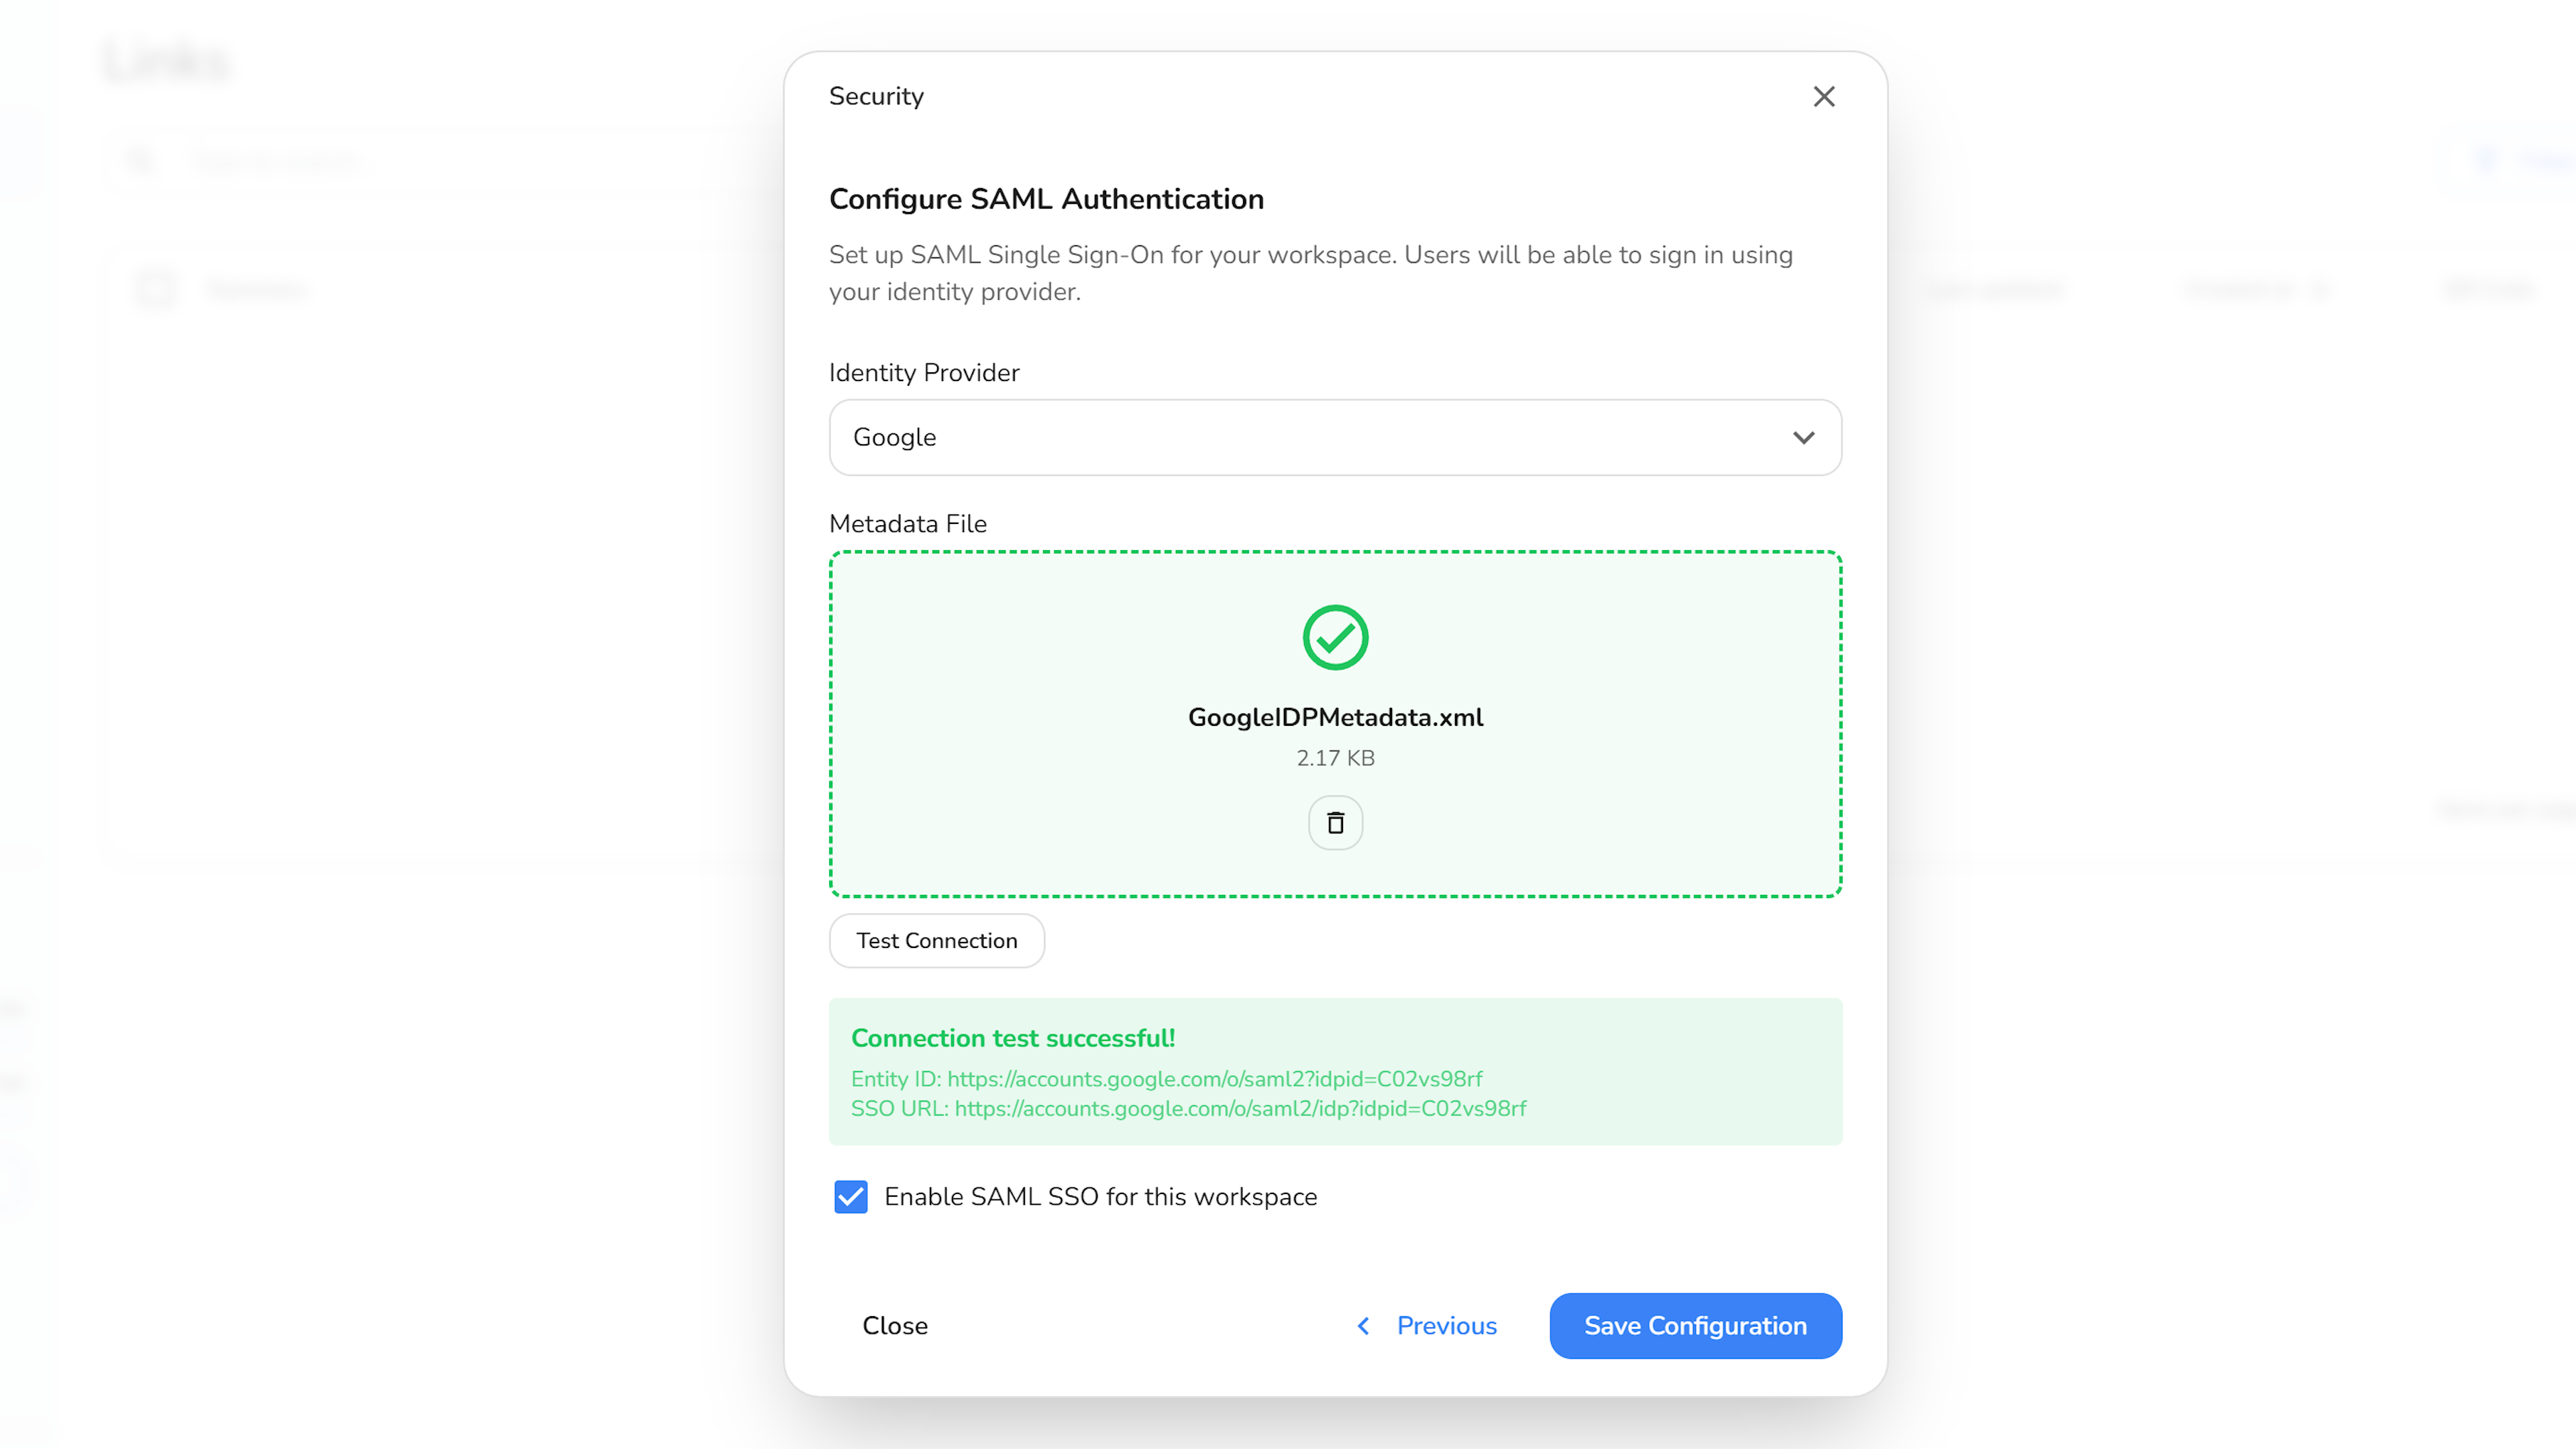
Biqli SAML Configuration modal
Once saved, your Google Workspace integration is ready and team members can log in using Google SSO.