

Step 1: Create or Select SAML Application
In your Azure Admin console, select Microsoft Entra ID (formerly Azure Active Directory) or search for it in the top search bar.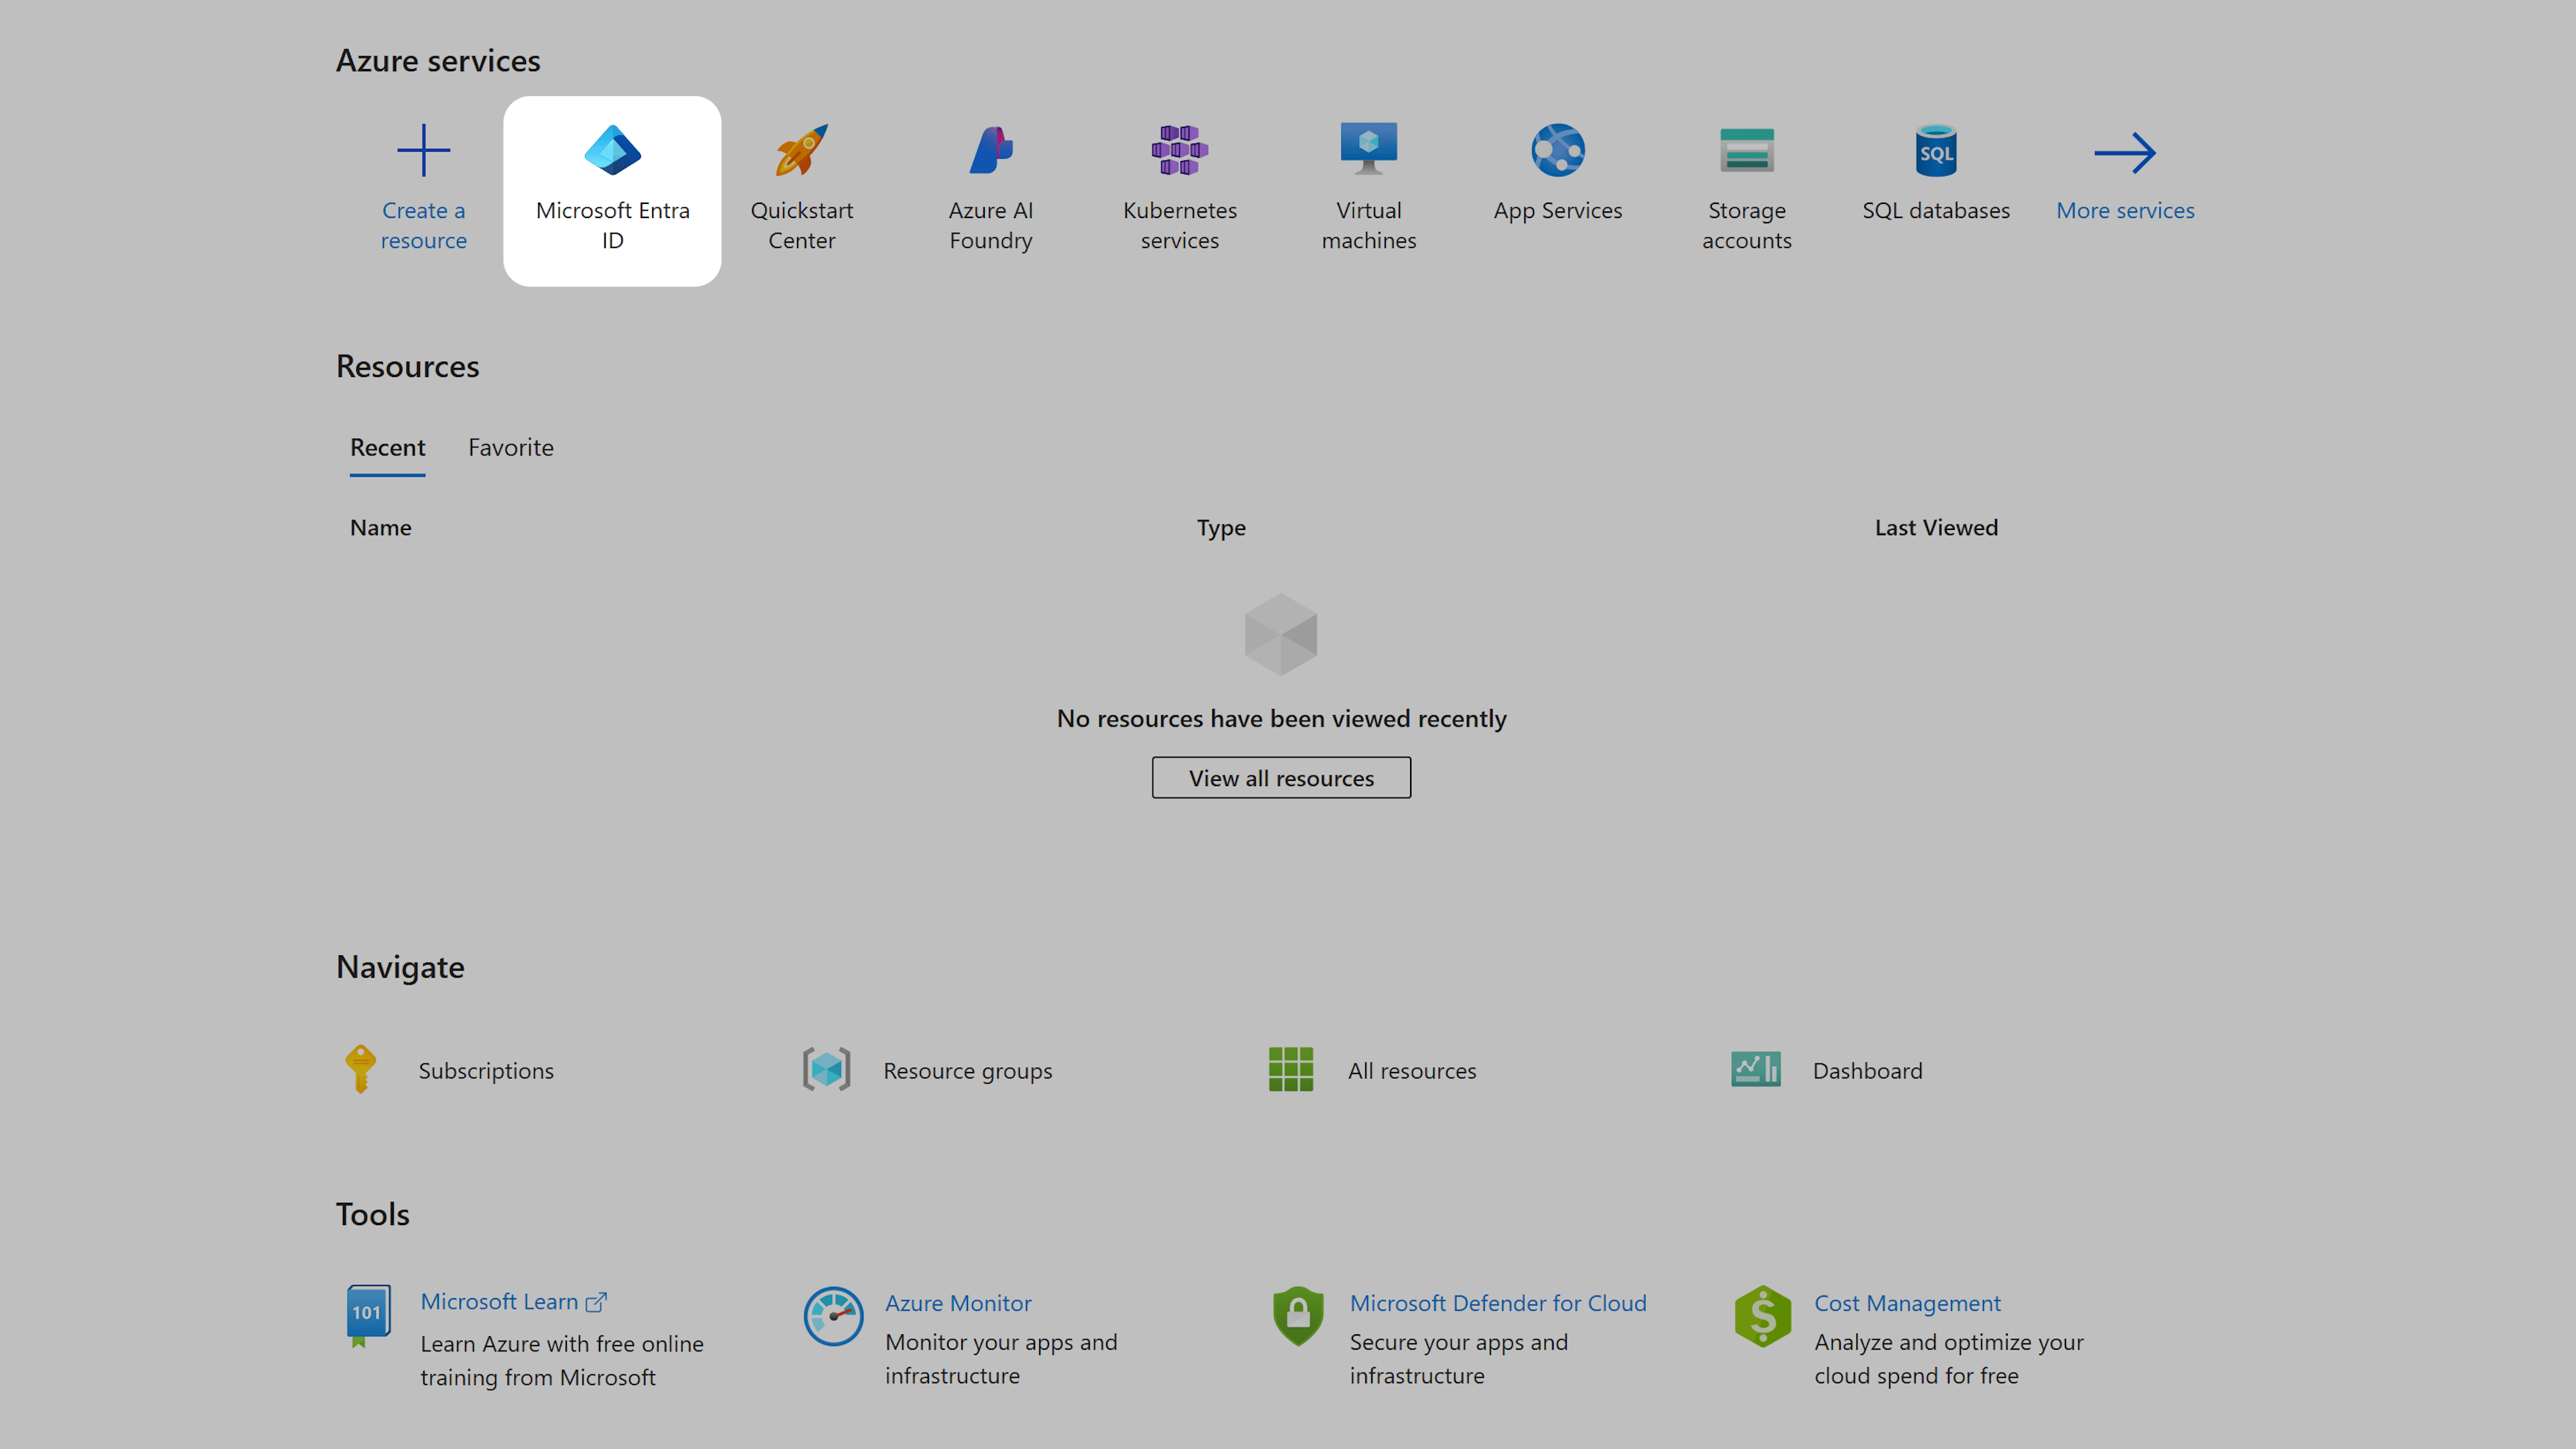
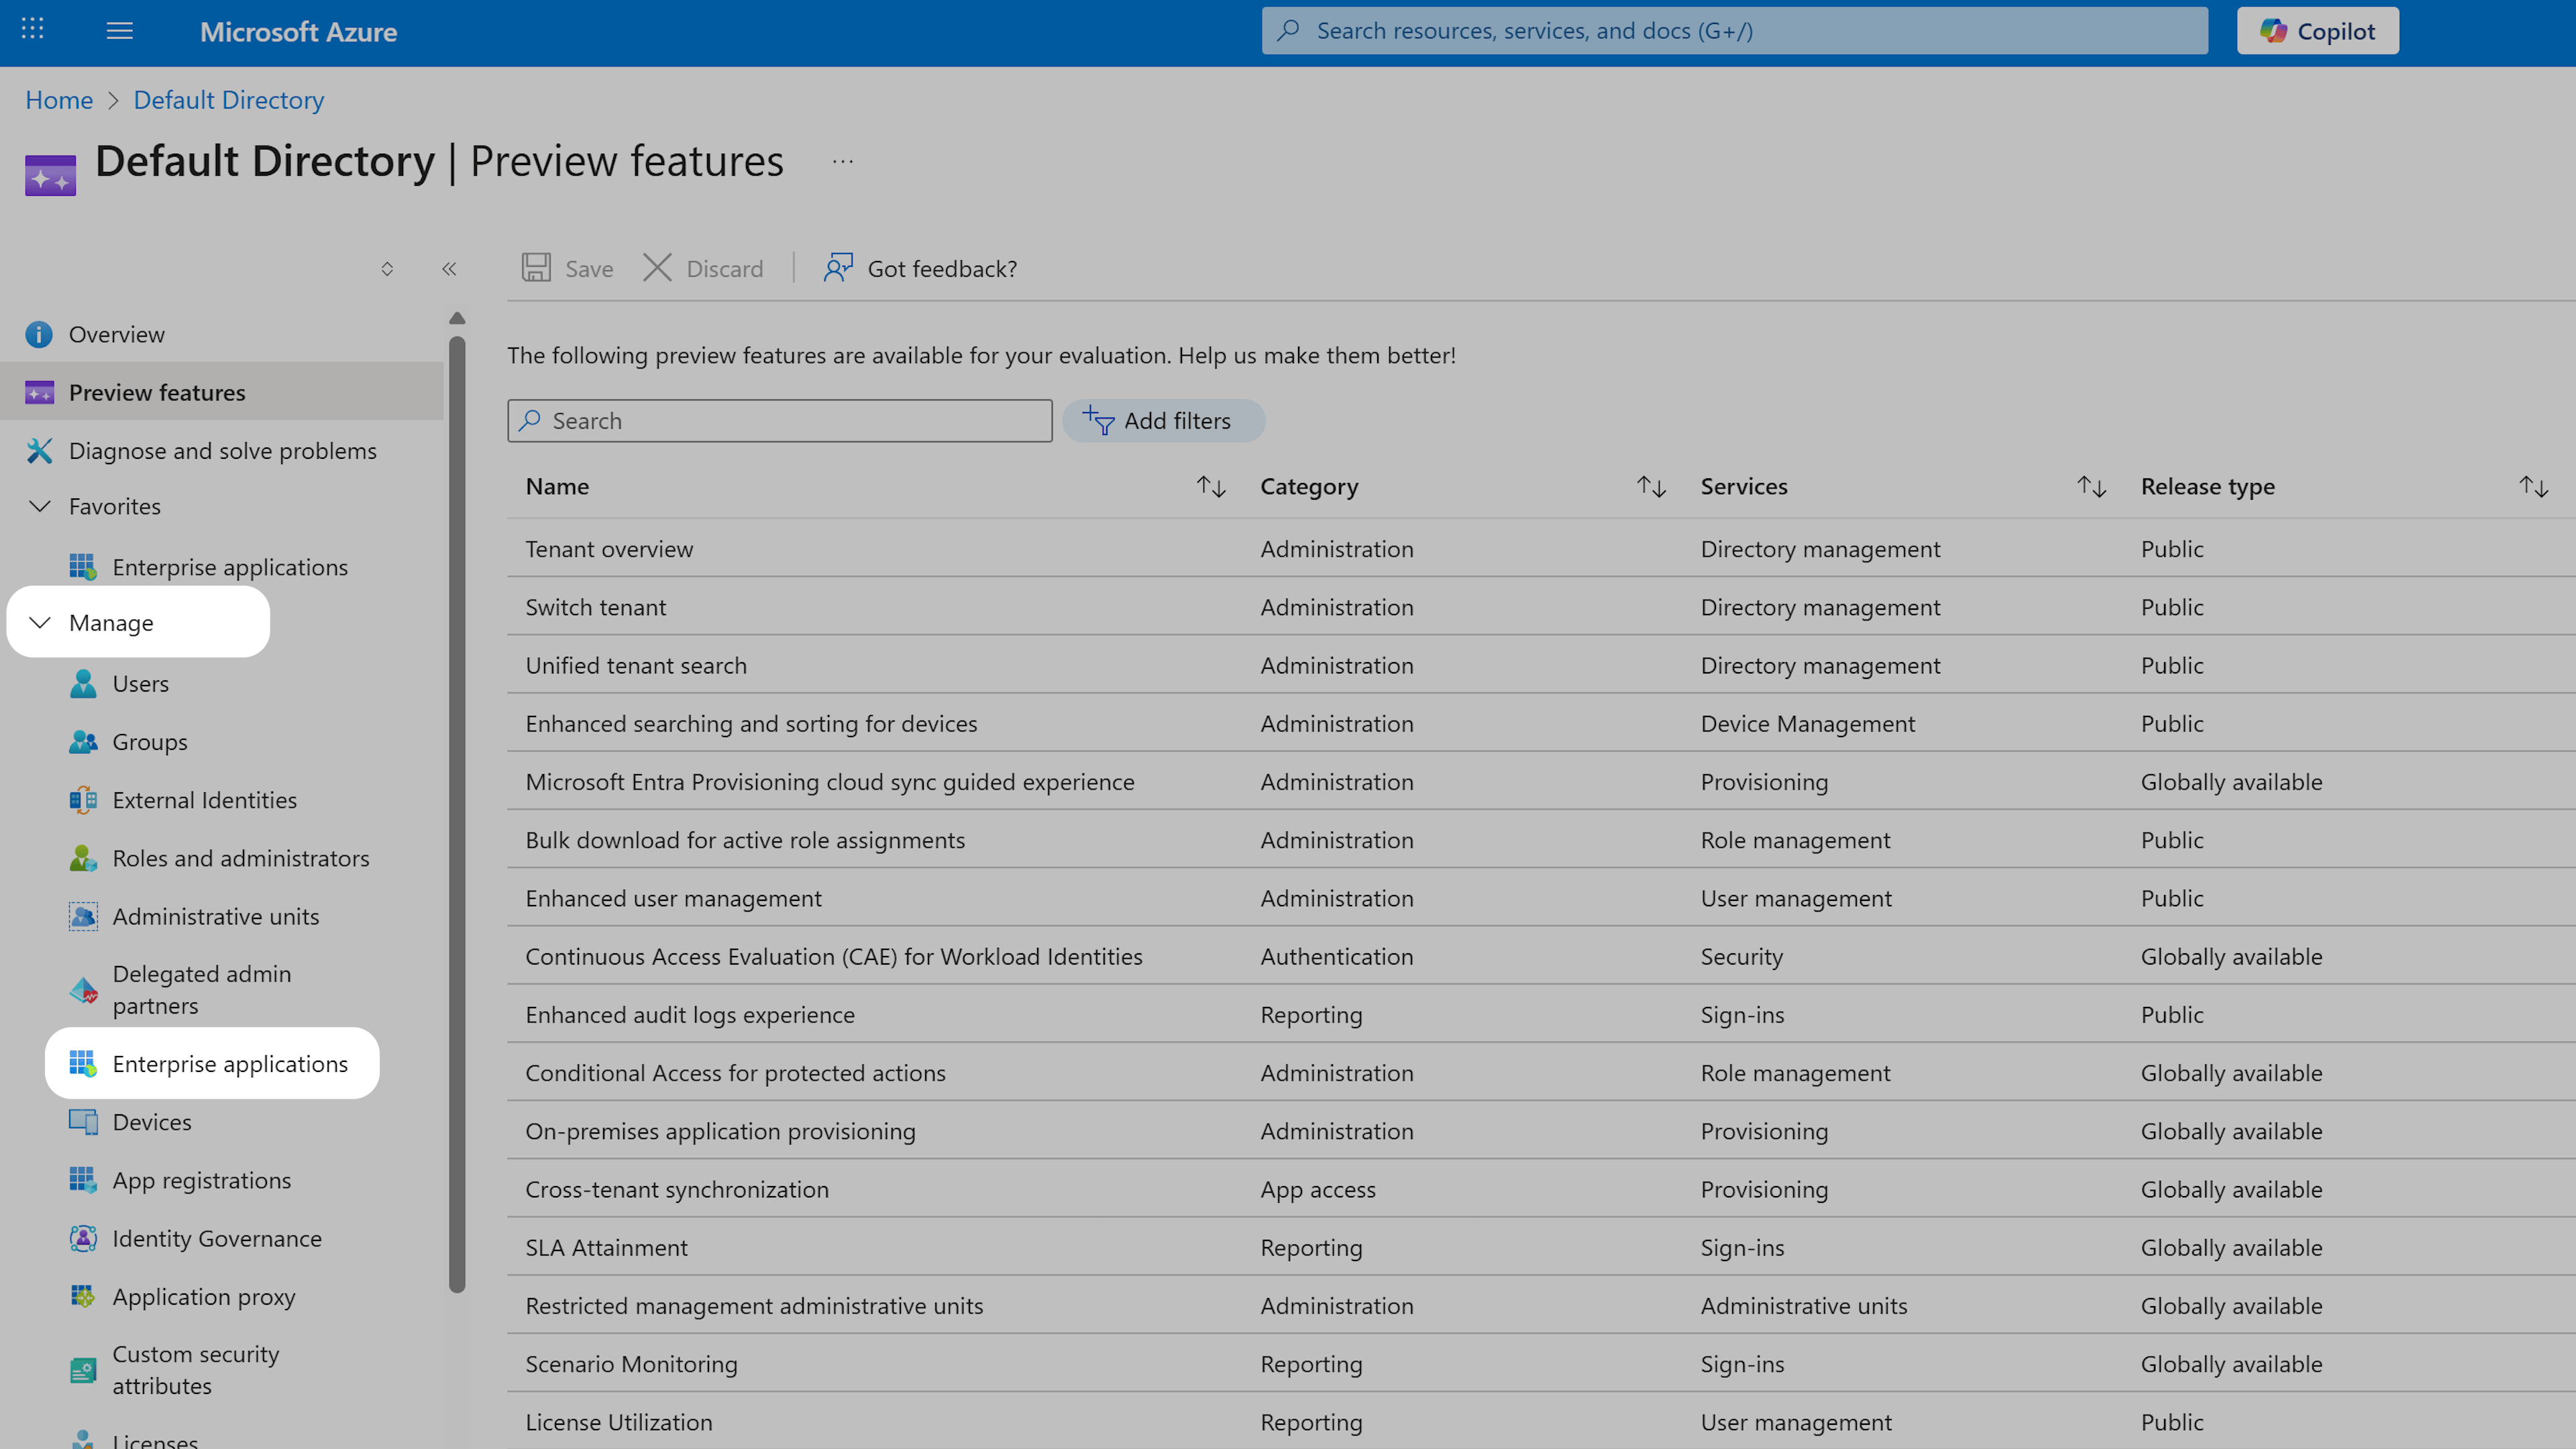
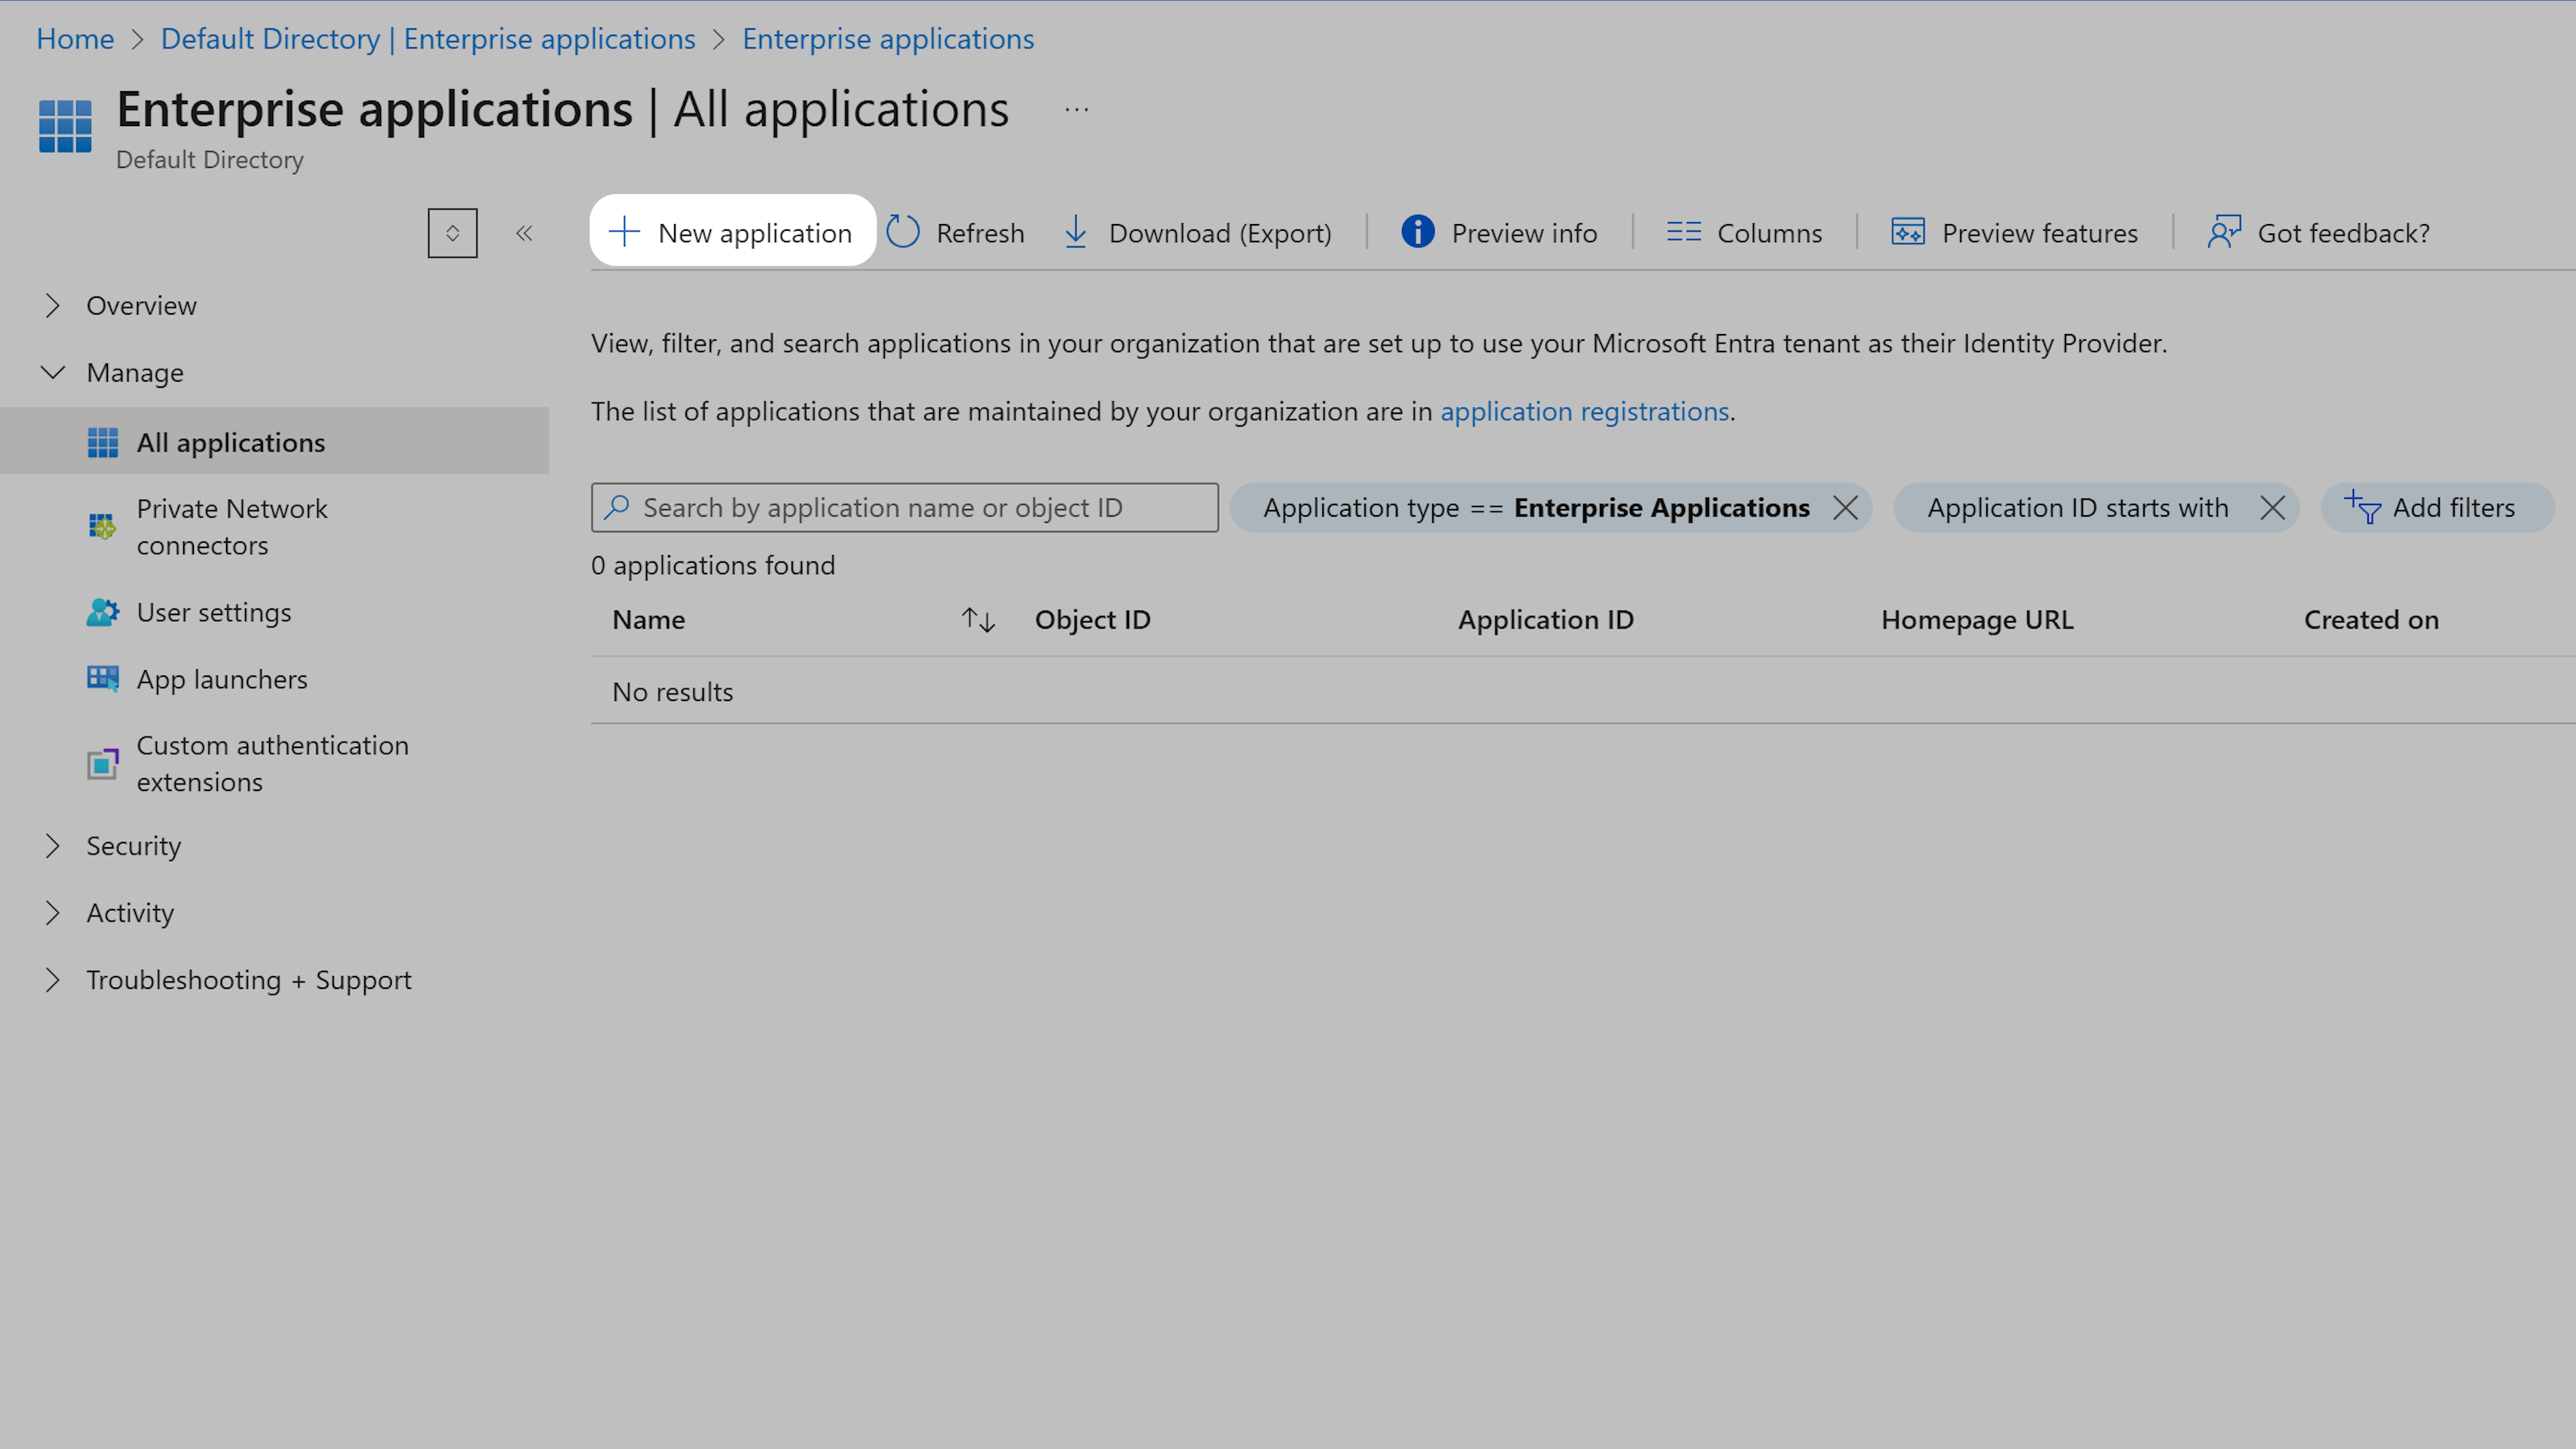
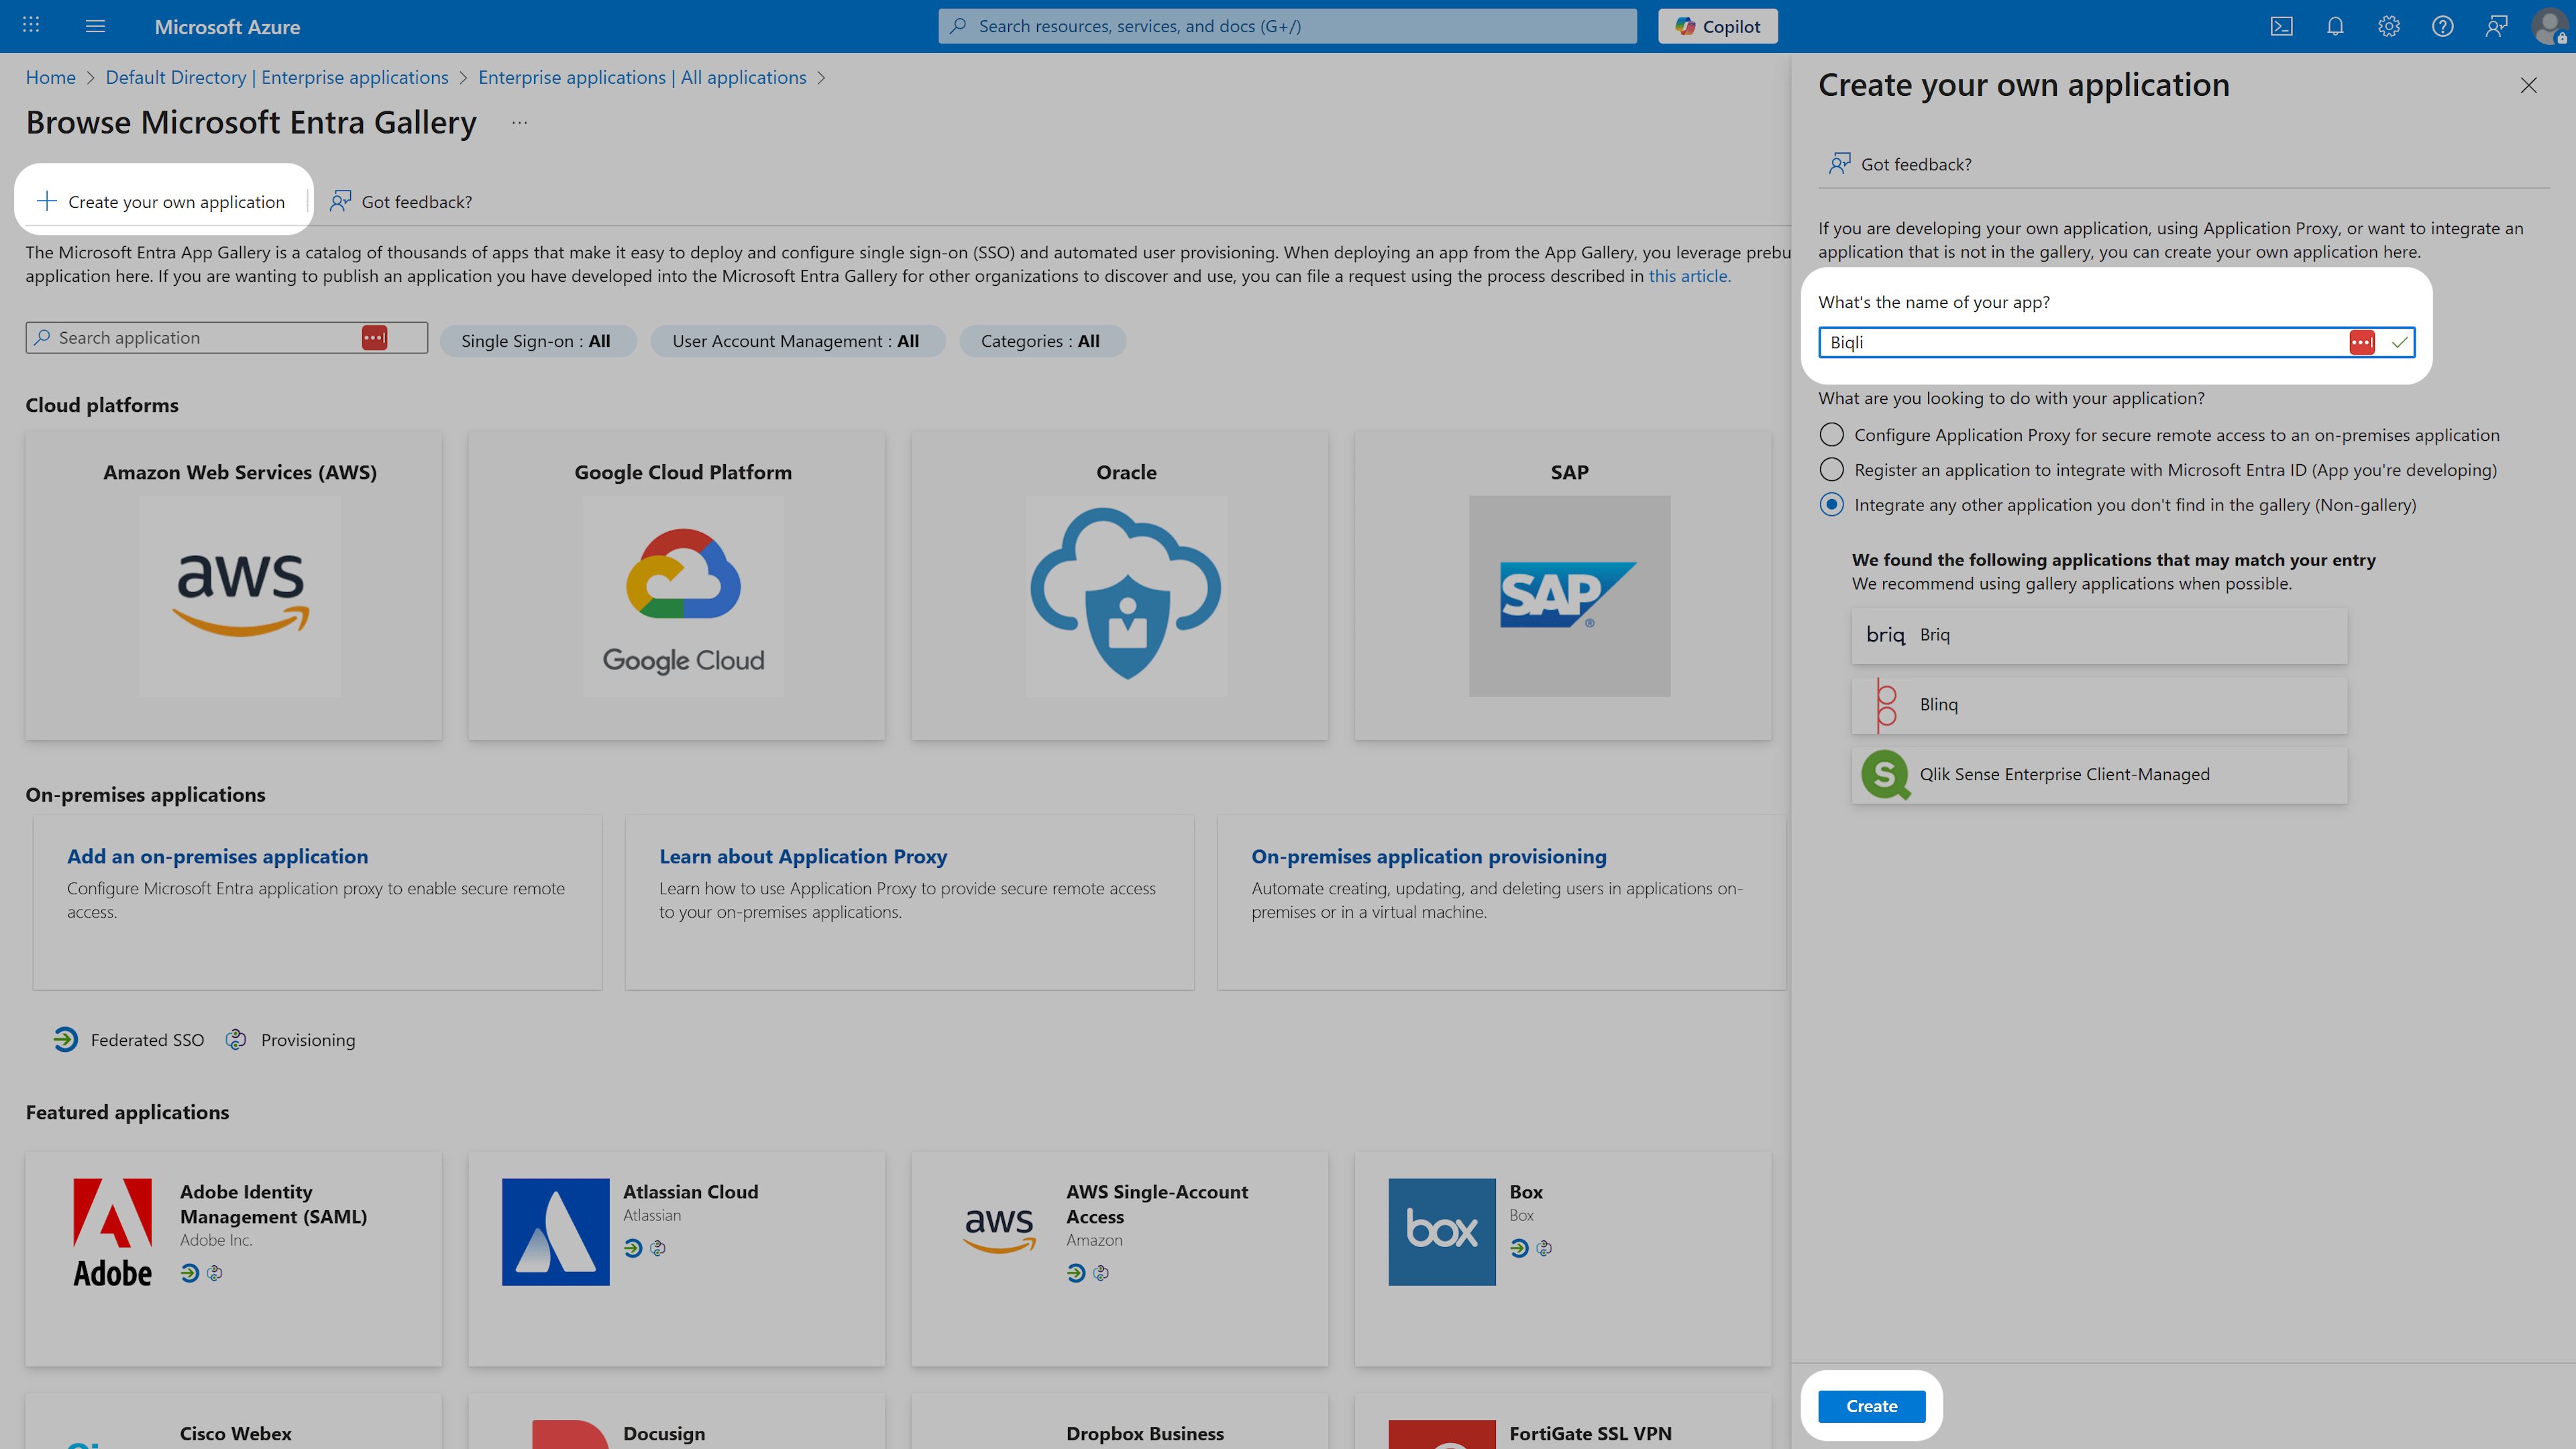
Step 2: Configure SAML Settings
In the left sidebar under the Manage section, choose Single sign-on, then select SAML.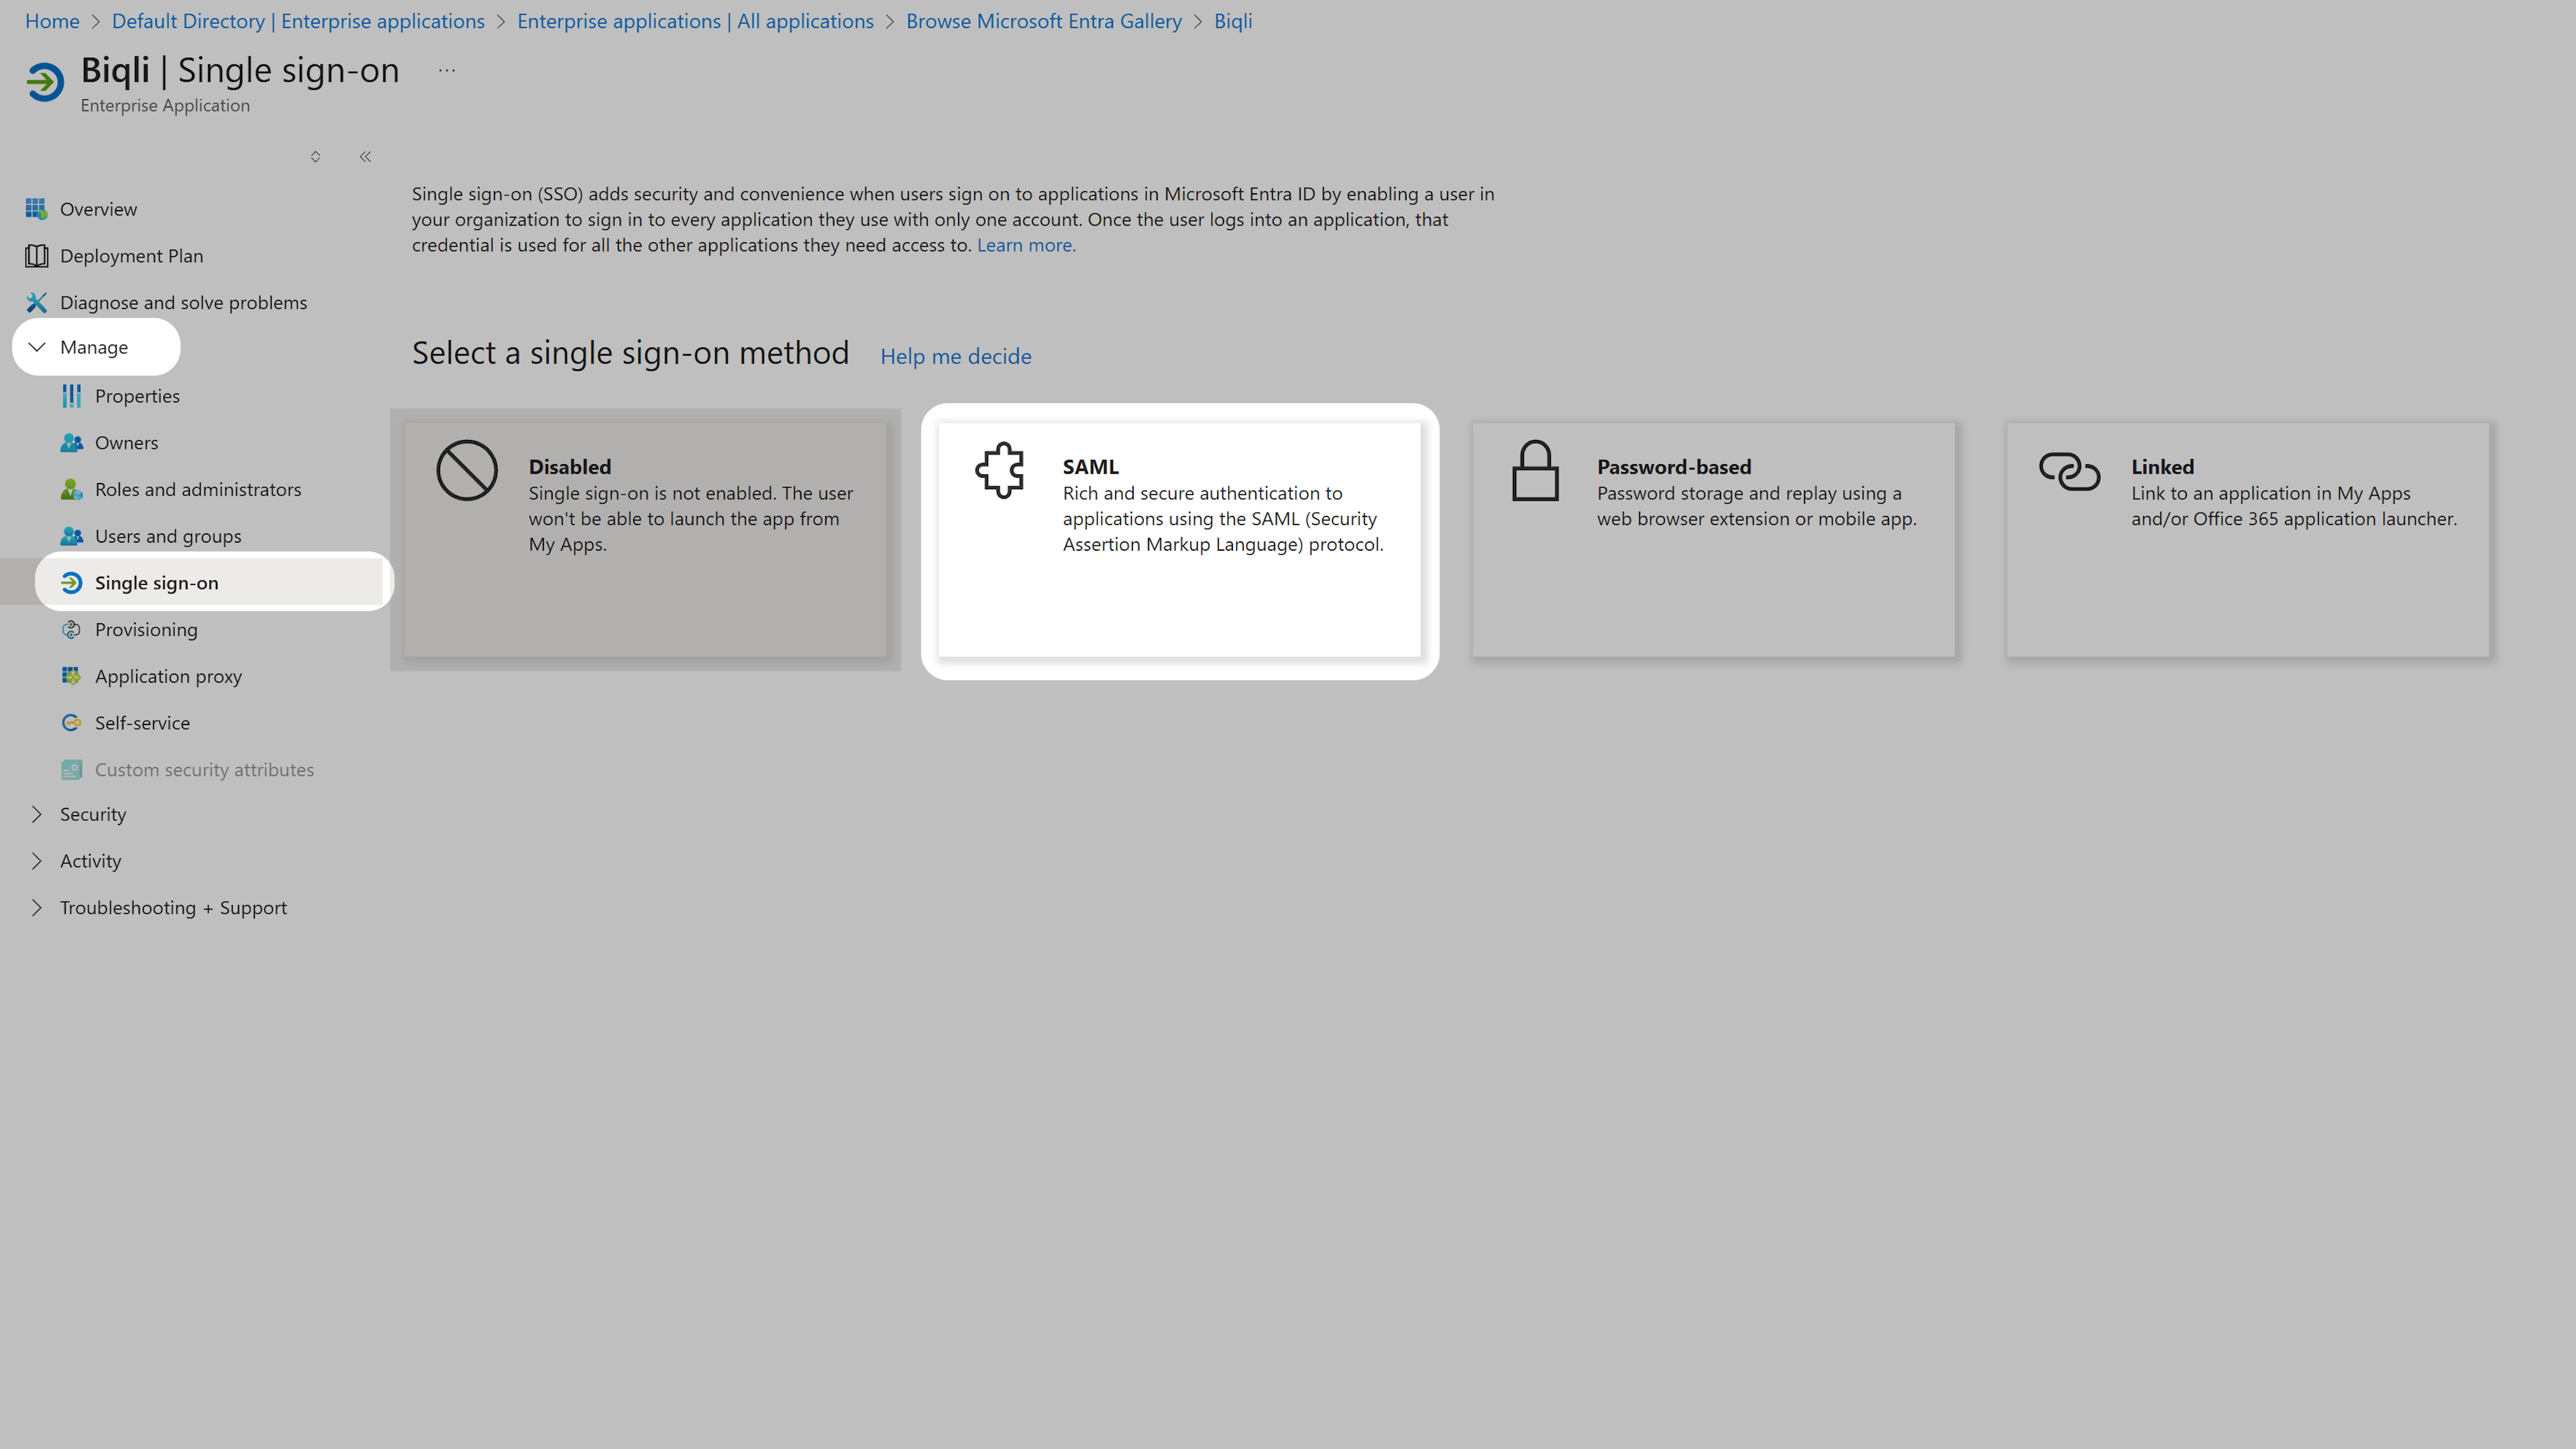
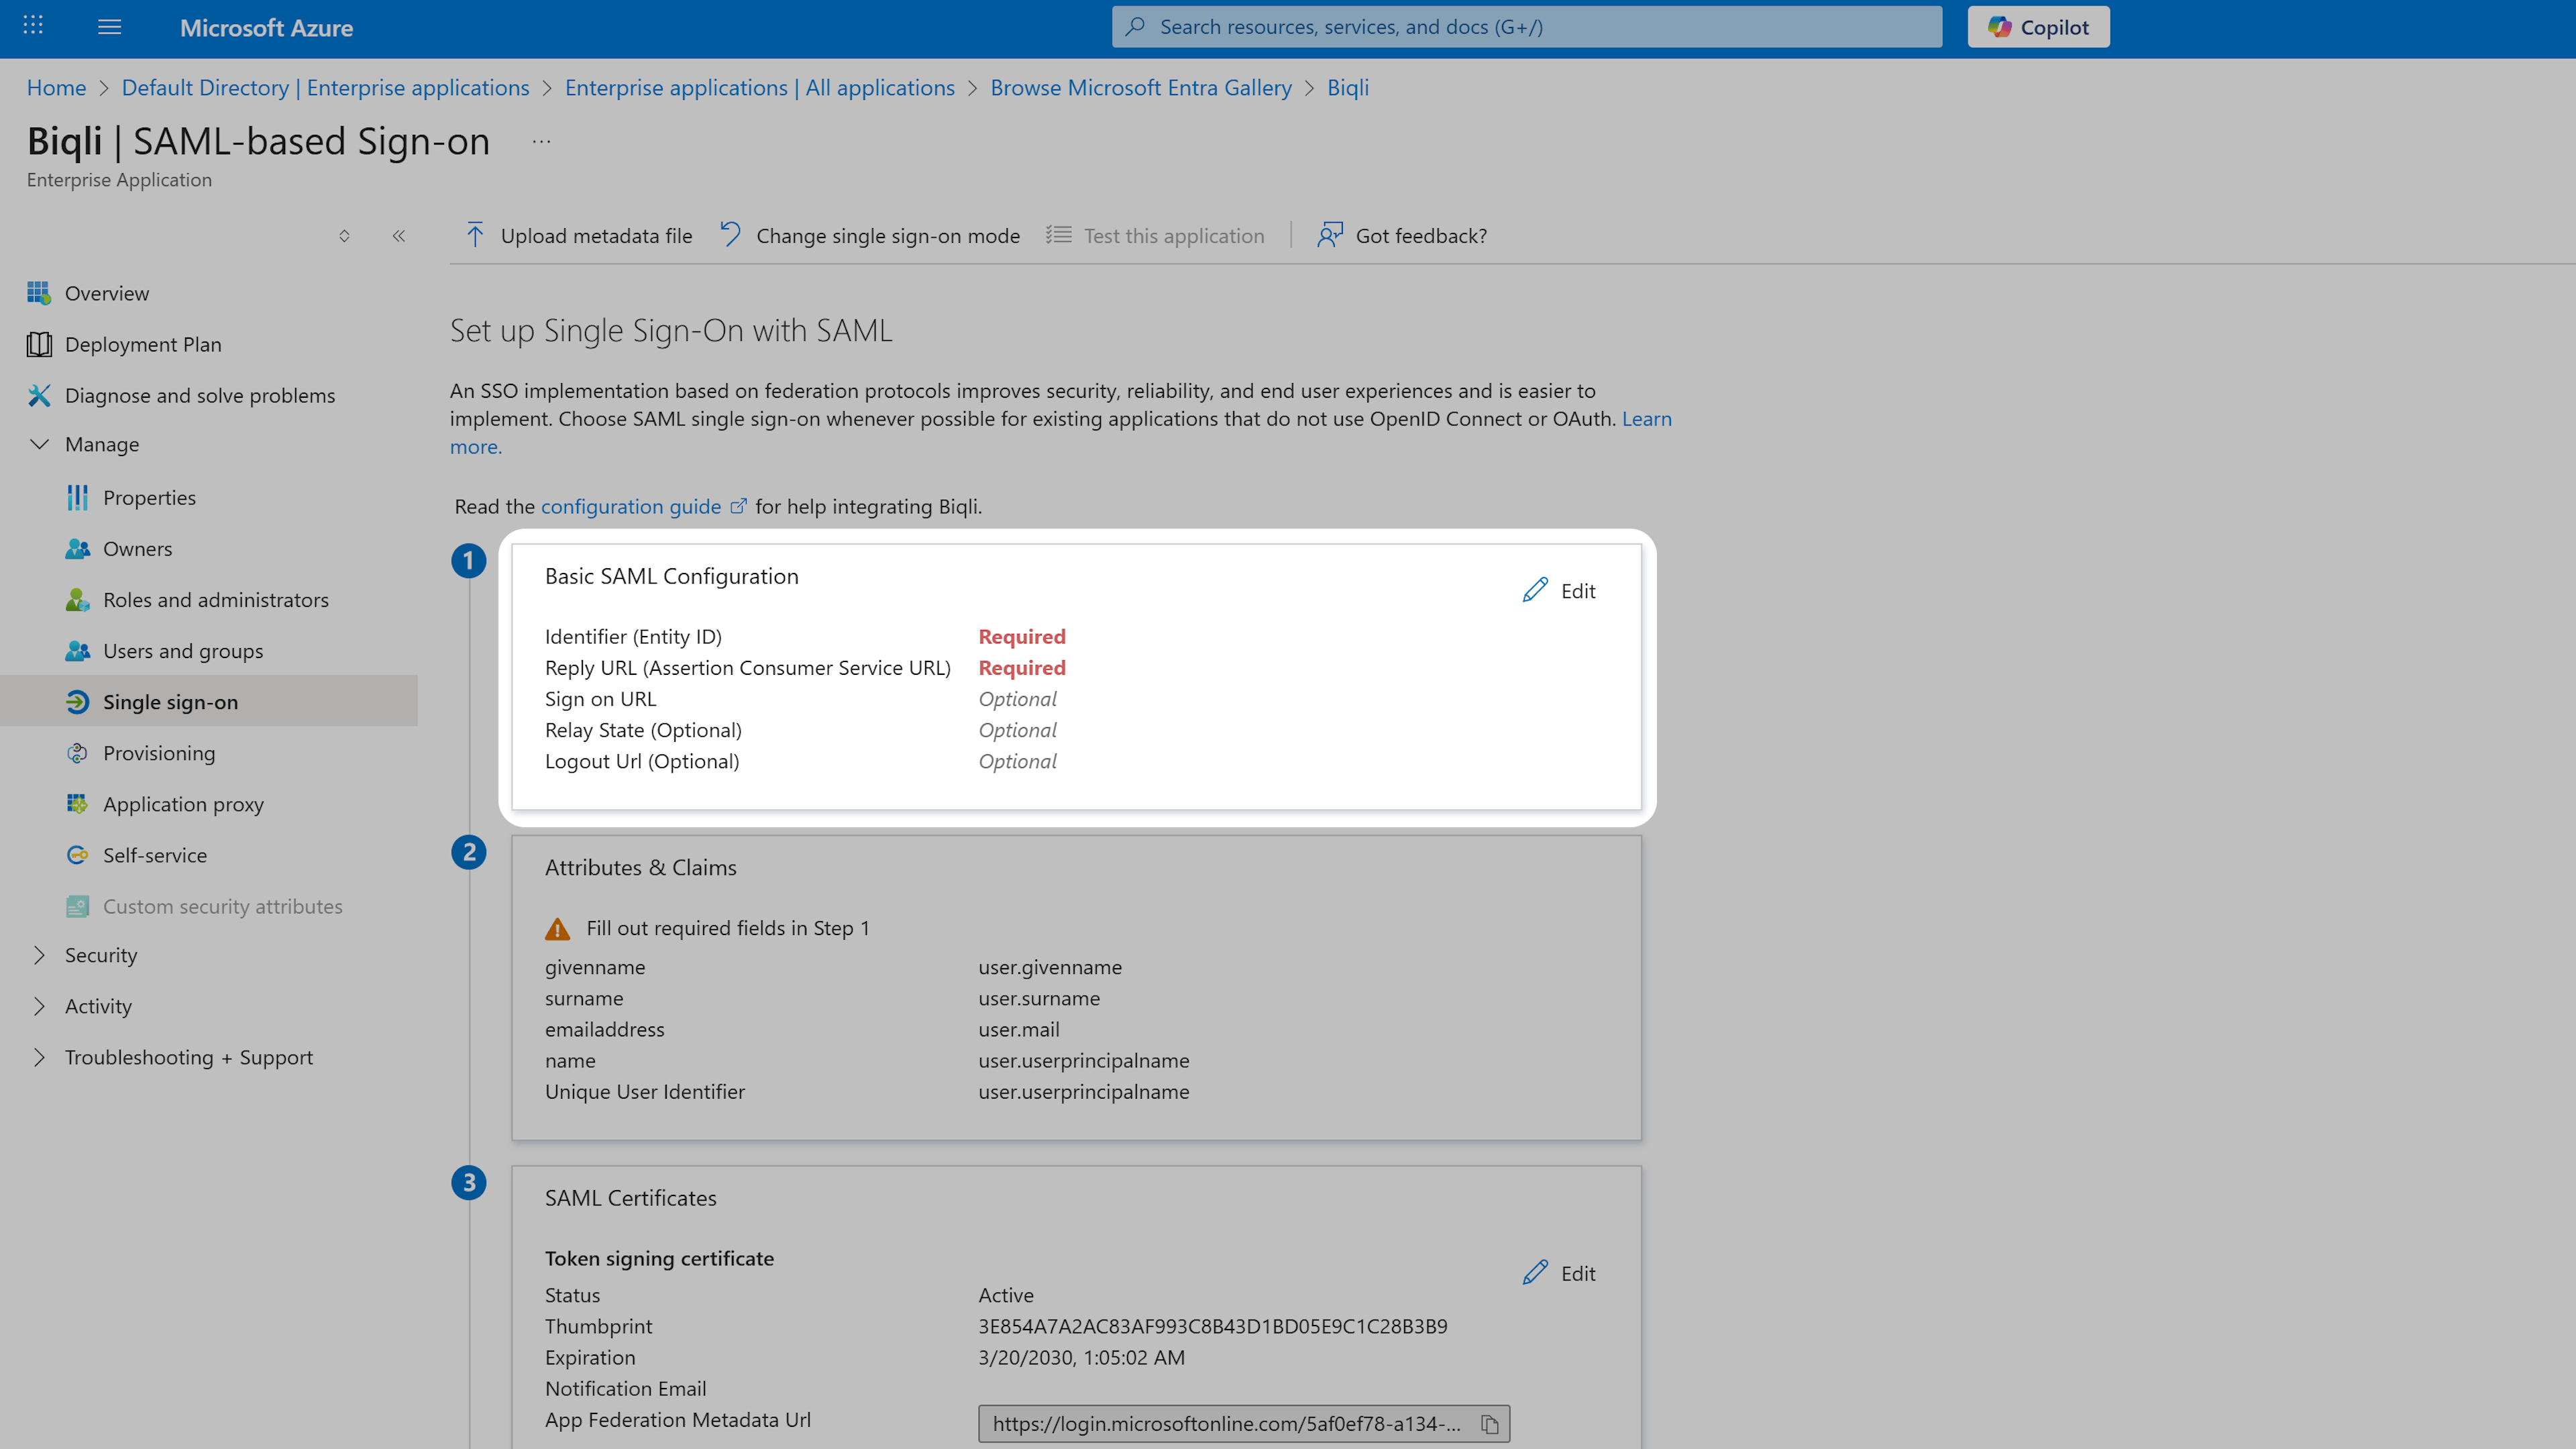
Identifier (Entity ID)
Reply URL (Assertion Consumer Service URL)
Please ensure you replace
{WORKSPACE_SLUG} with the slug of the specific workspace in which you are activating Azure AD SAML.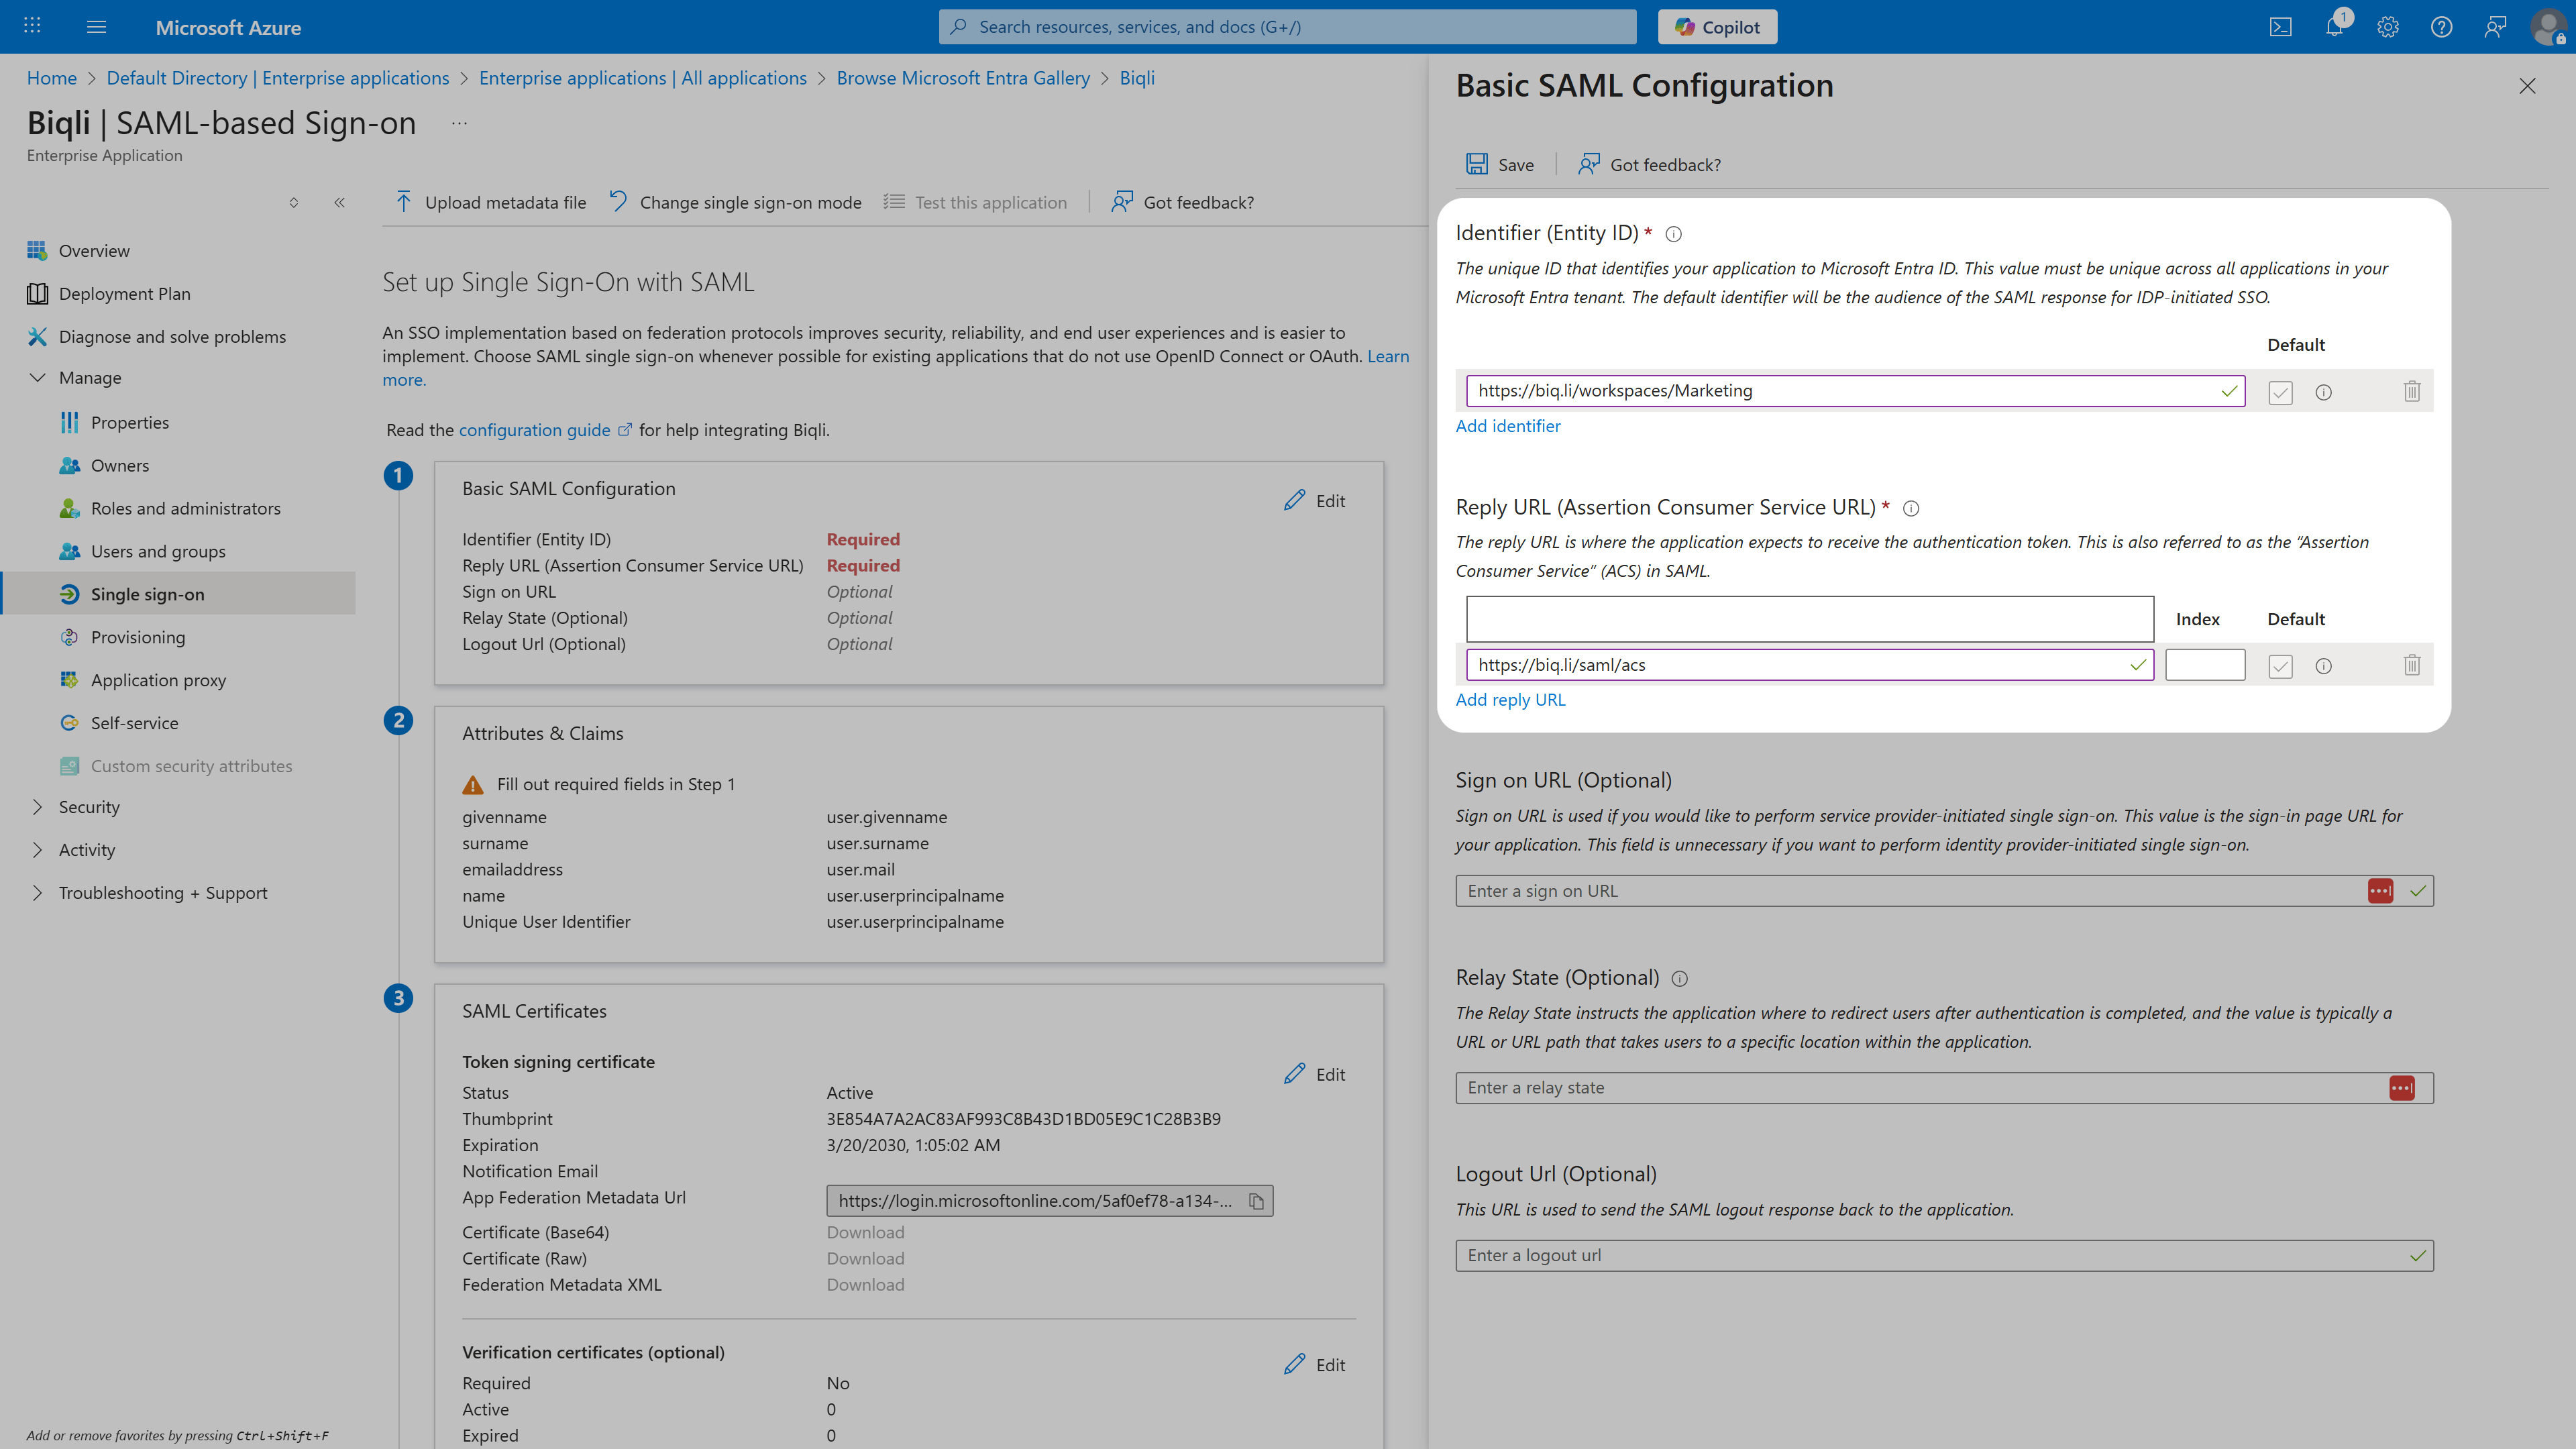
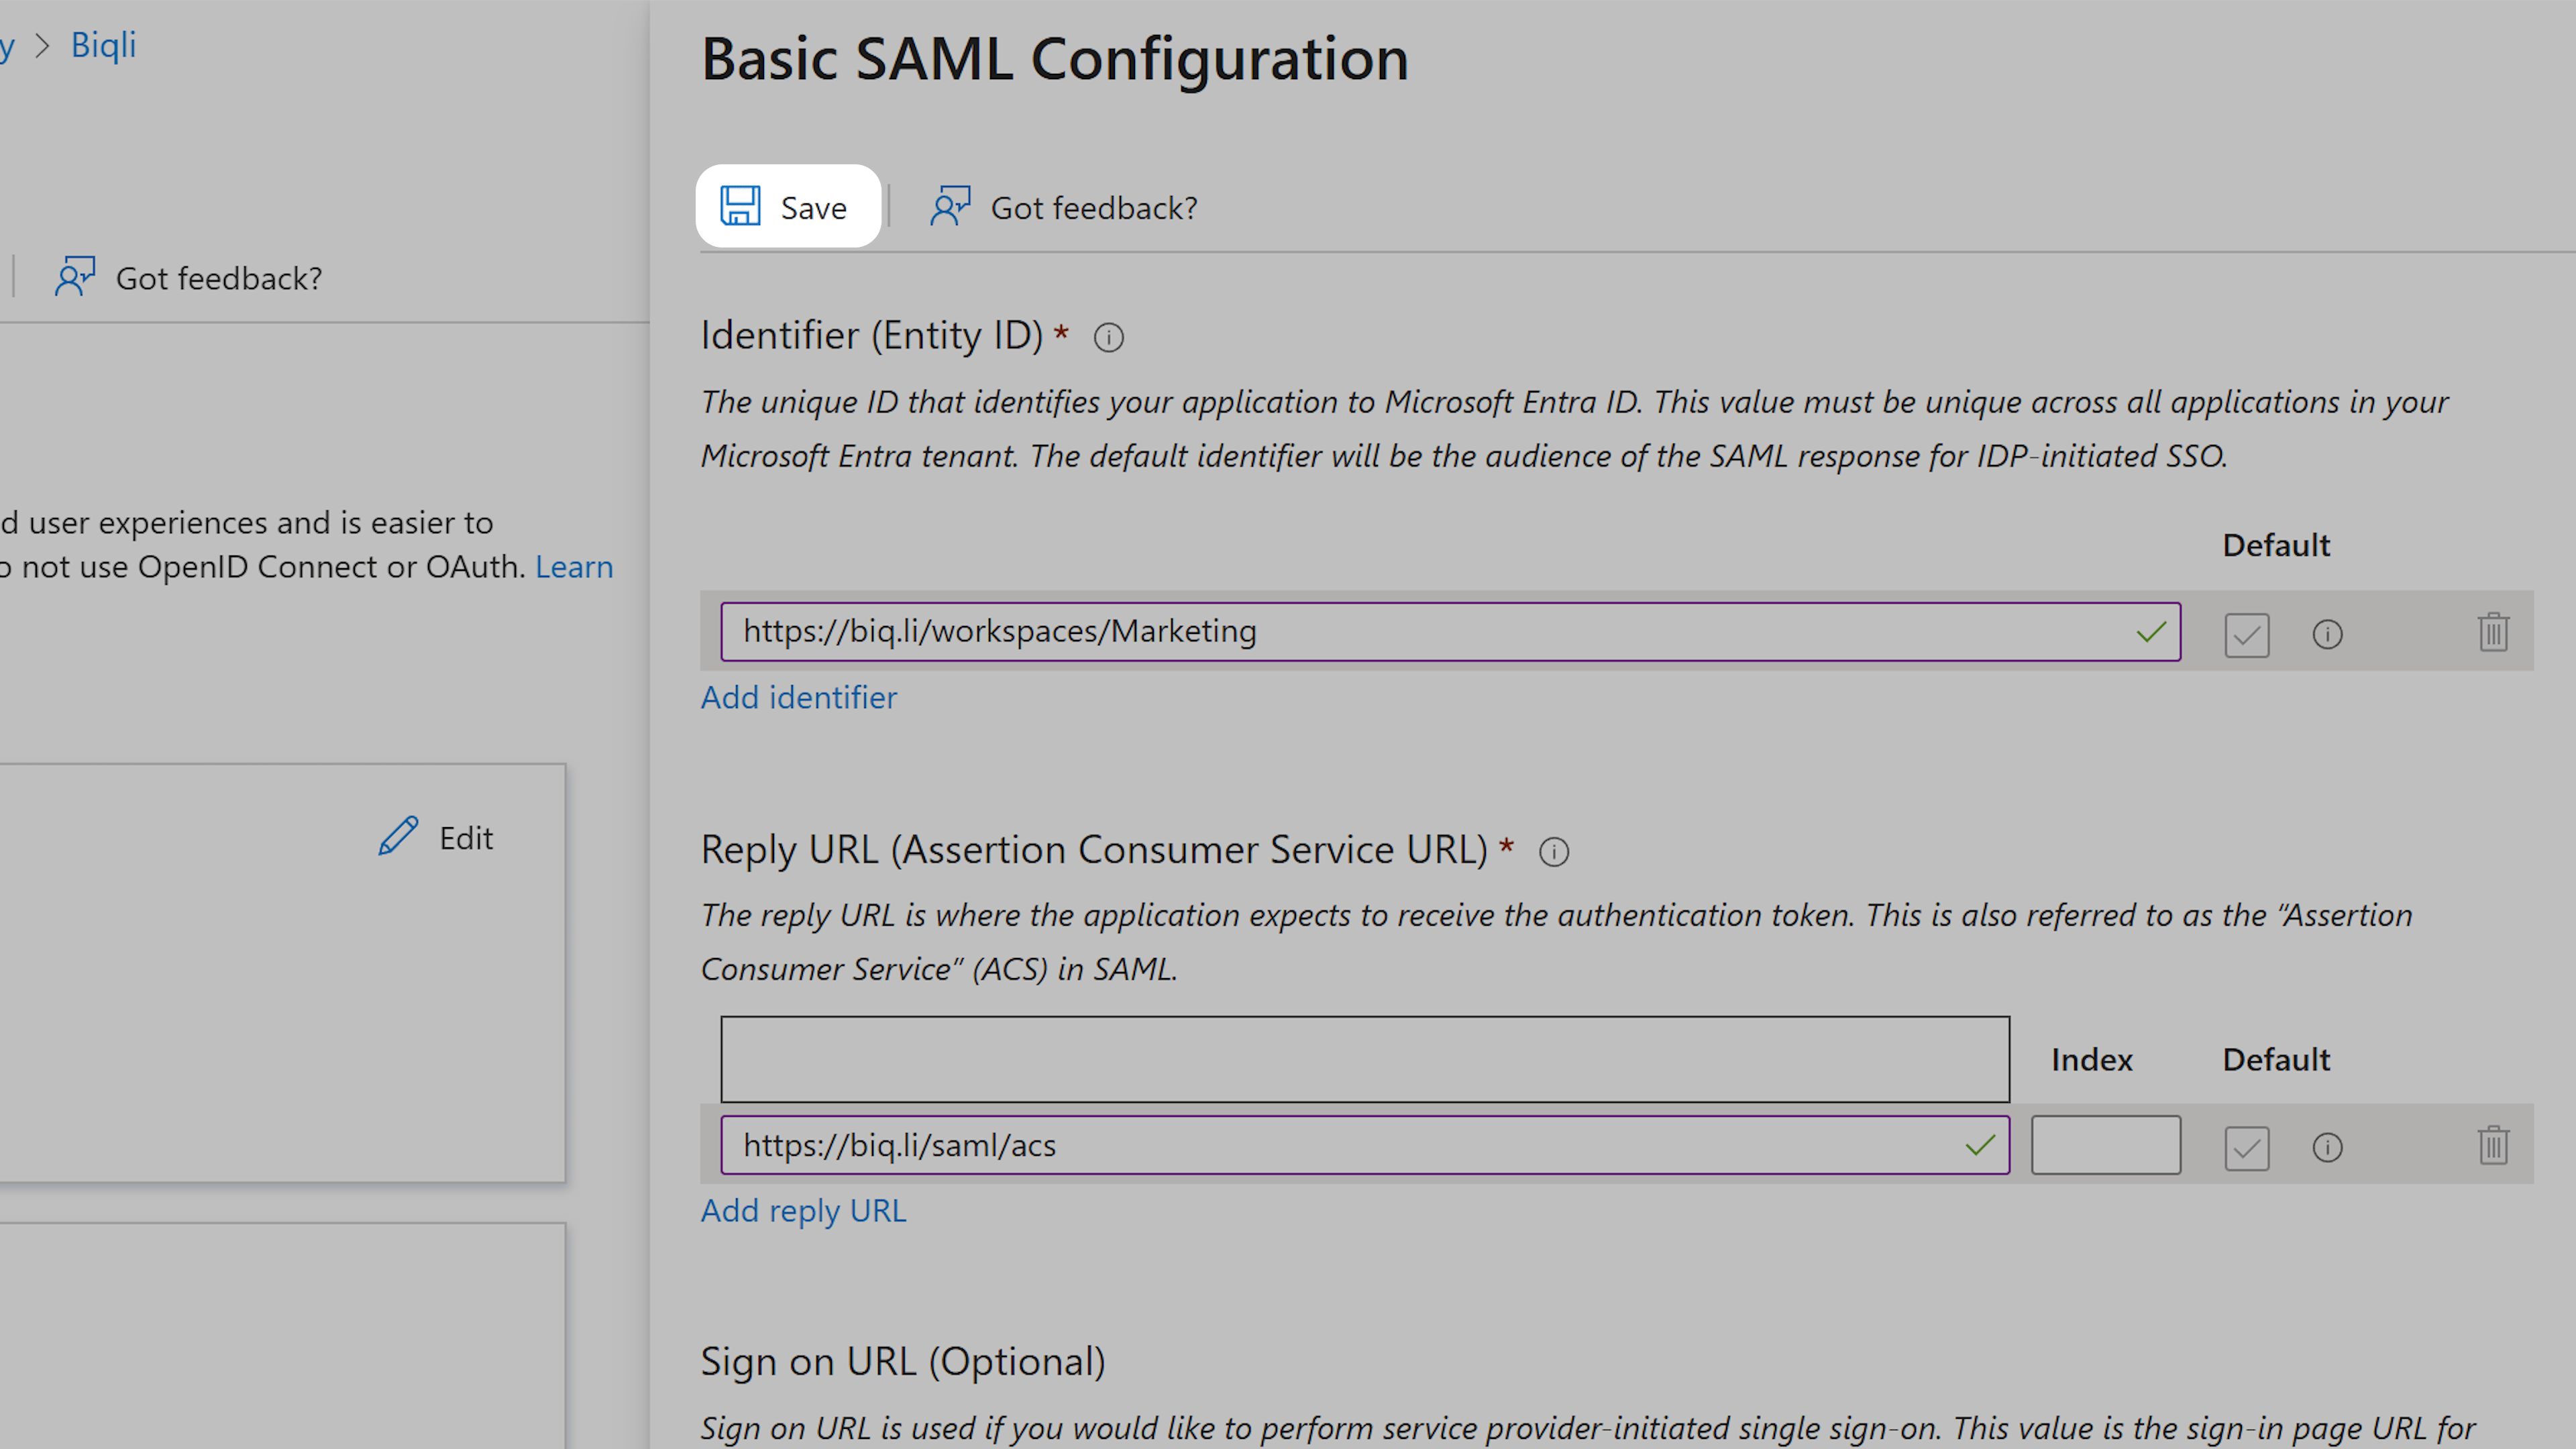
Step 3: Attribute Mapping
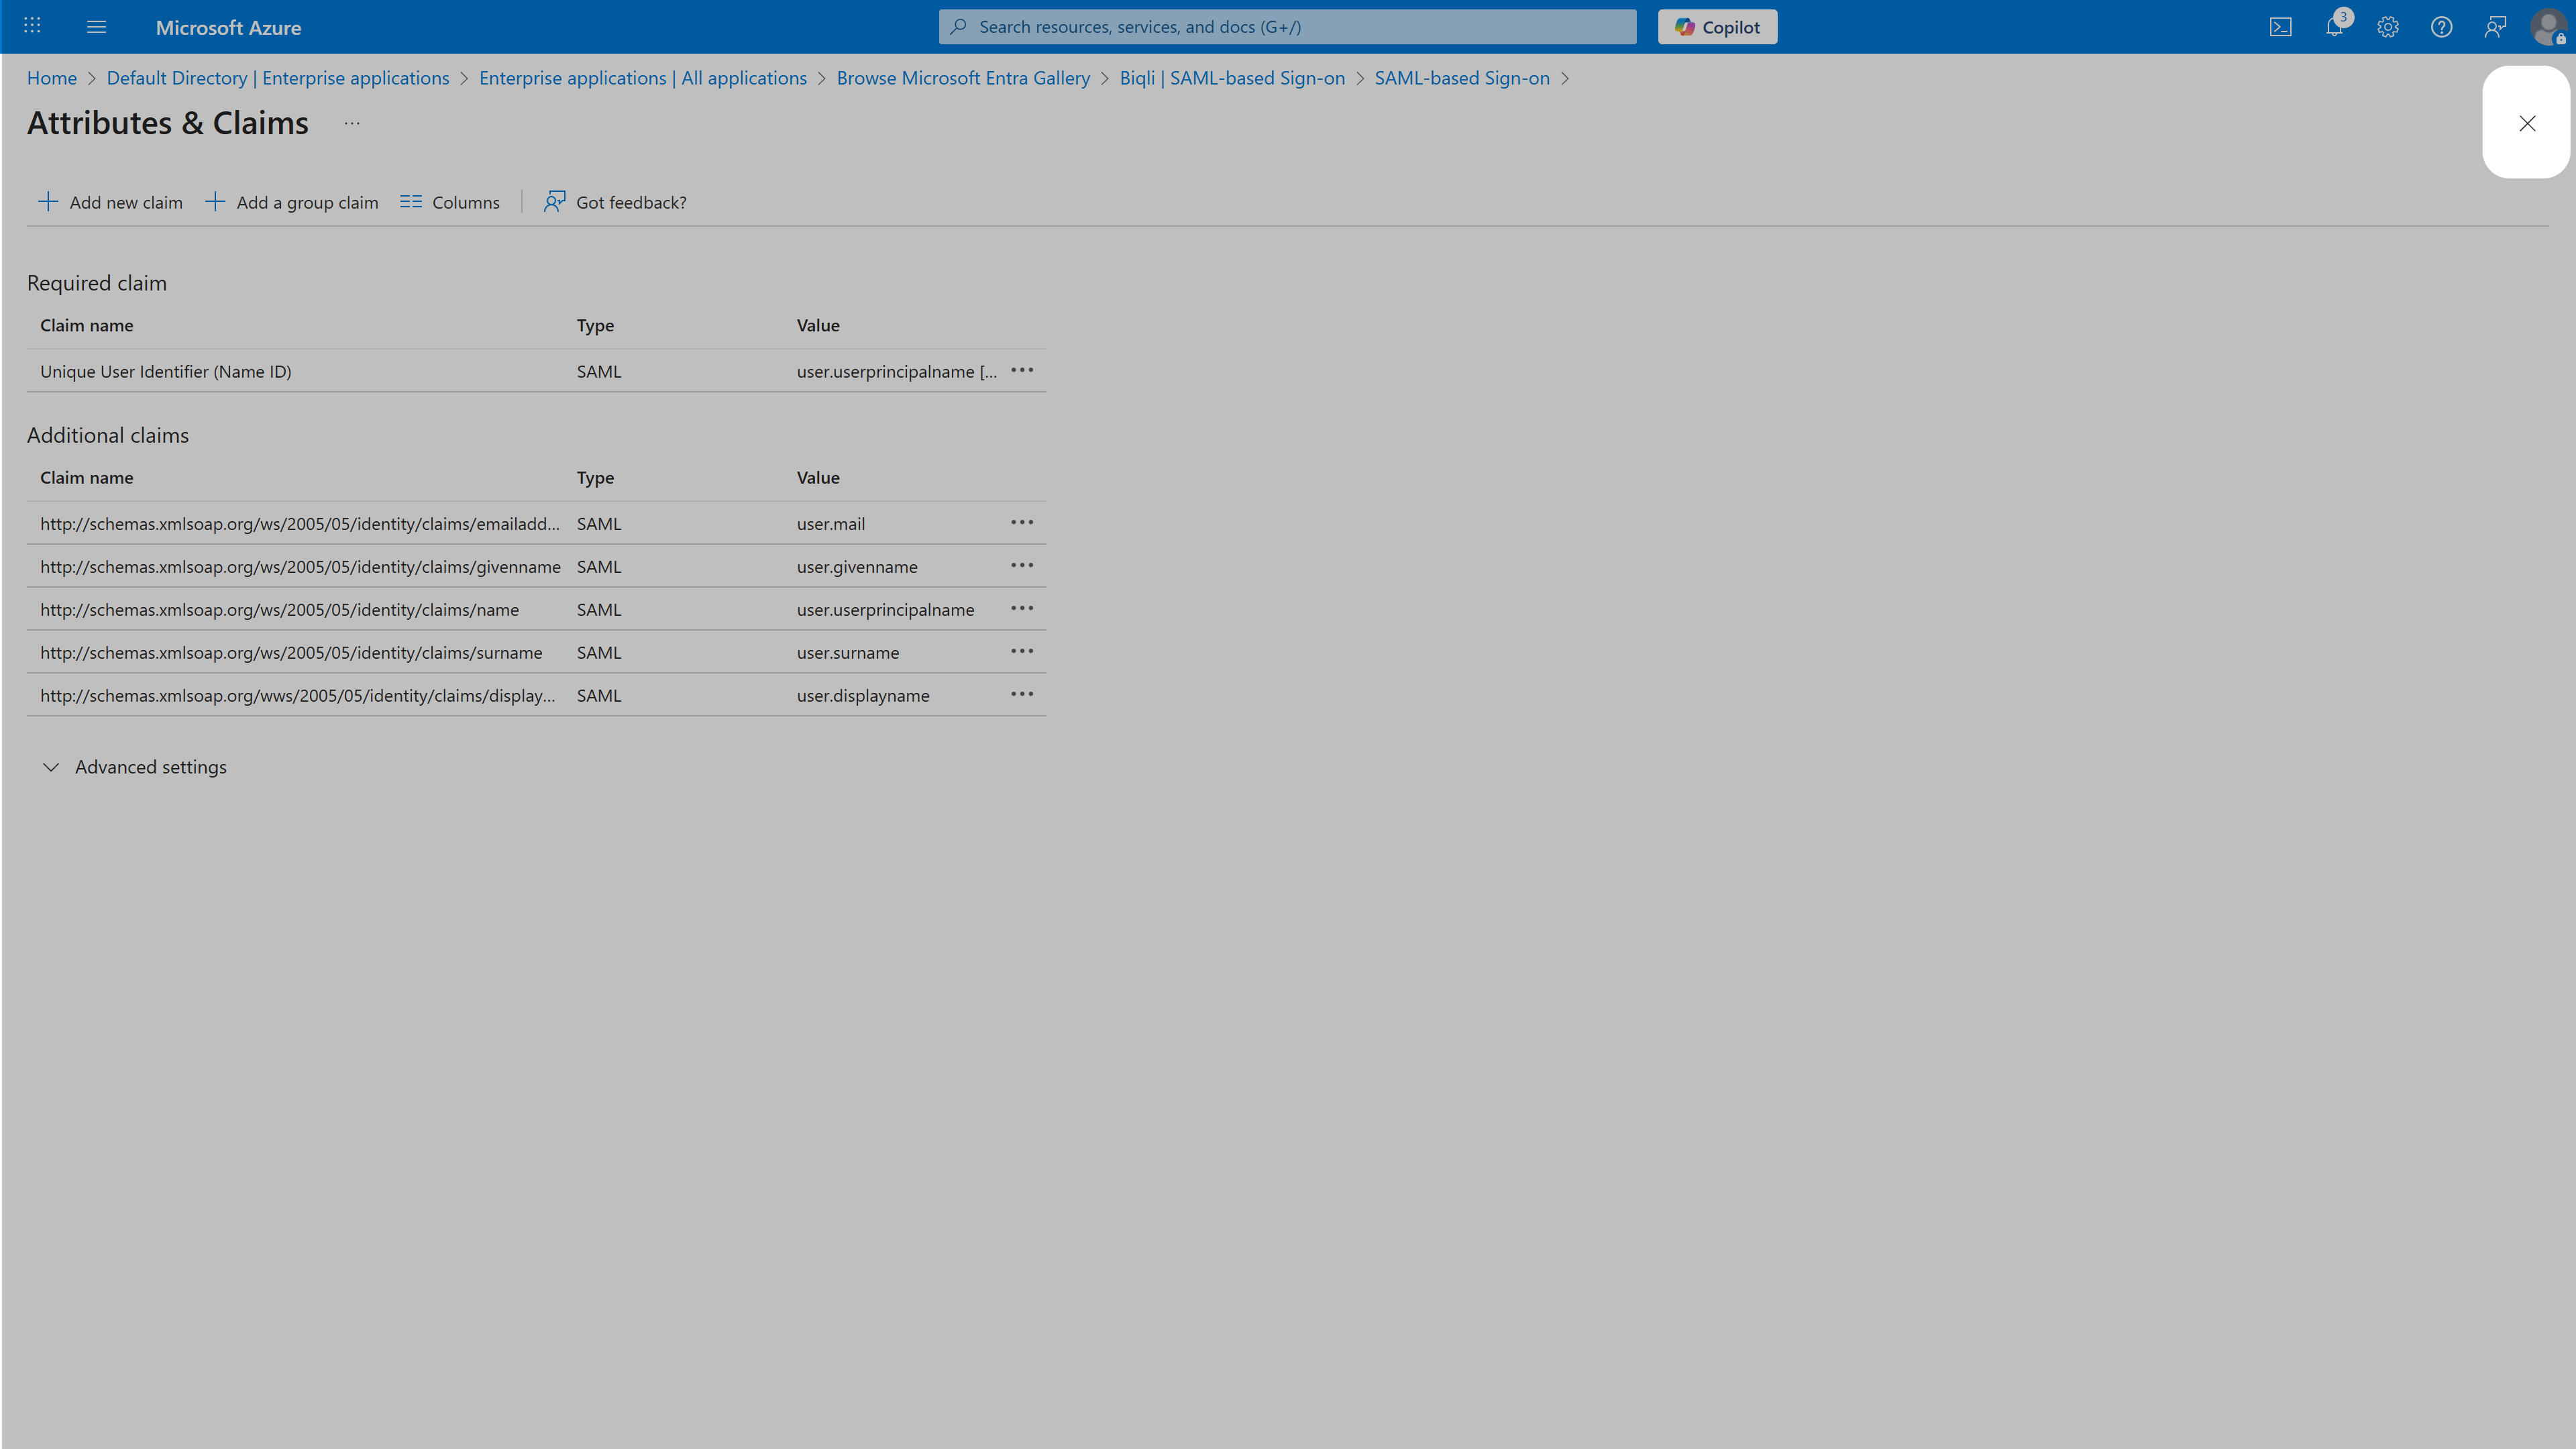
Click Edit on the Attributes & Claims section.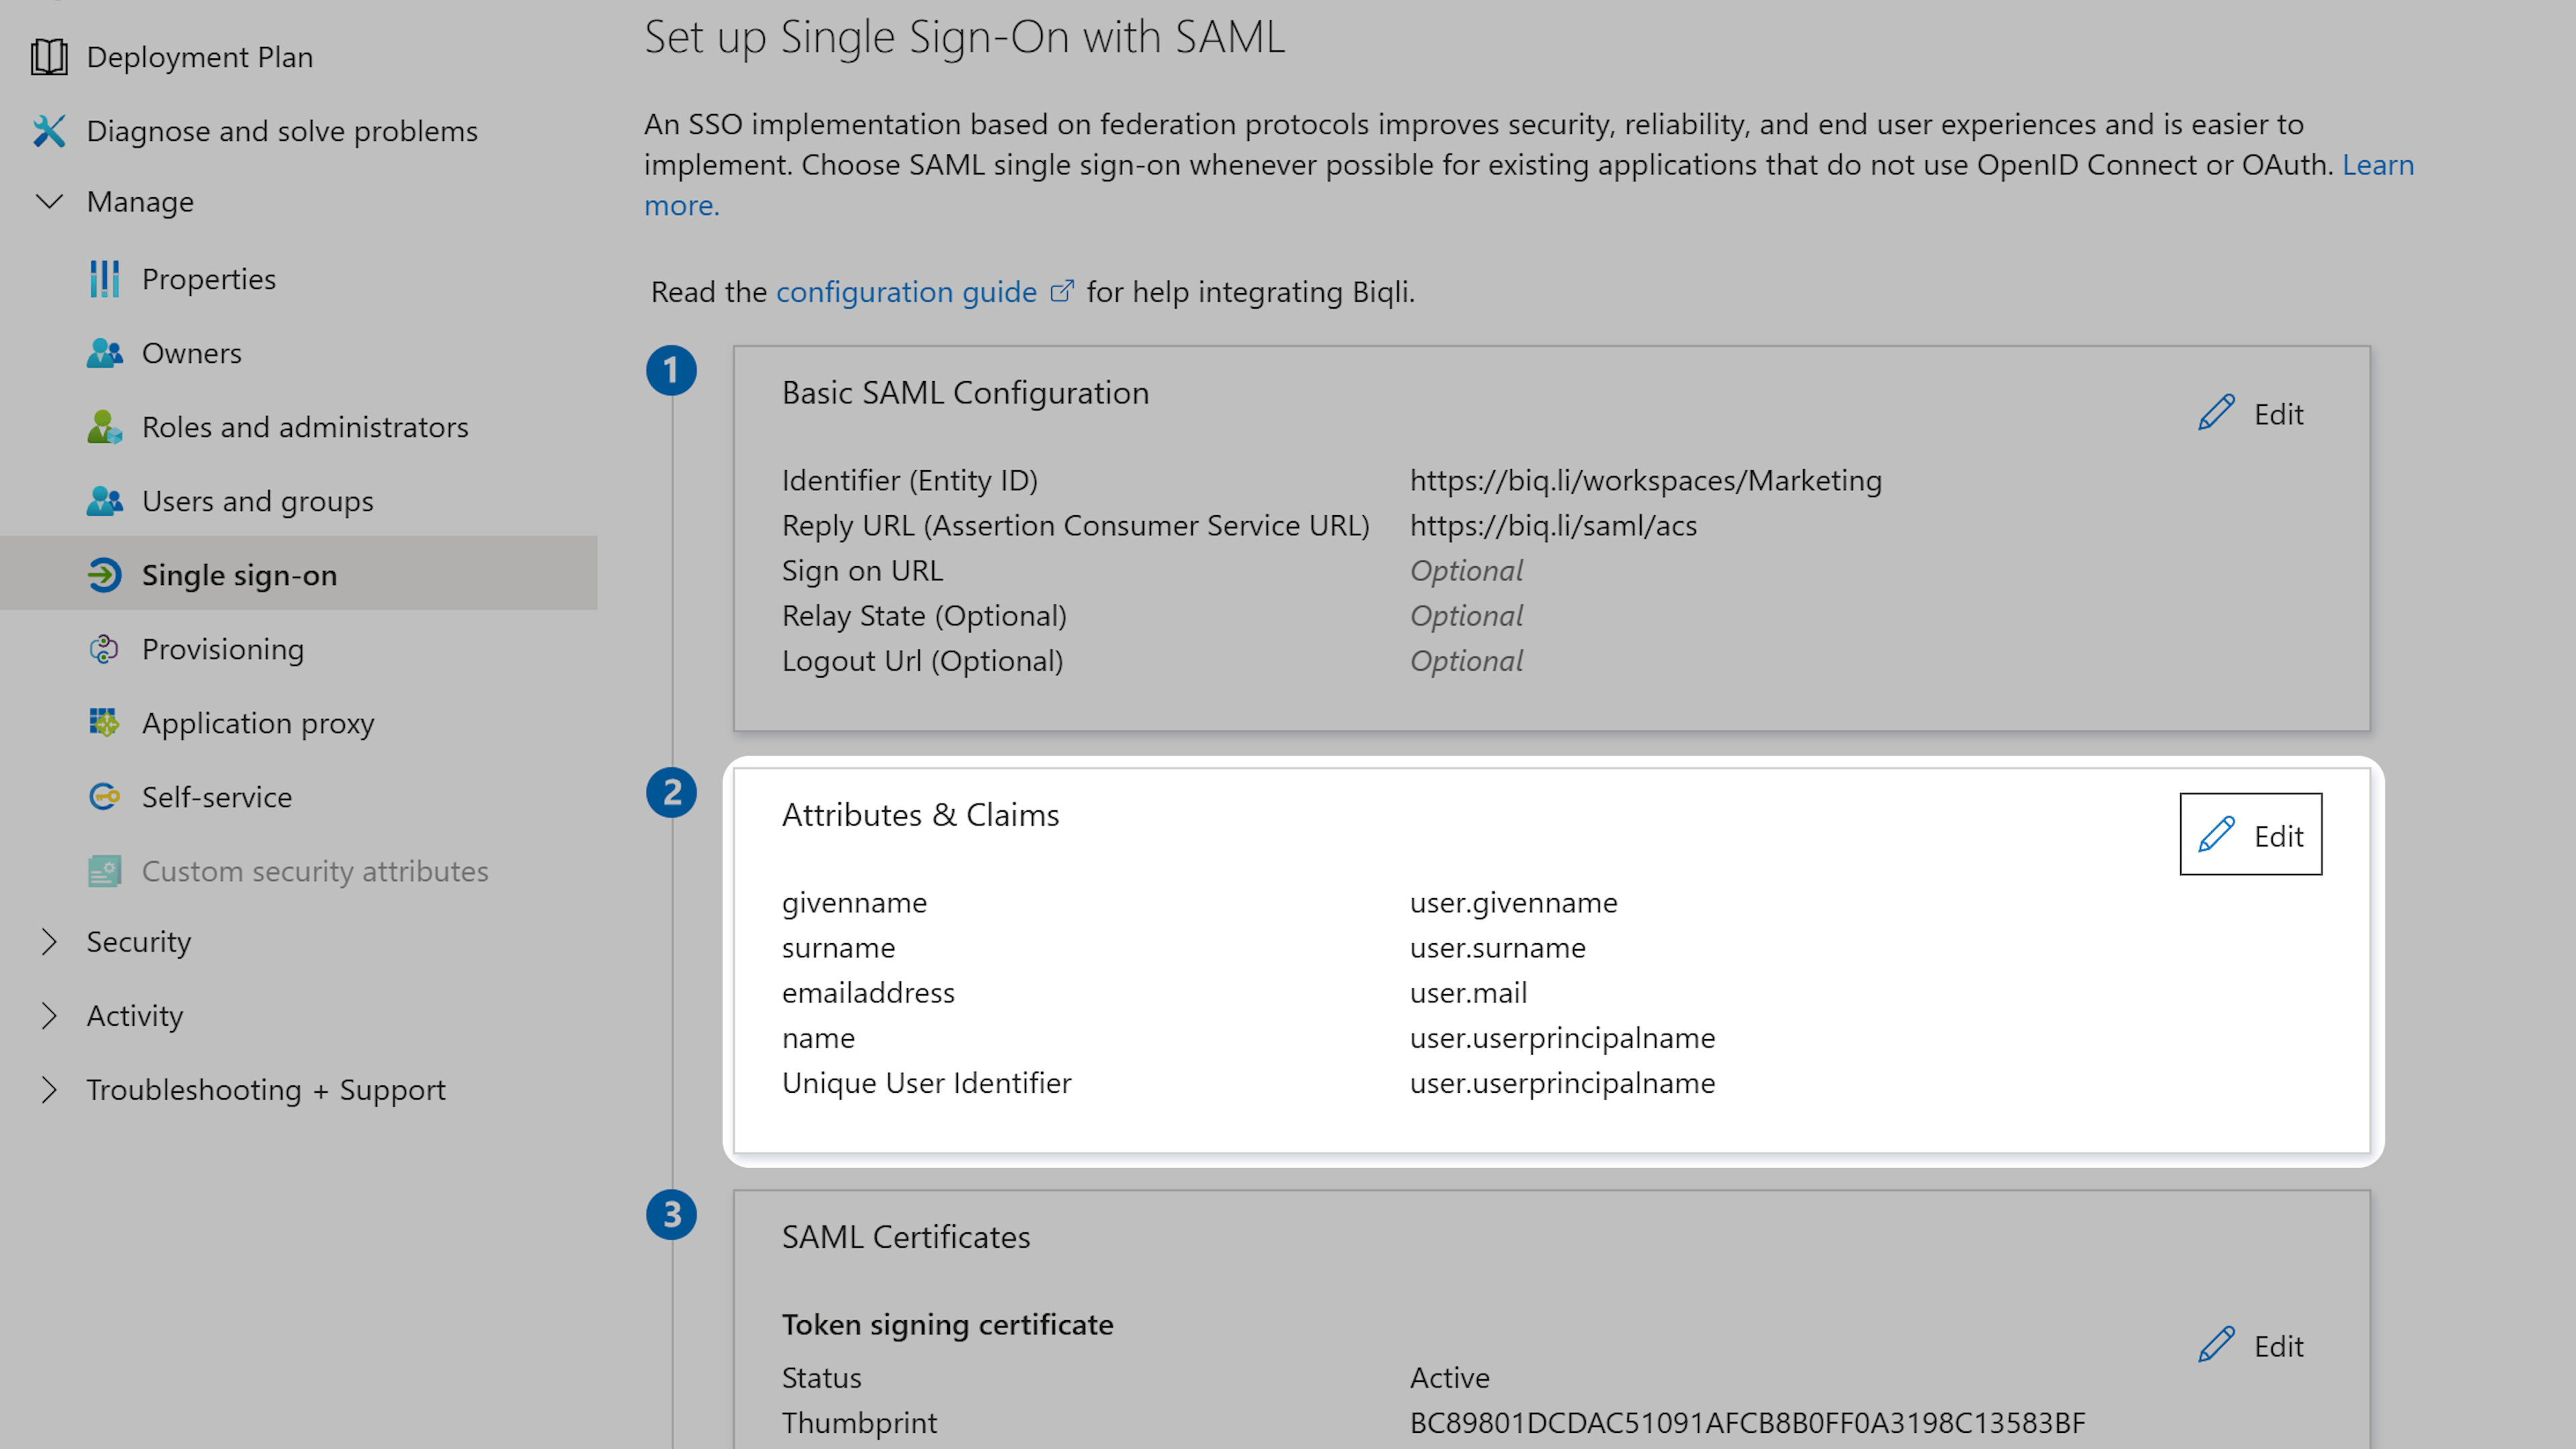
Name
Namespace
Source attribute
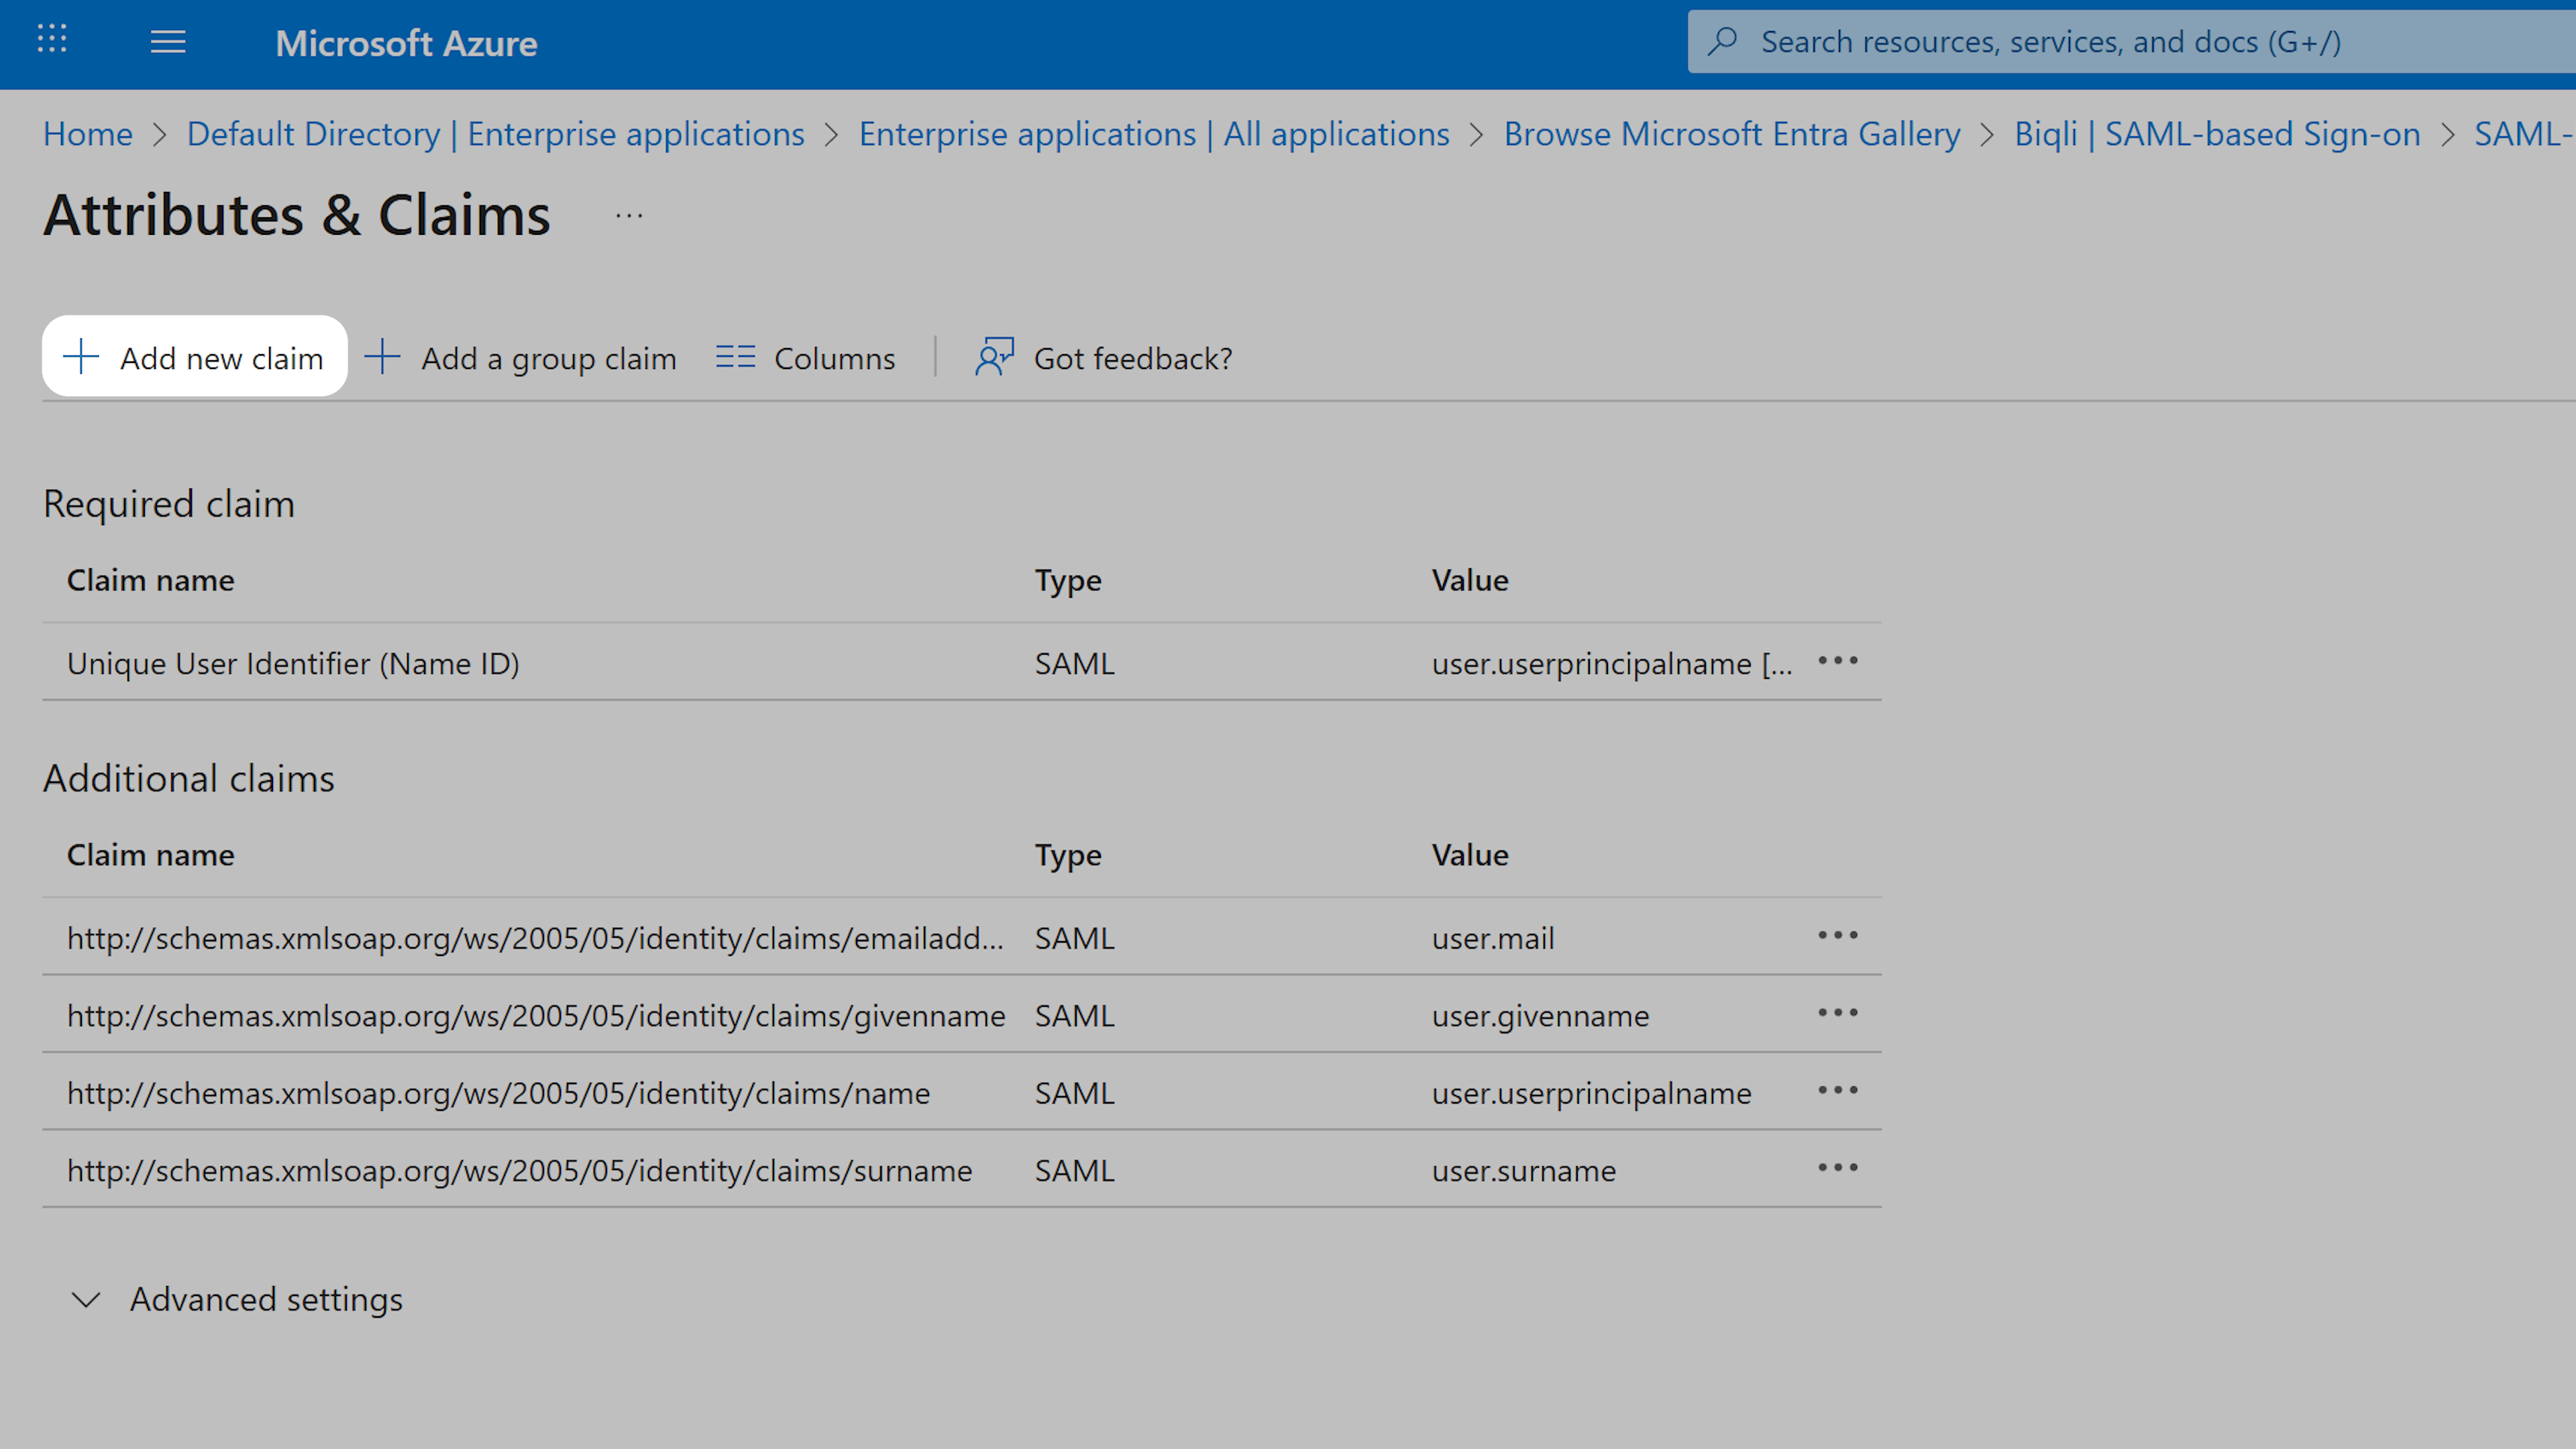
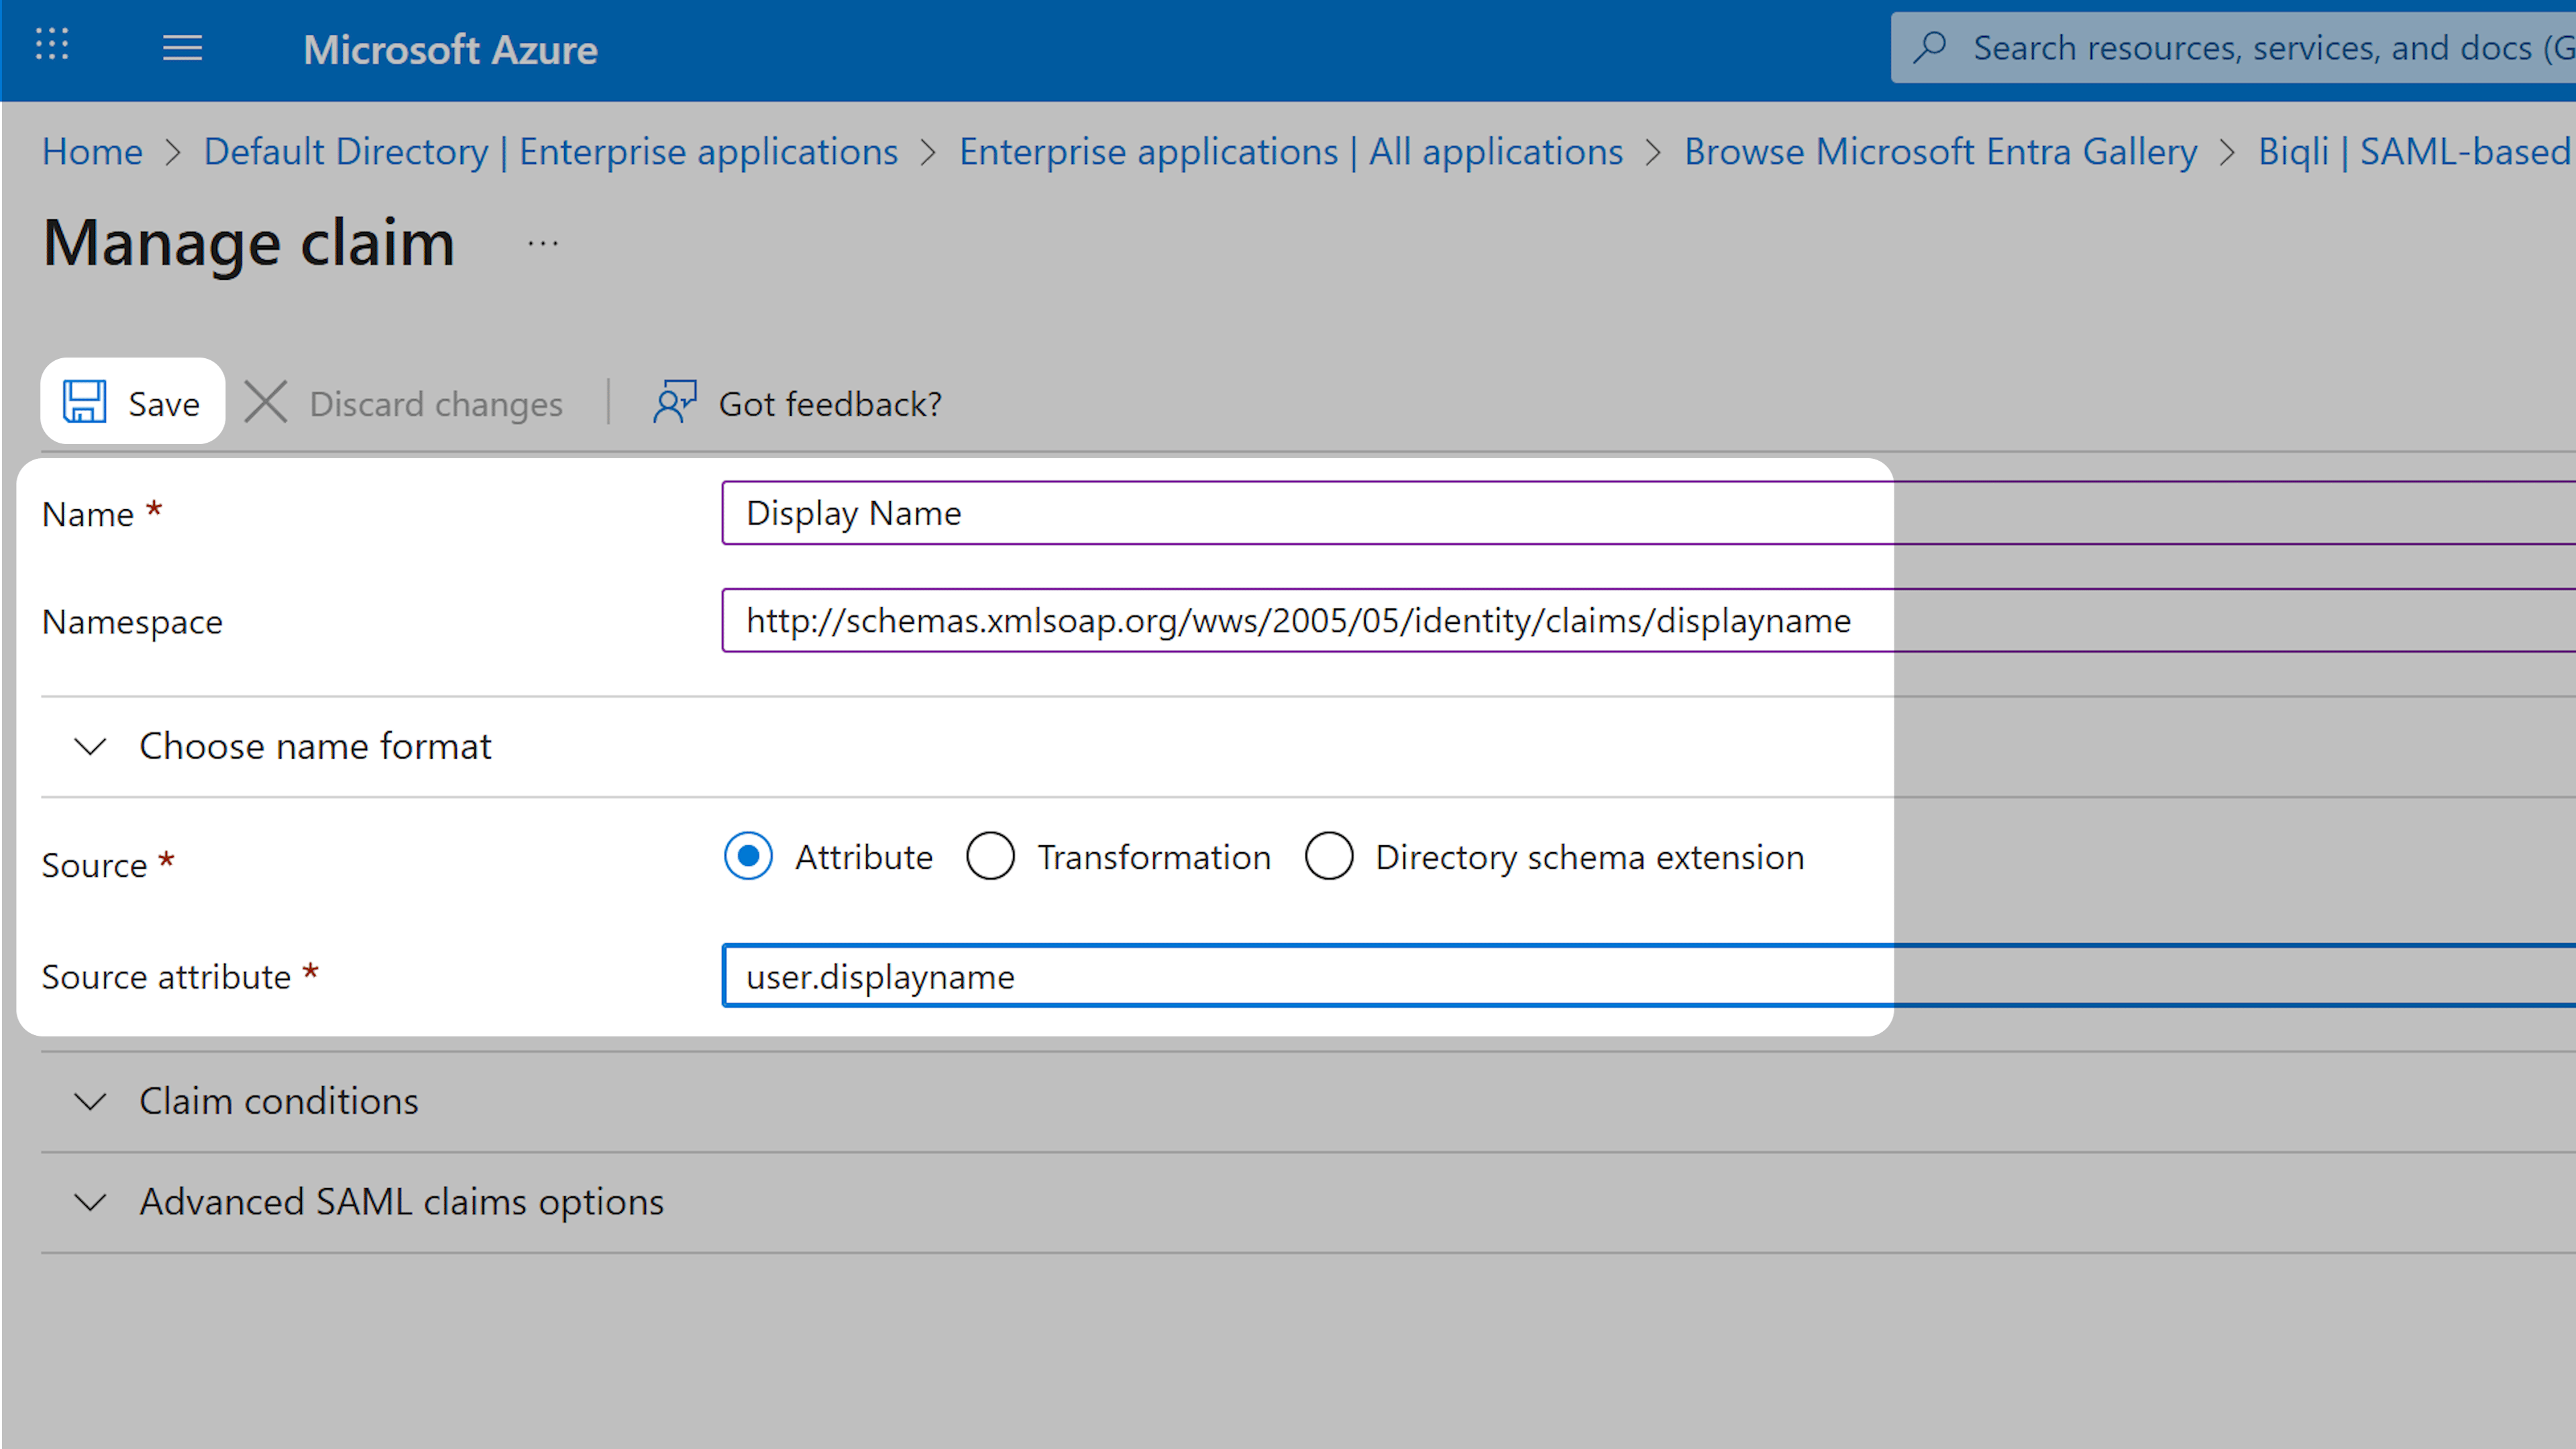
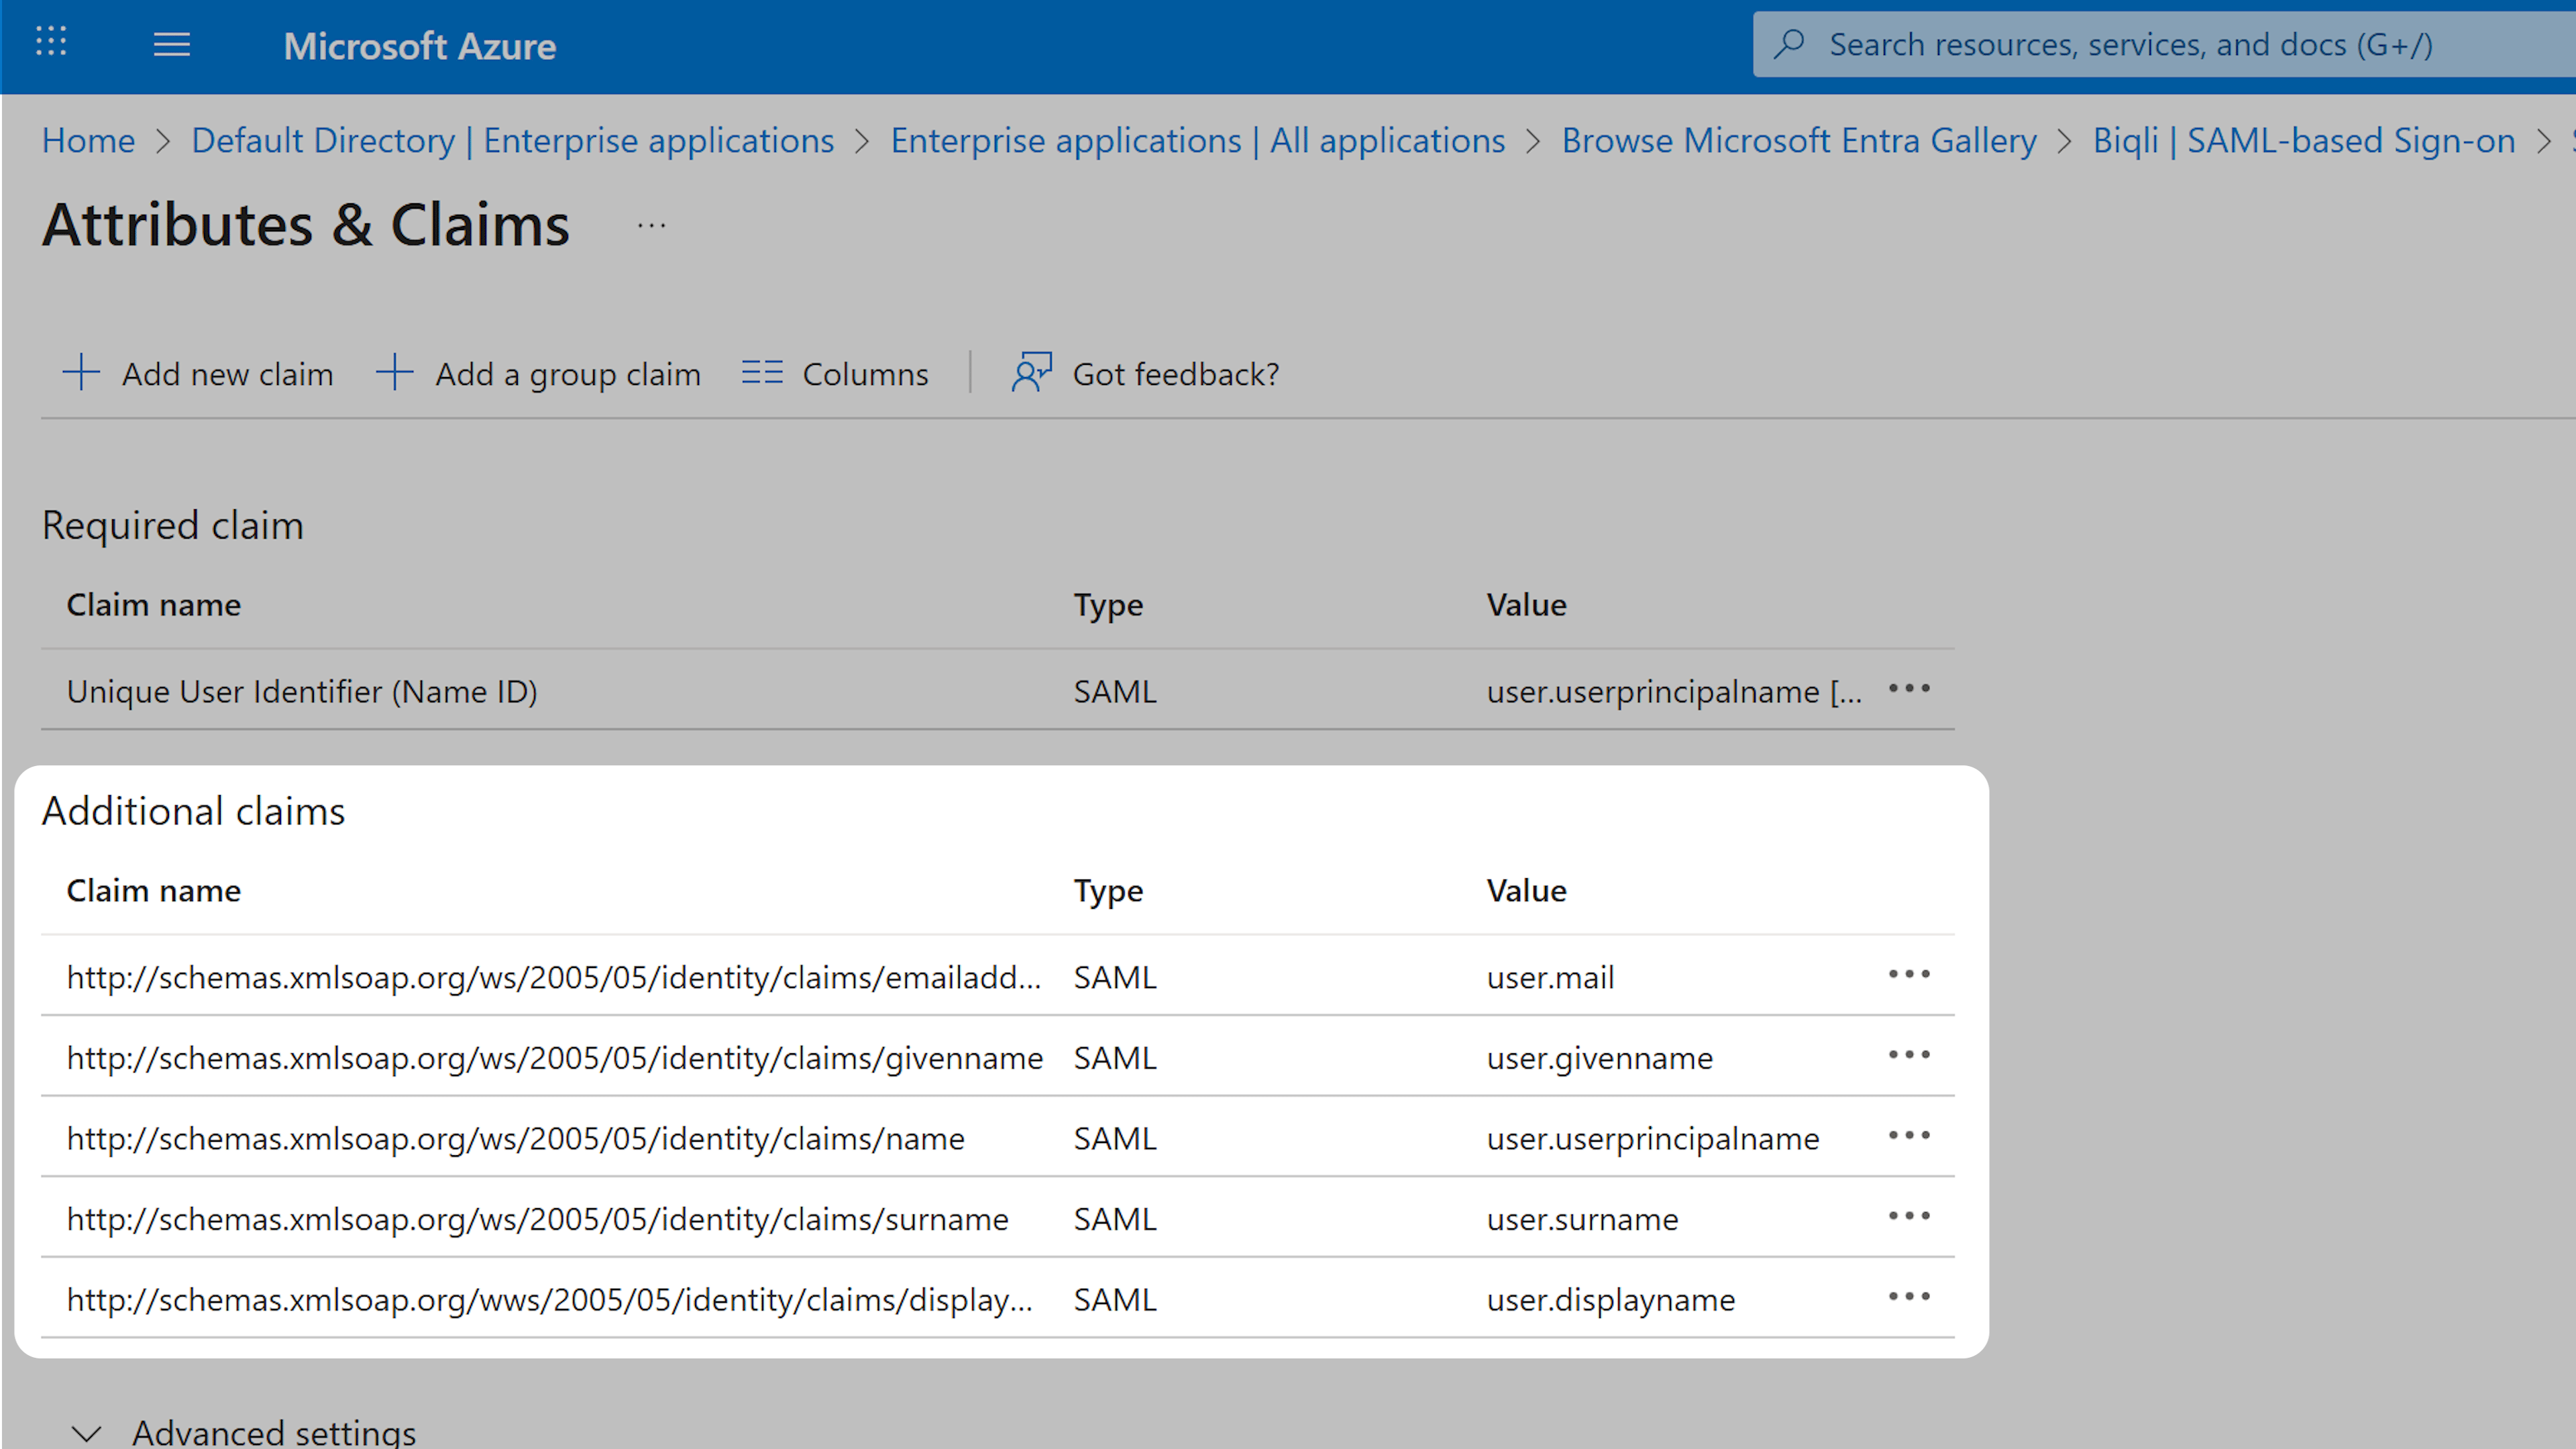
| Claim name | Value |
|---|---|
http://schemas.xmlsoap.org/ws/2005/05/identity/claims/displayname | user.displayname |
http://schemas.xmlsoap.org/ws/2005/05/identity/claims/emailaddress | user.mail |
http://schemas.xmlsoap.org/ws/2005/05/identity/claims/givenname | user.givenname |
http://schemas.xmlsoap.org/ws/2005/05/identity/claims/surname | user.surname |
Step 4: Copy the Metadata URL
Scroll down to the third section, SAML Certificates. Locate the App Federation Metadata URL and copy it to your clipboard.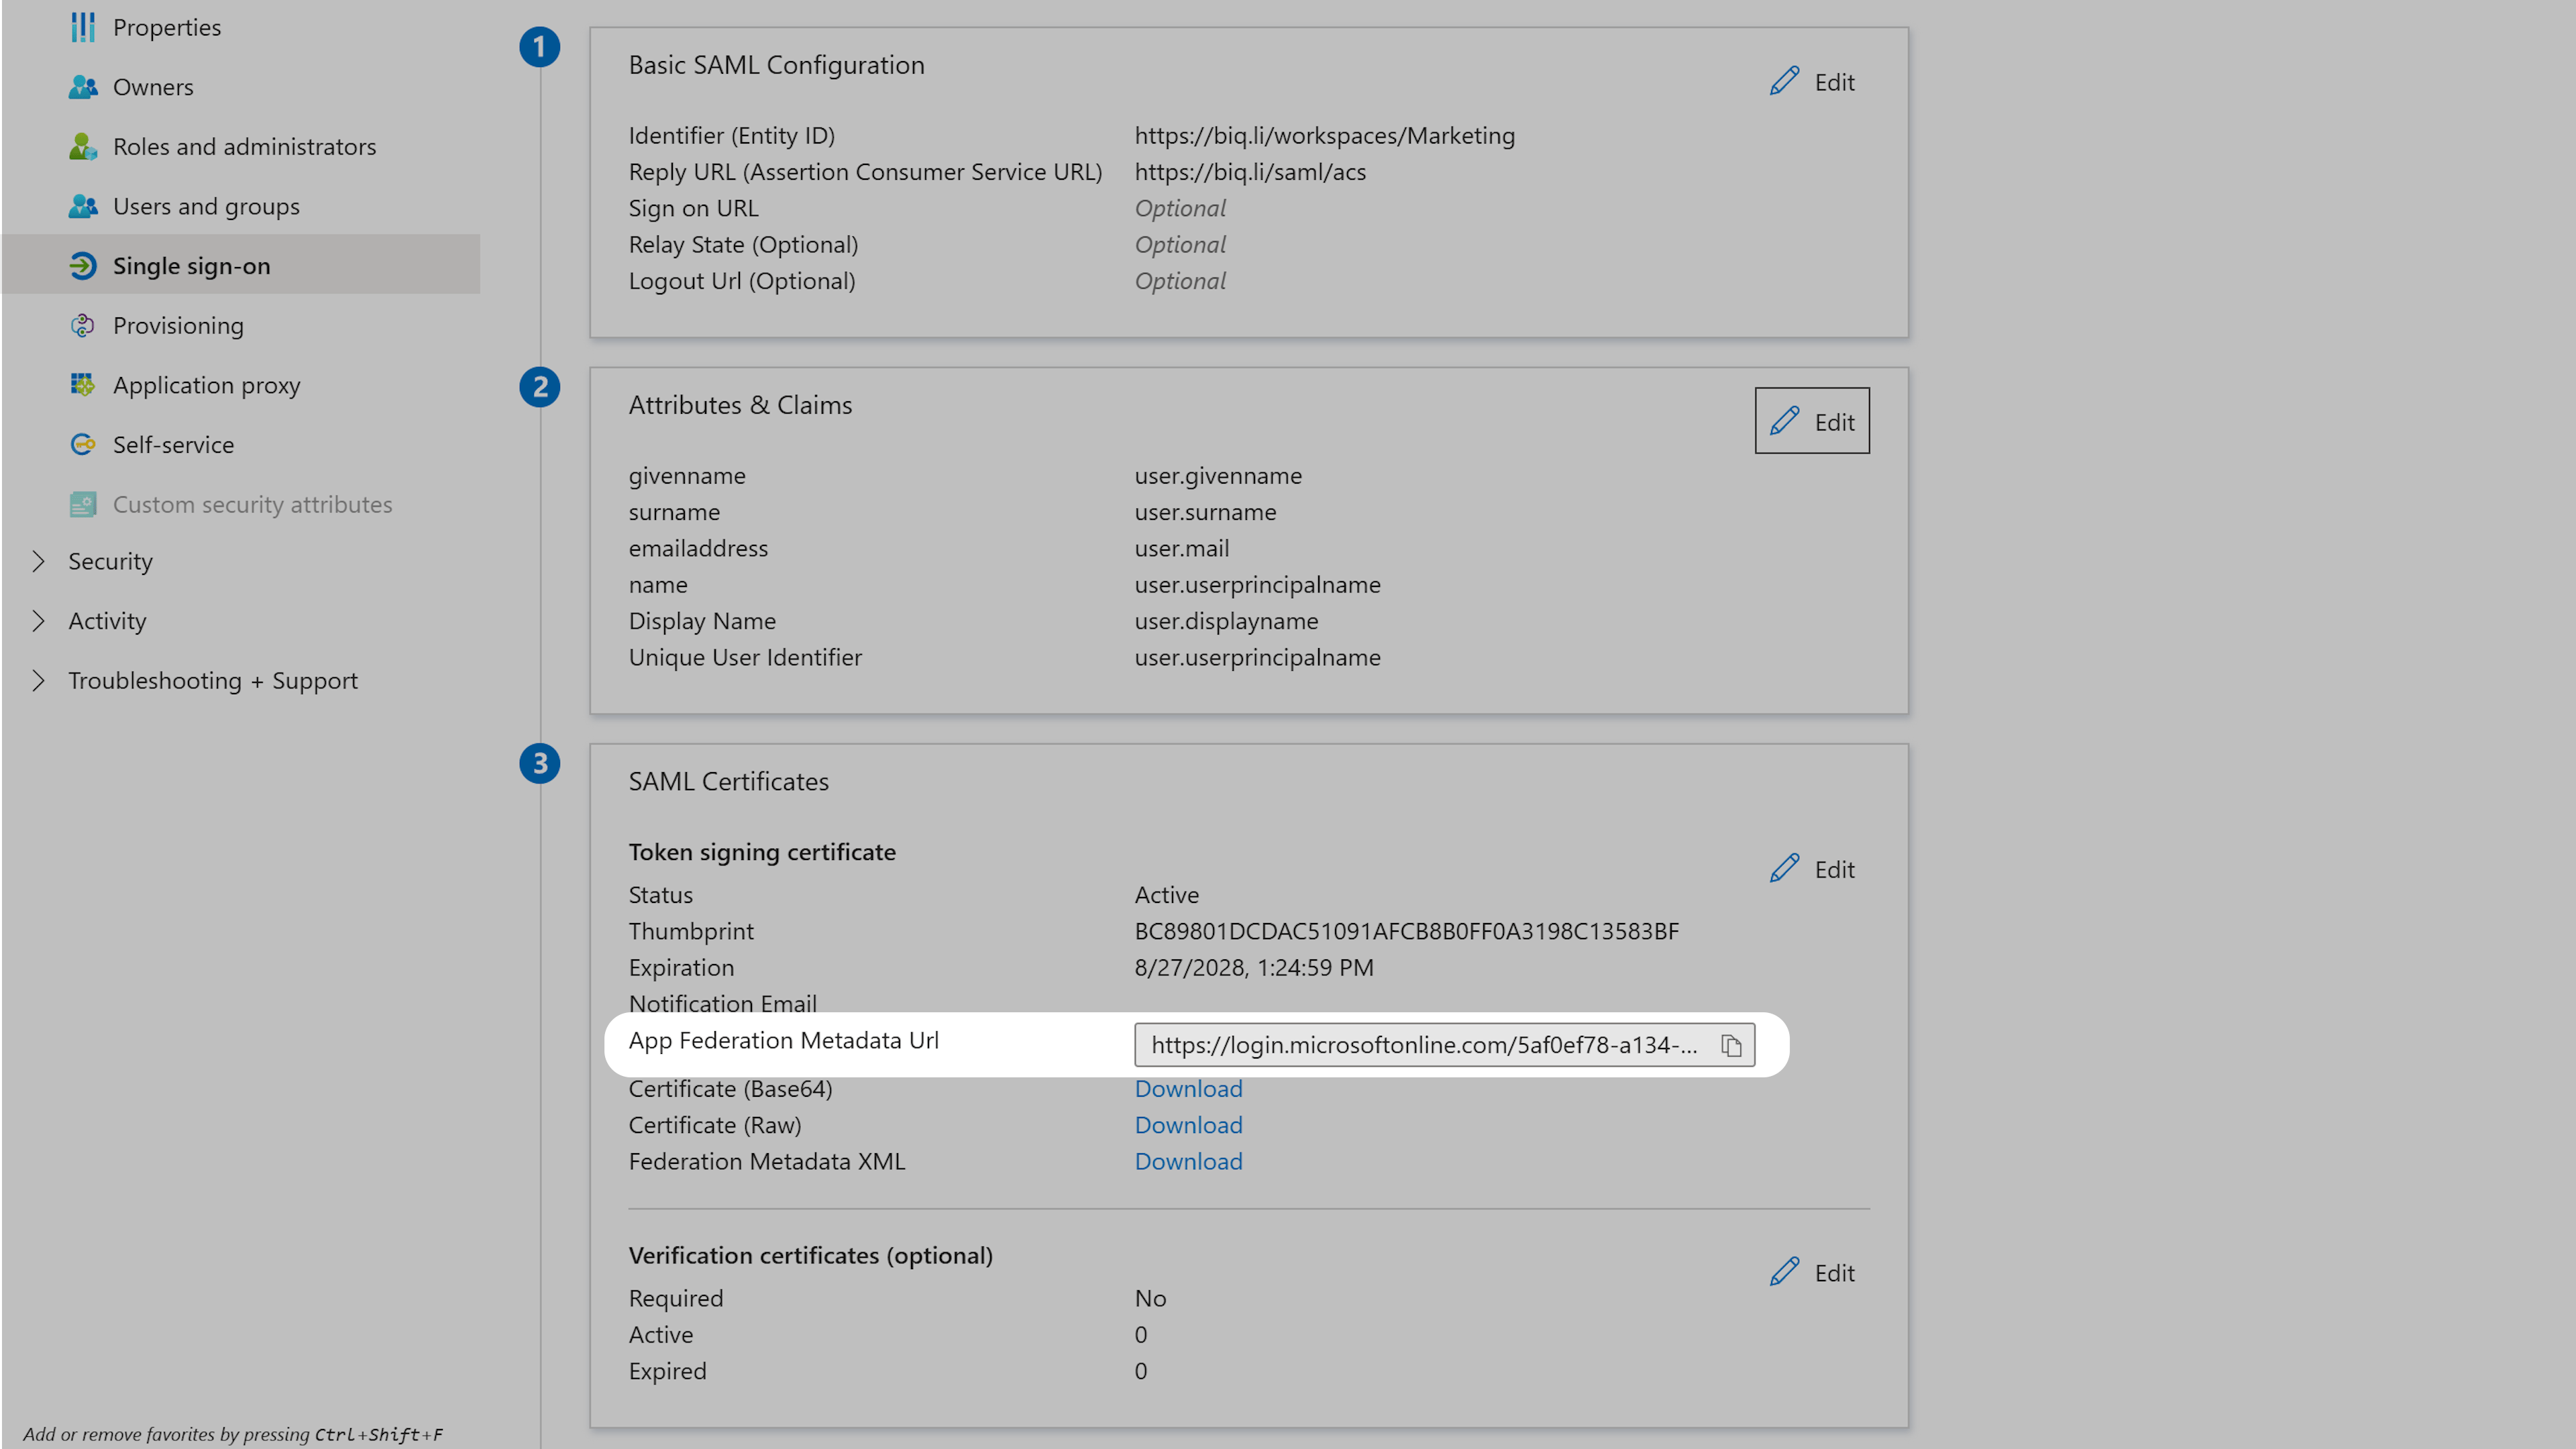
Step 5: Configure SAML SSO on Biqli
Navigate to your workspace Security Settings in Biqli. Under the SAML Single Sign-On section, click Configure SAML Single Sign-On.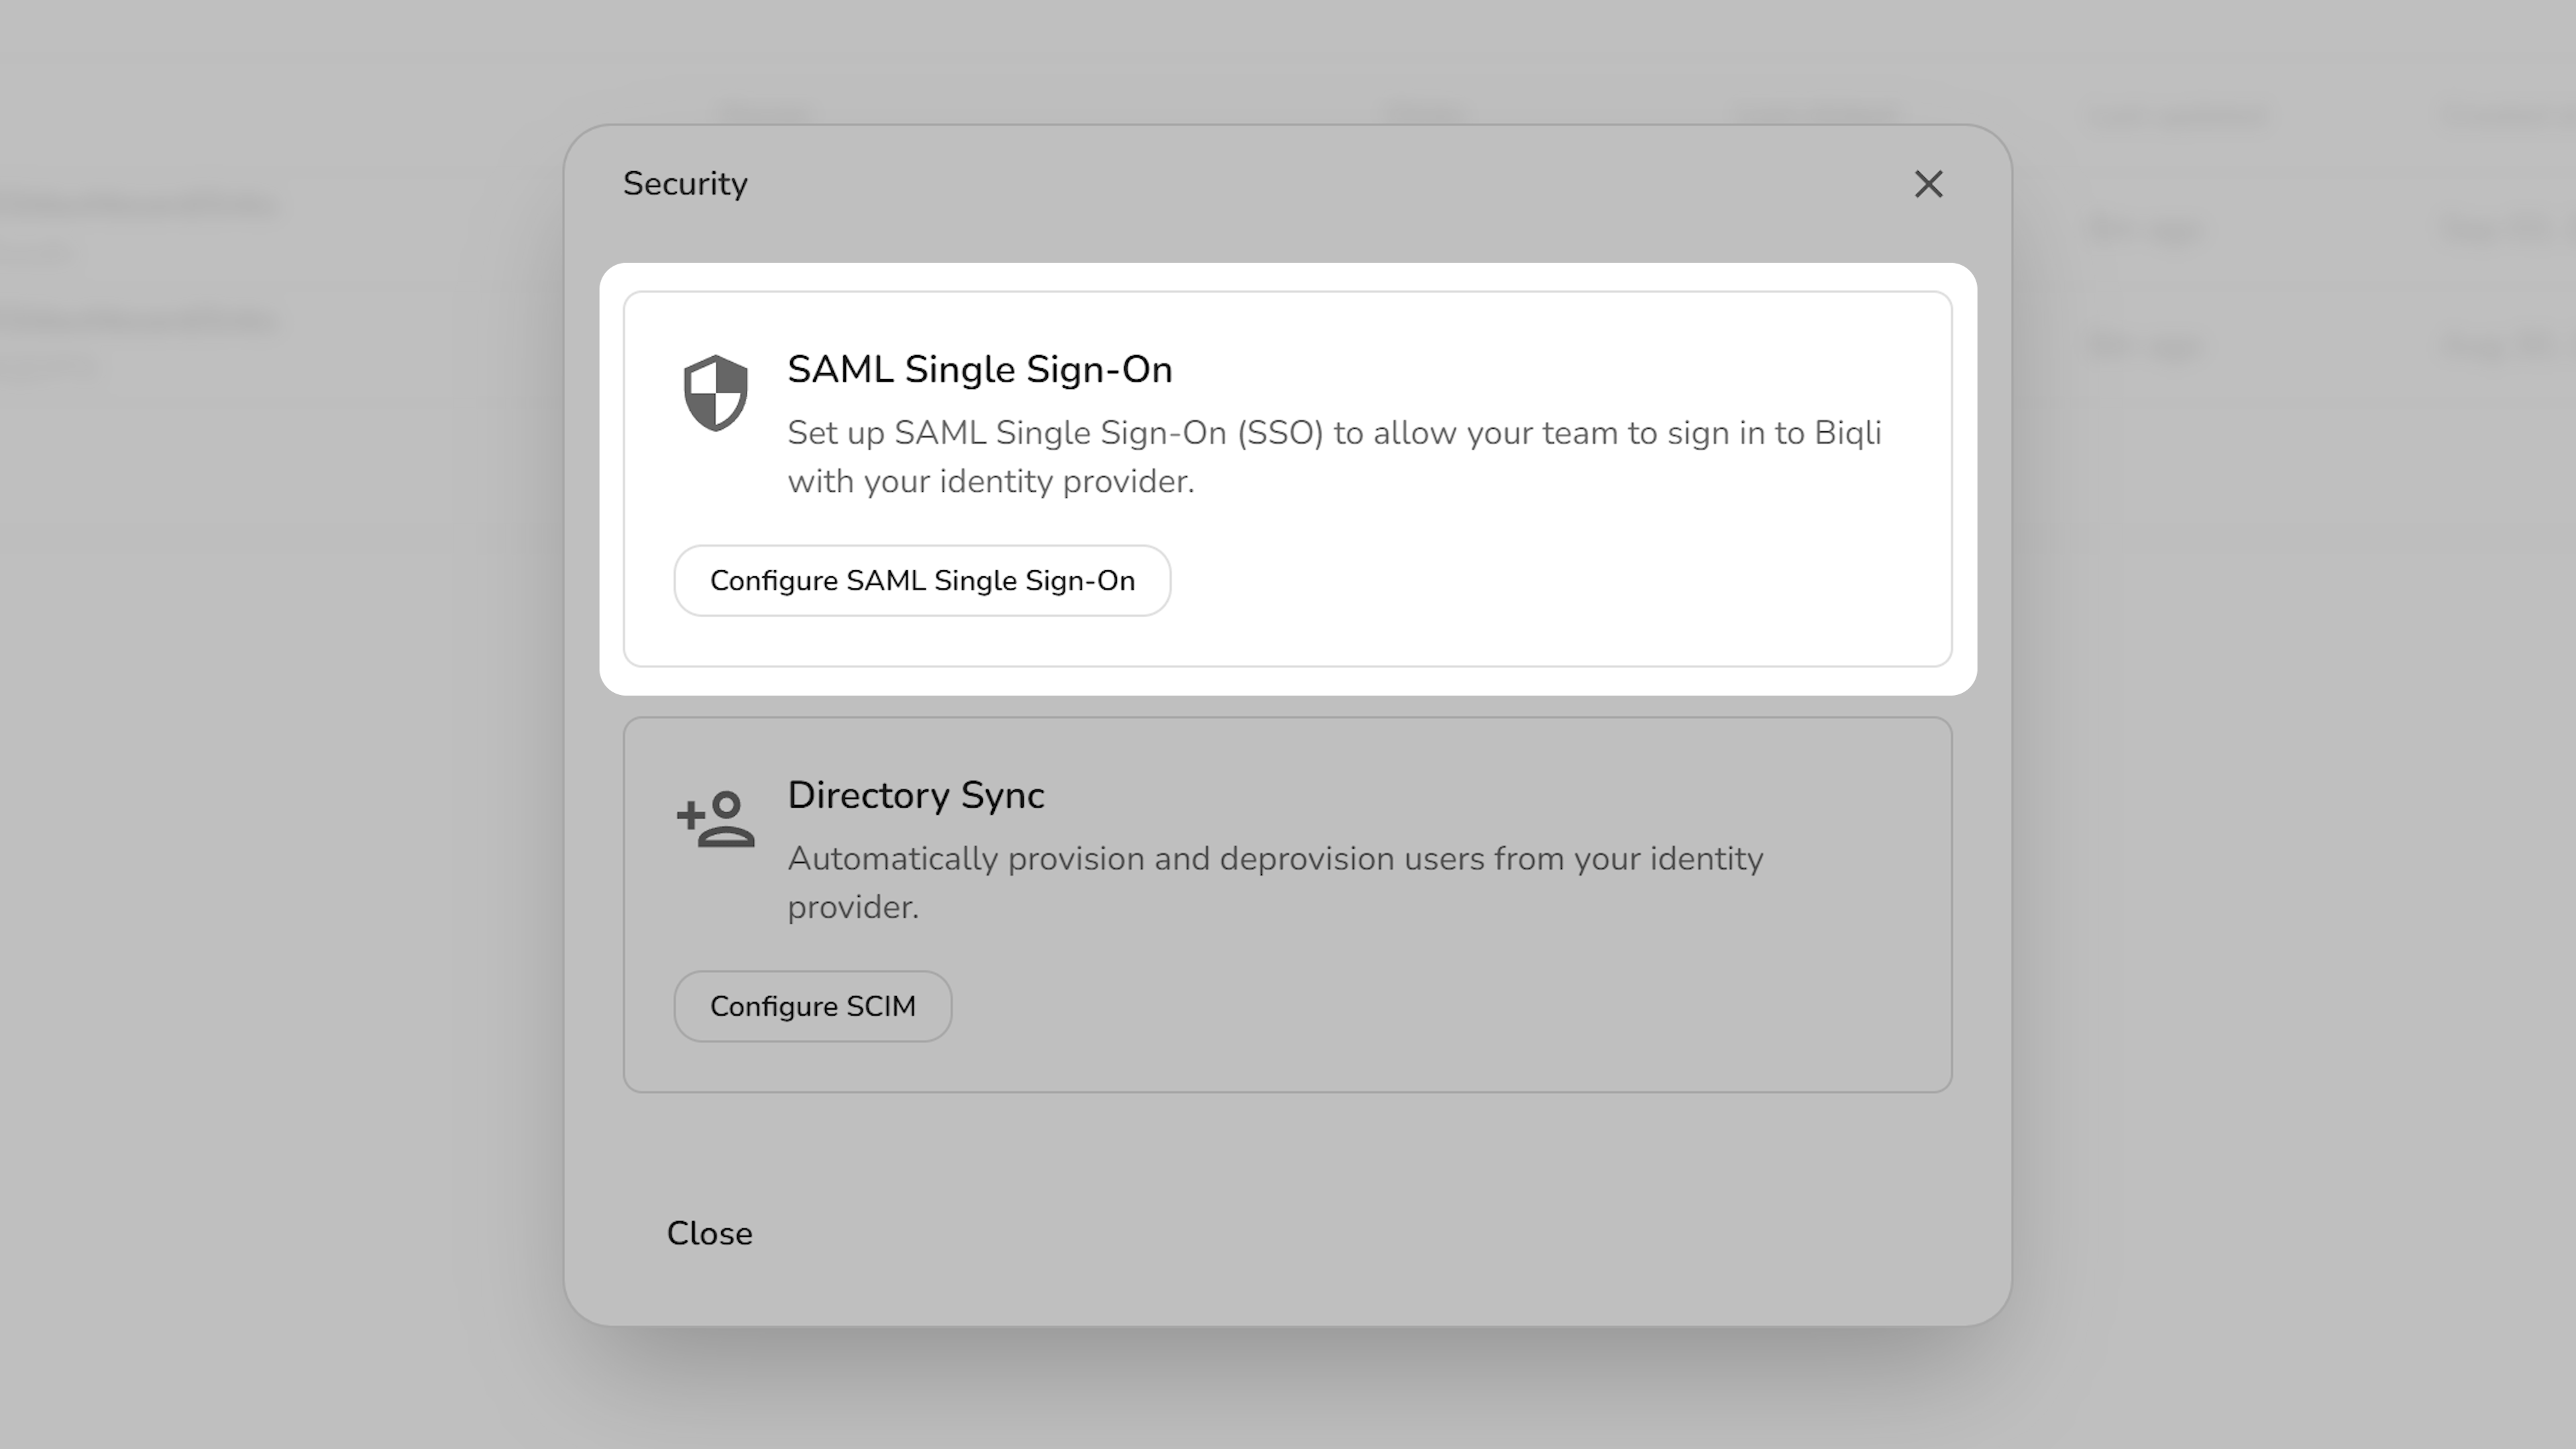
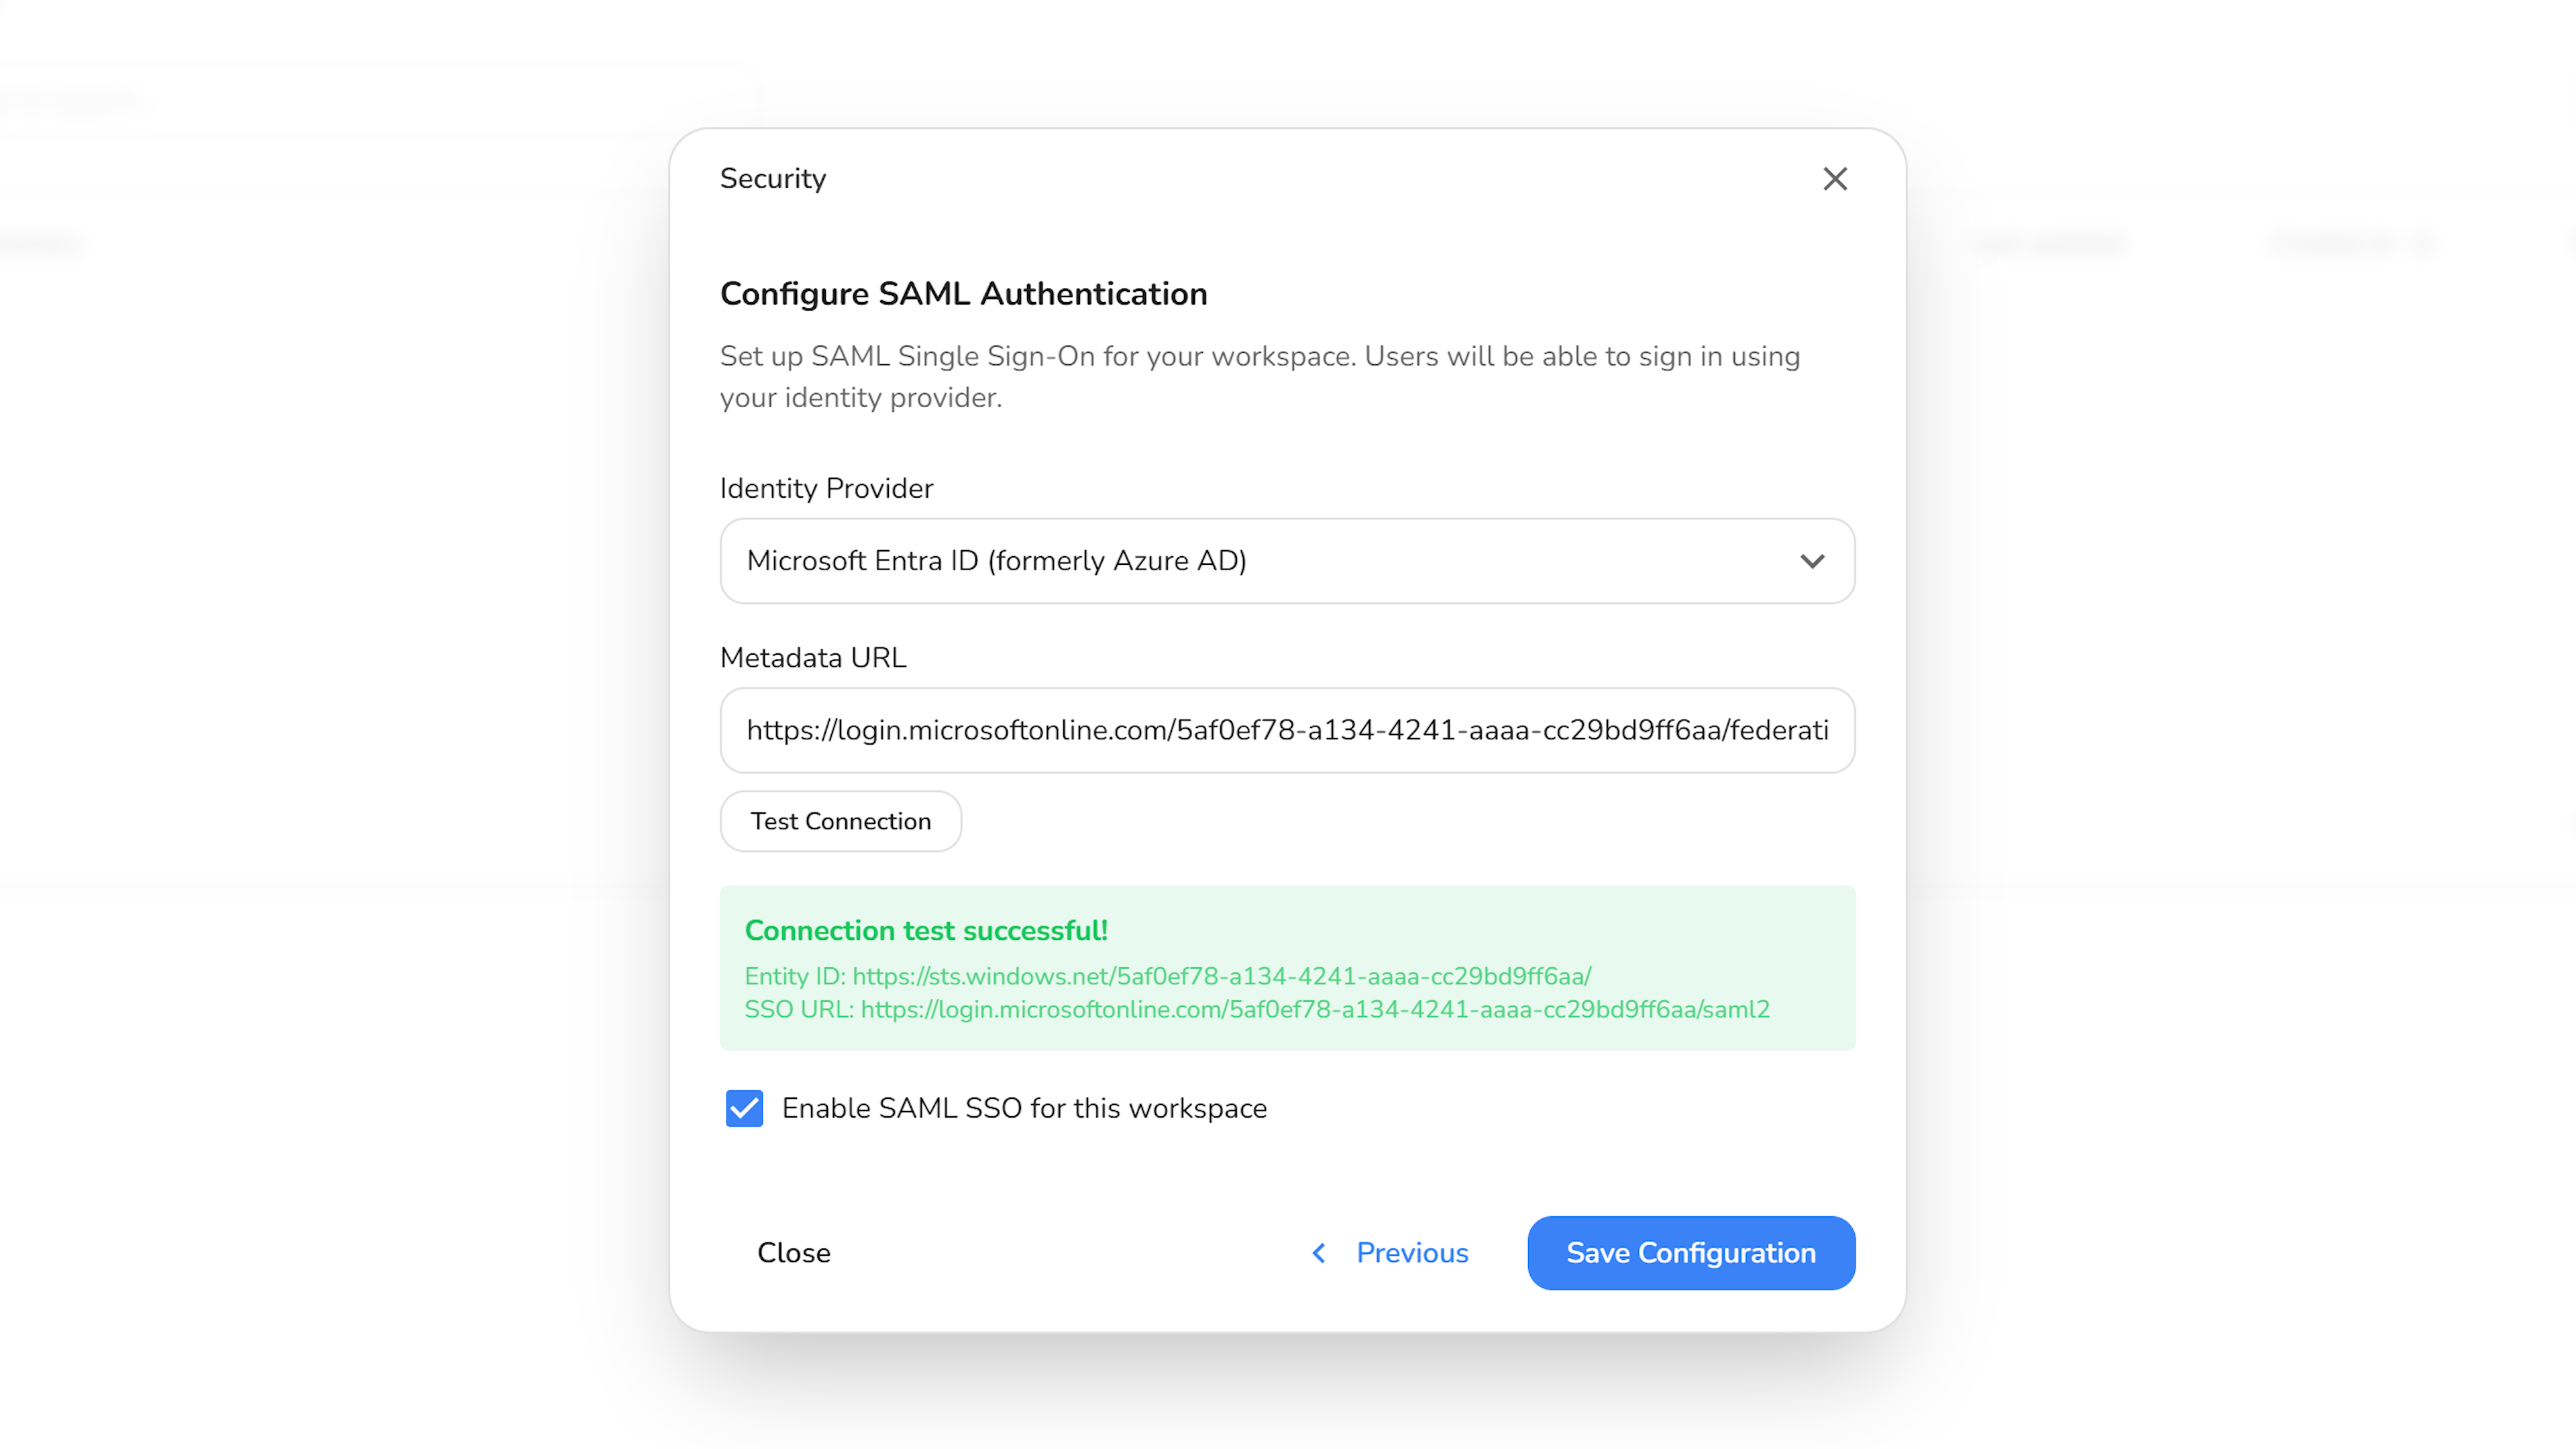
- Select Identity Provider: Choose Microsoft Entra ID as your SAML provider.
- Metadata URL: Paste the App Federation Metadata URL you copied in Step 4.
- Test Connection: Verify the connection credentials.
- Enable SAML: Toggle on SAML authentication for your workspace.
- Save Changes: Click Save changes to finalize.
Step 6: Assign Users
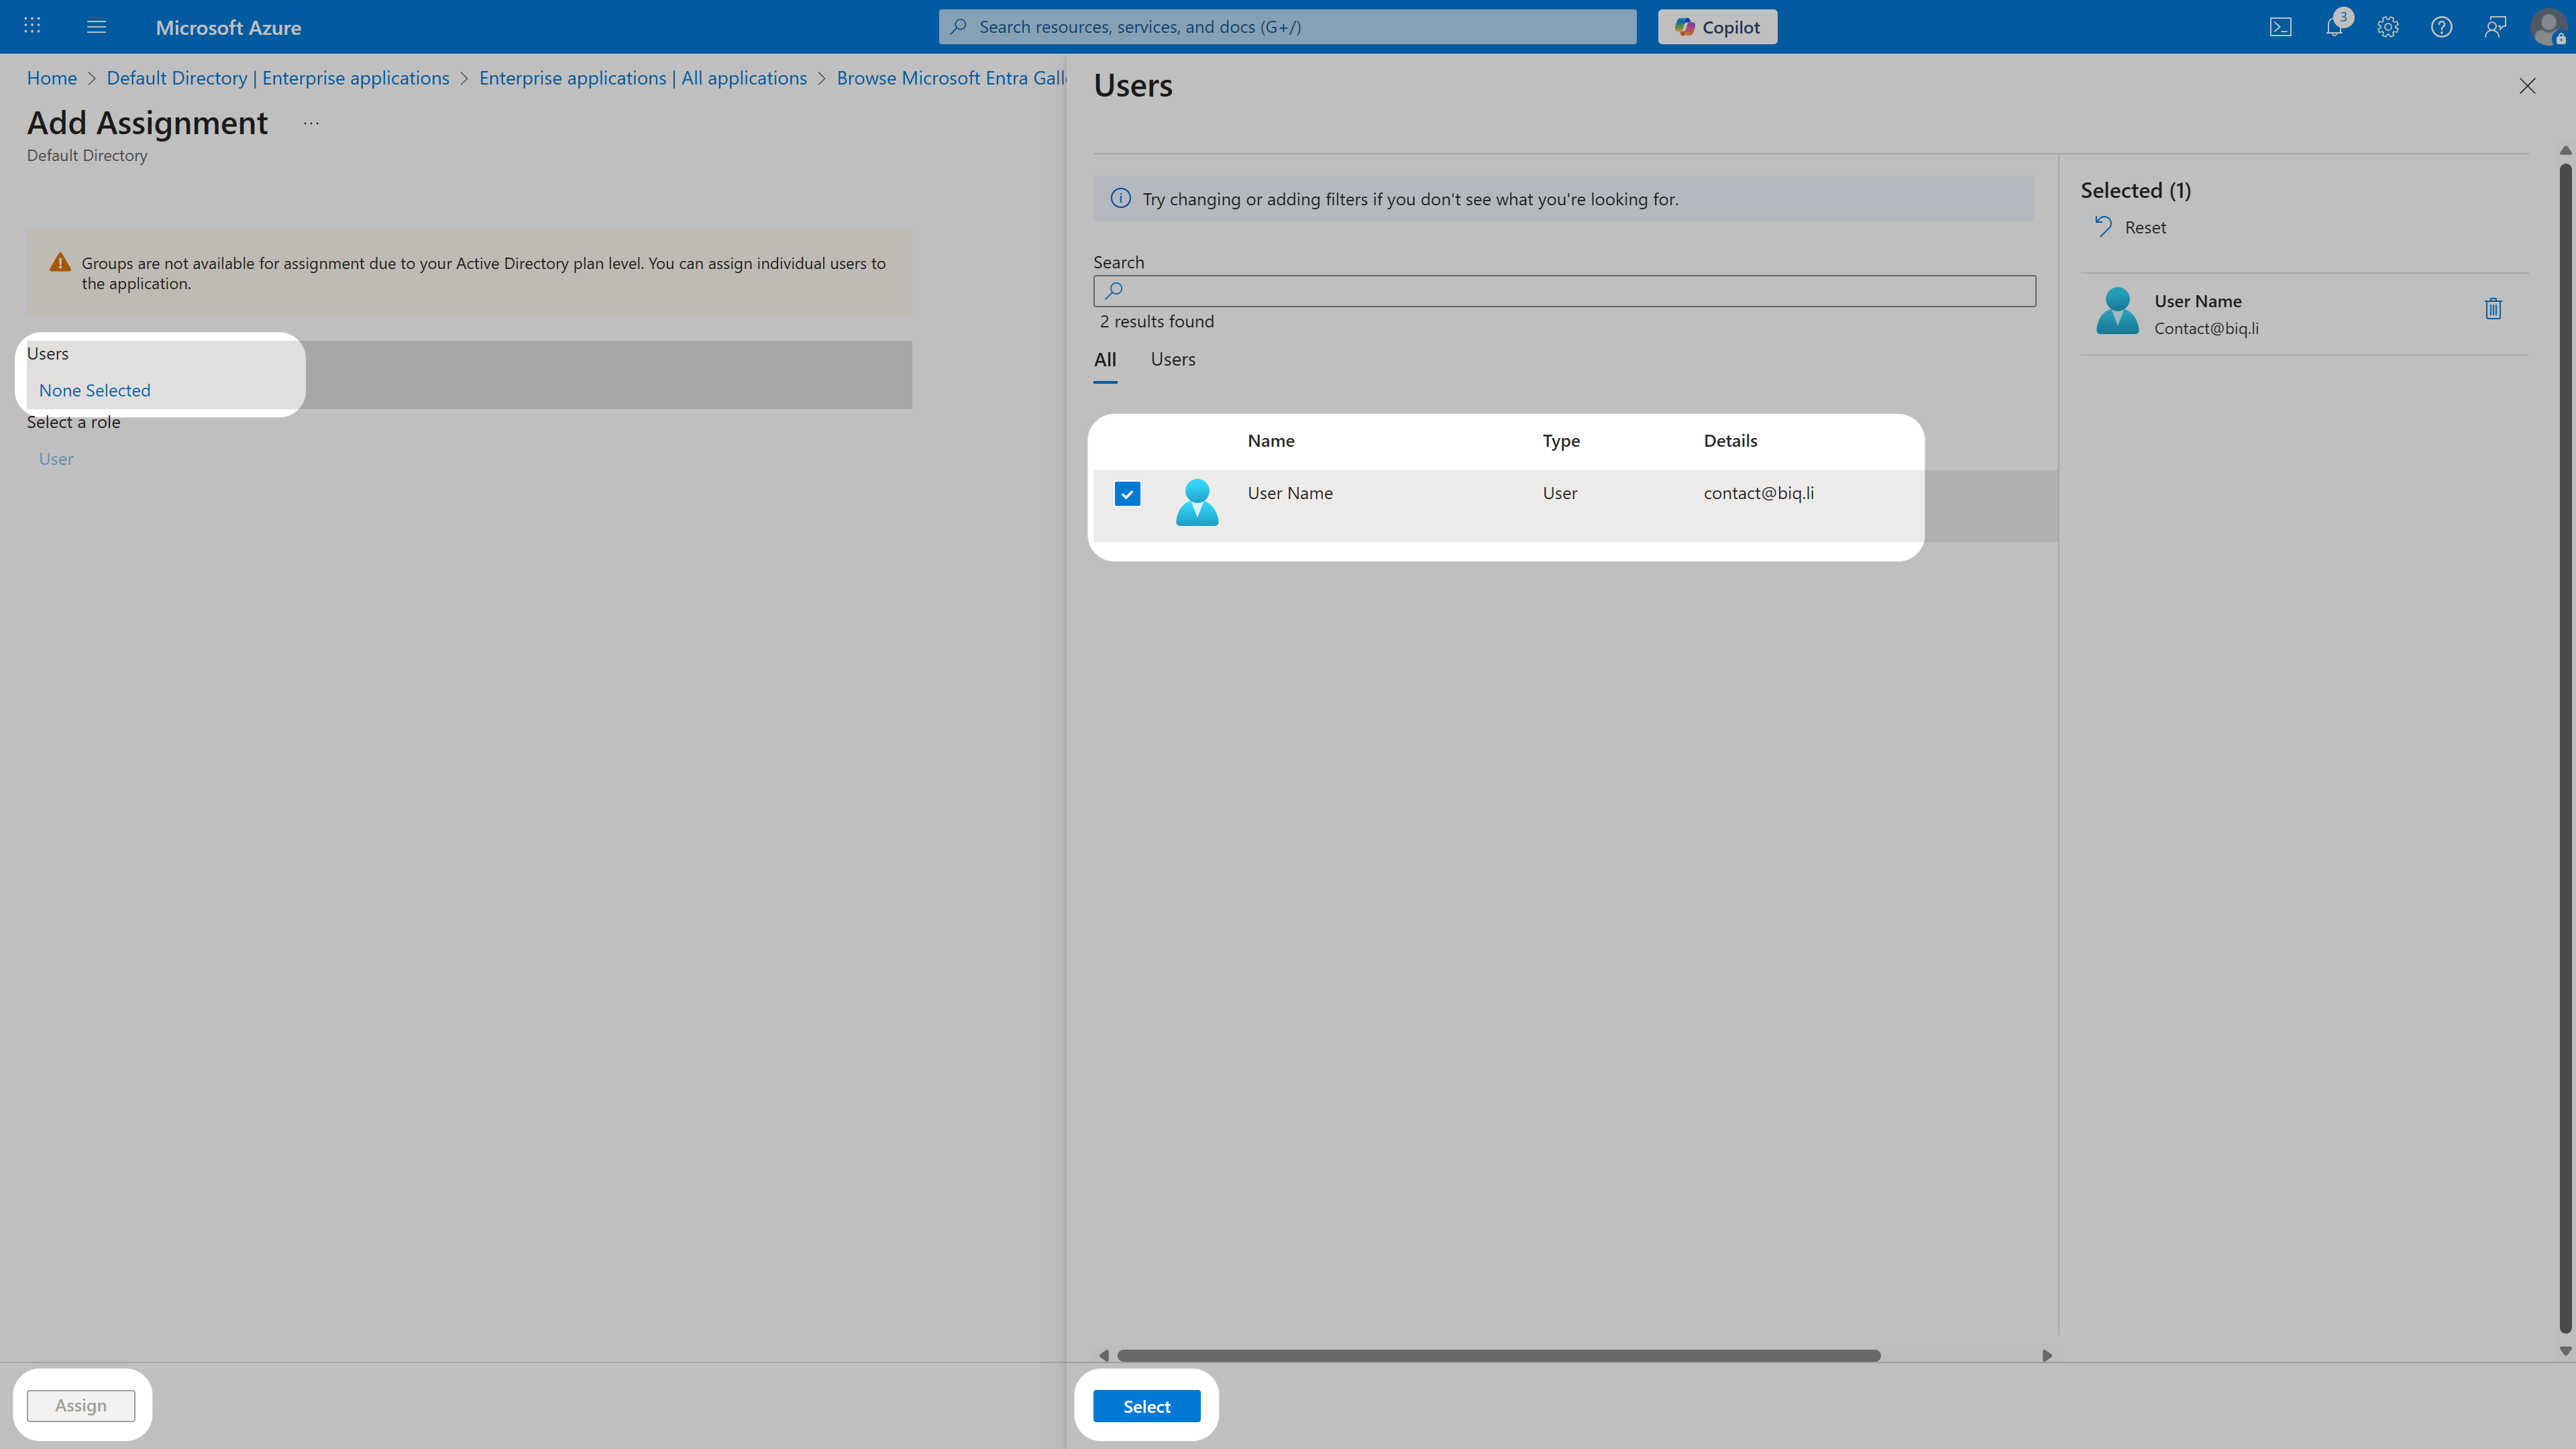
Once SAML SSO is active, you can start assigning users and groups to your workspace. To assign users, open your Enterprise Application, go to Users and groups in the left navigation menu, and click Add user/group.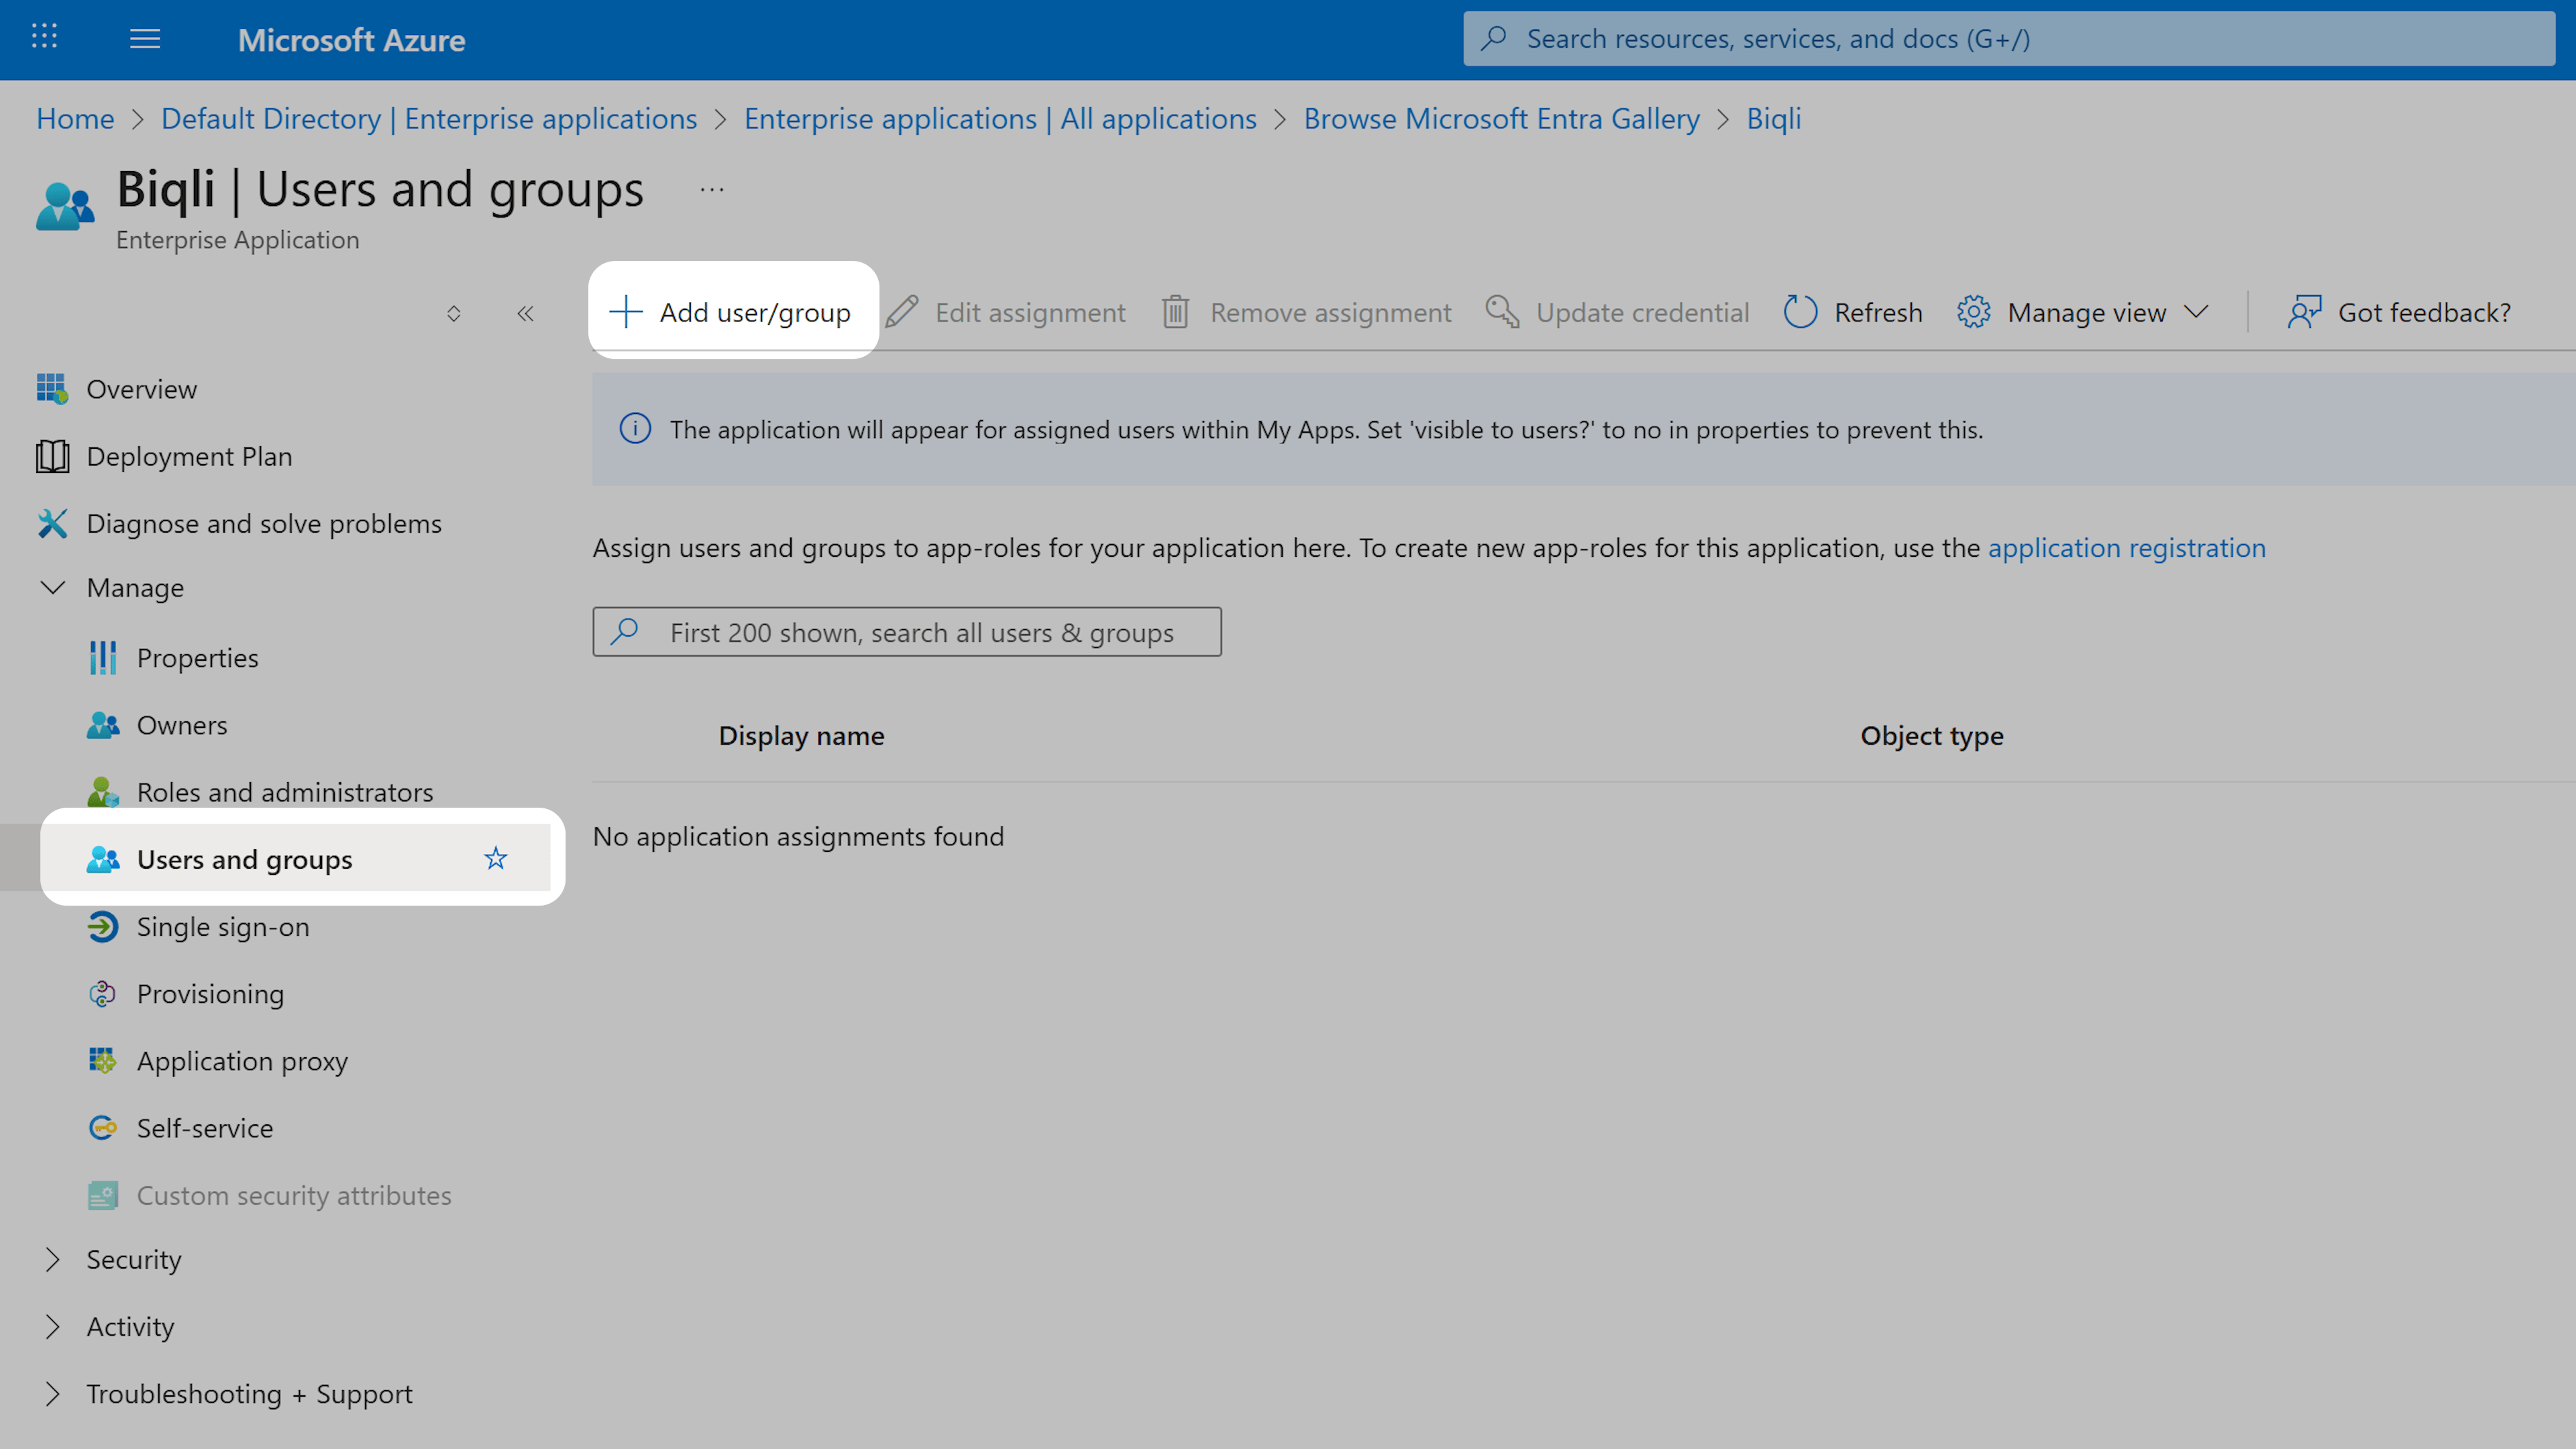
Technical Notes
Just-In-Time (JIT) Provisioning: When users sign in for the first time, their Biqli account will be automatically created and assigned to your workspace.