> ## Documentation Index
> Fetch the complete documentation index at: https://learn.biq.li/llms.txt
> Use this file to discover all available pages before exploring further.
# Configuring SAML SSO with Okta
> For Biqli Enterprise users, securely manage your team's access to Biqli using Okta SAML SSO.
**Enterprise Plan Feature**: SAML Single Sign-On is available exclusively for workspaces on the **Enterprise plan**.
## Step 1: Create SAML Integration in Okta
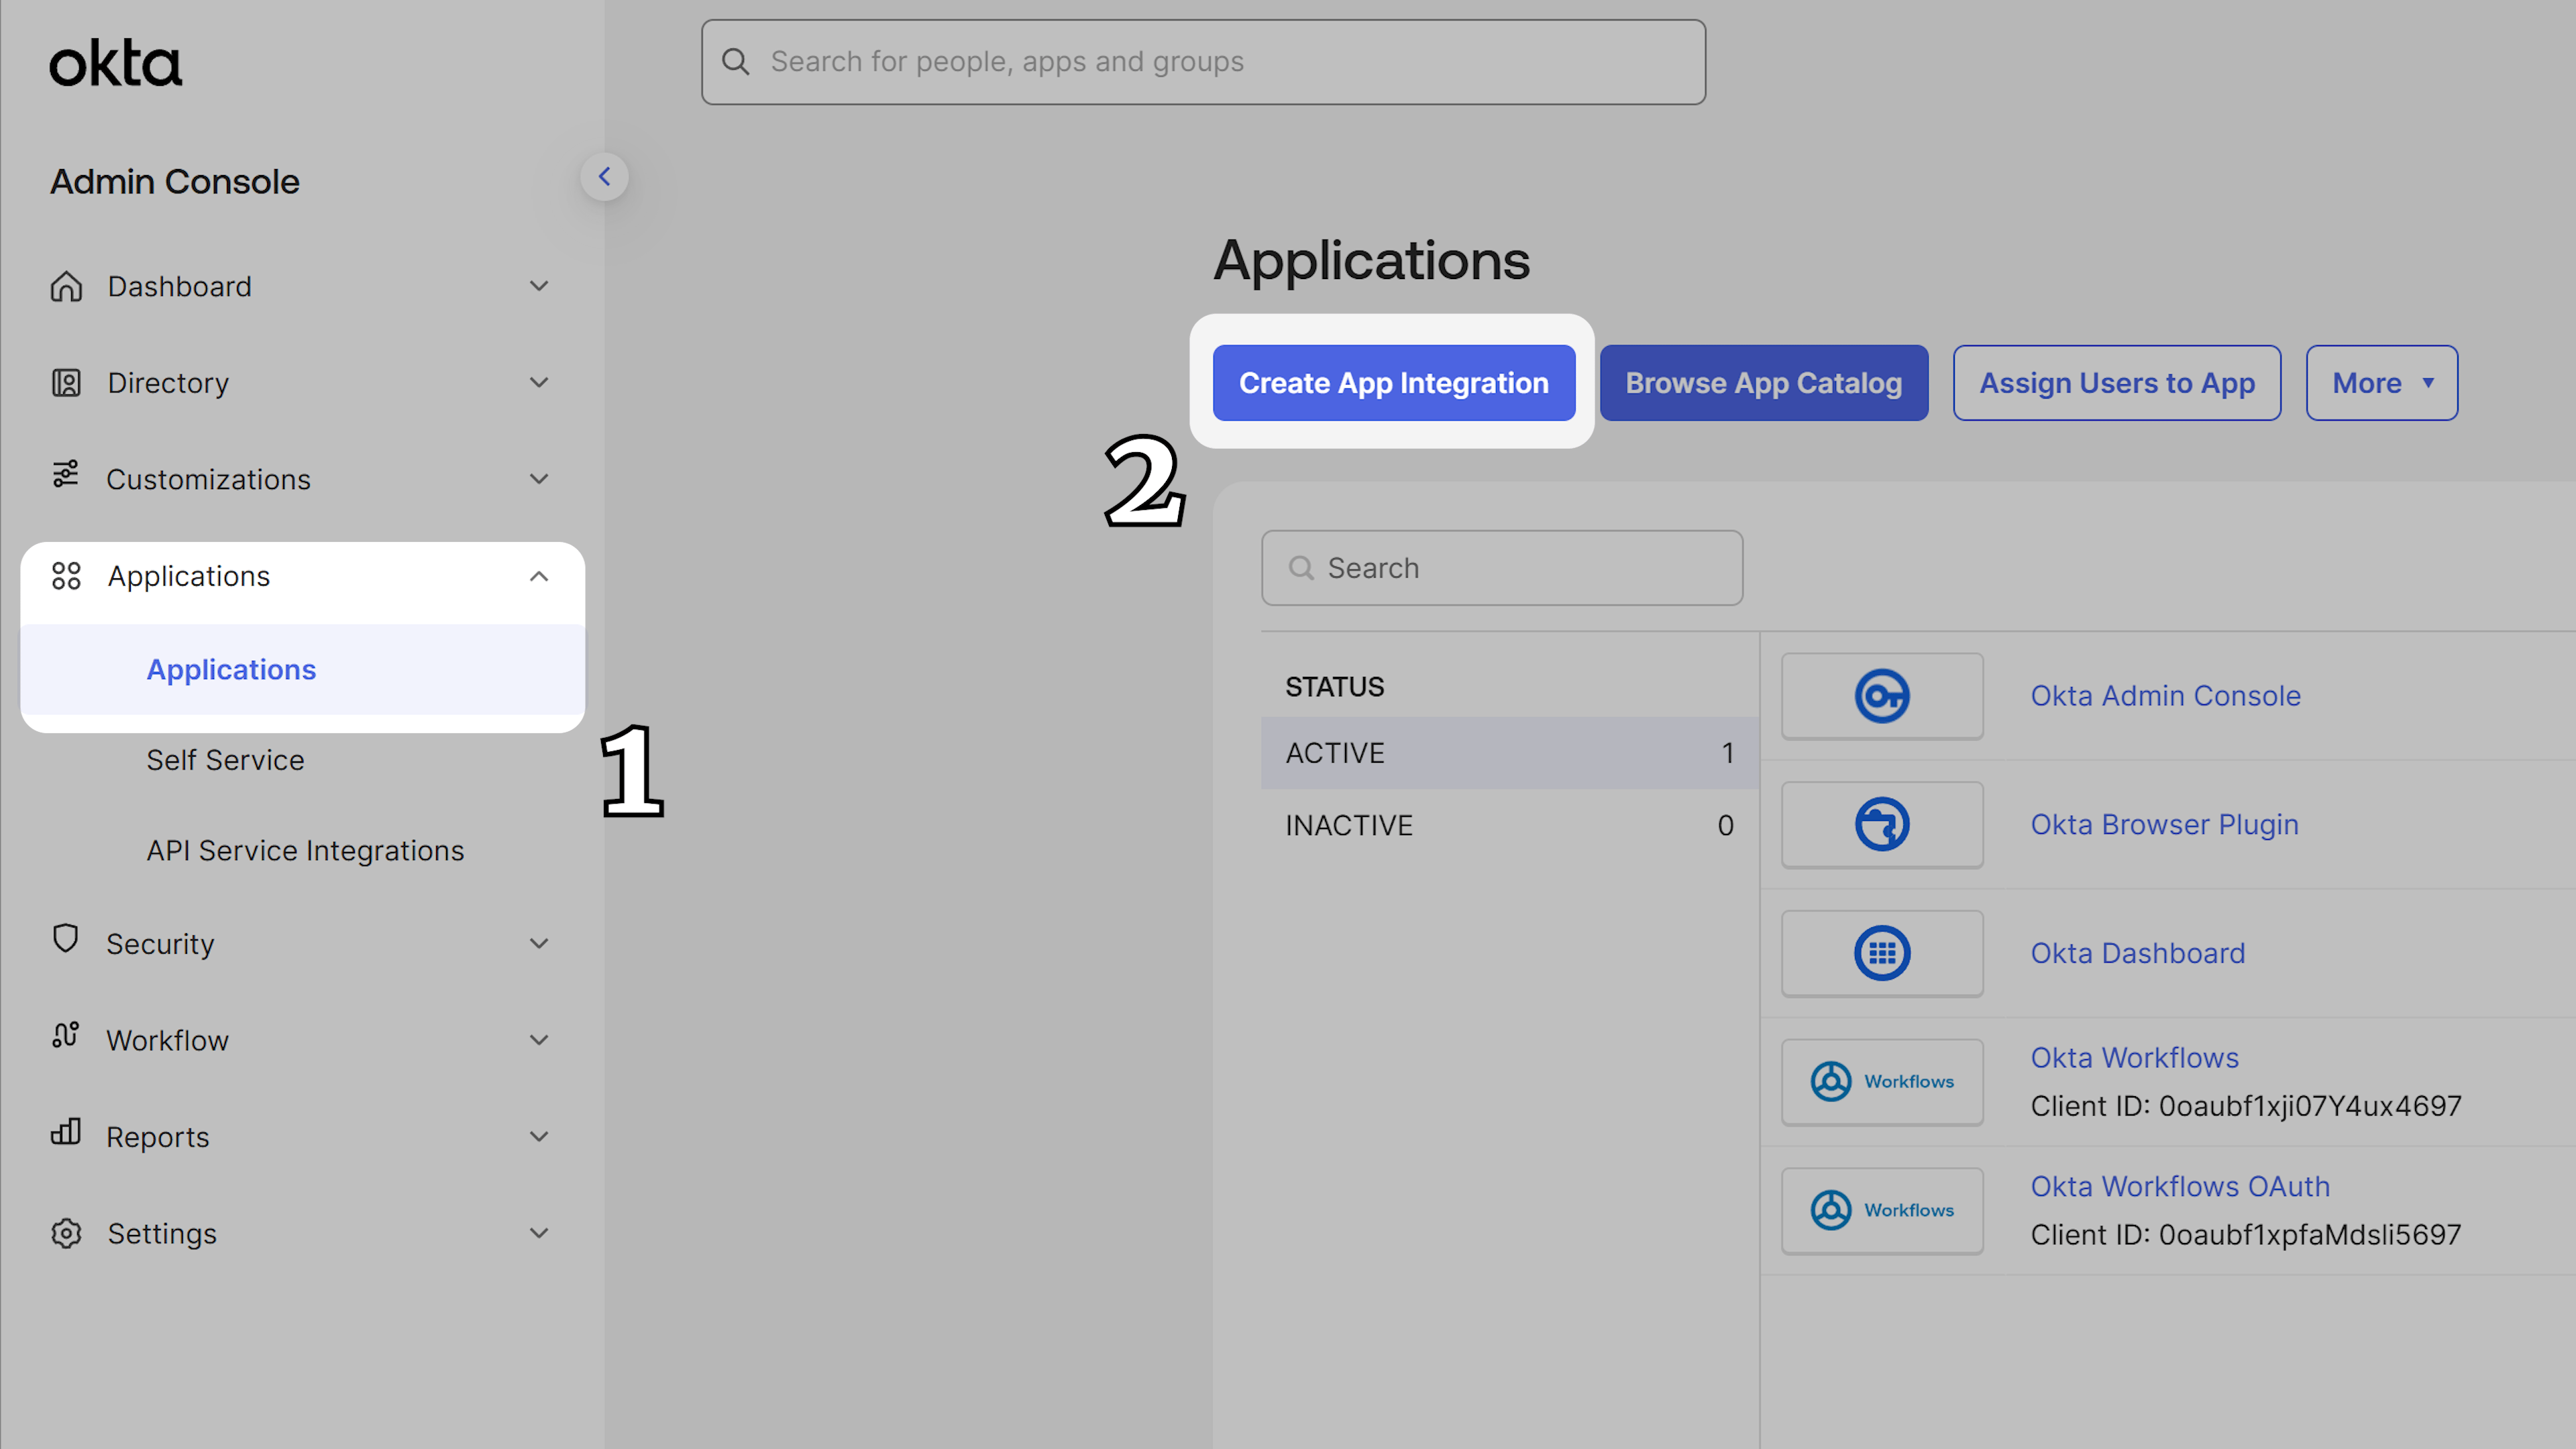
In your Okta Dashboard, navigate to the **Applications** section in the sidebar and click on **Create App Integration**.
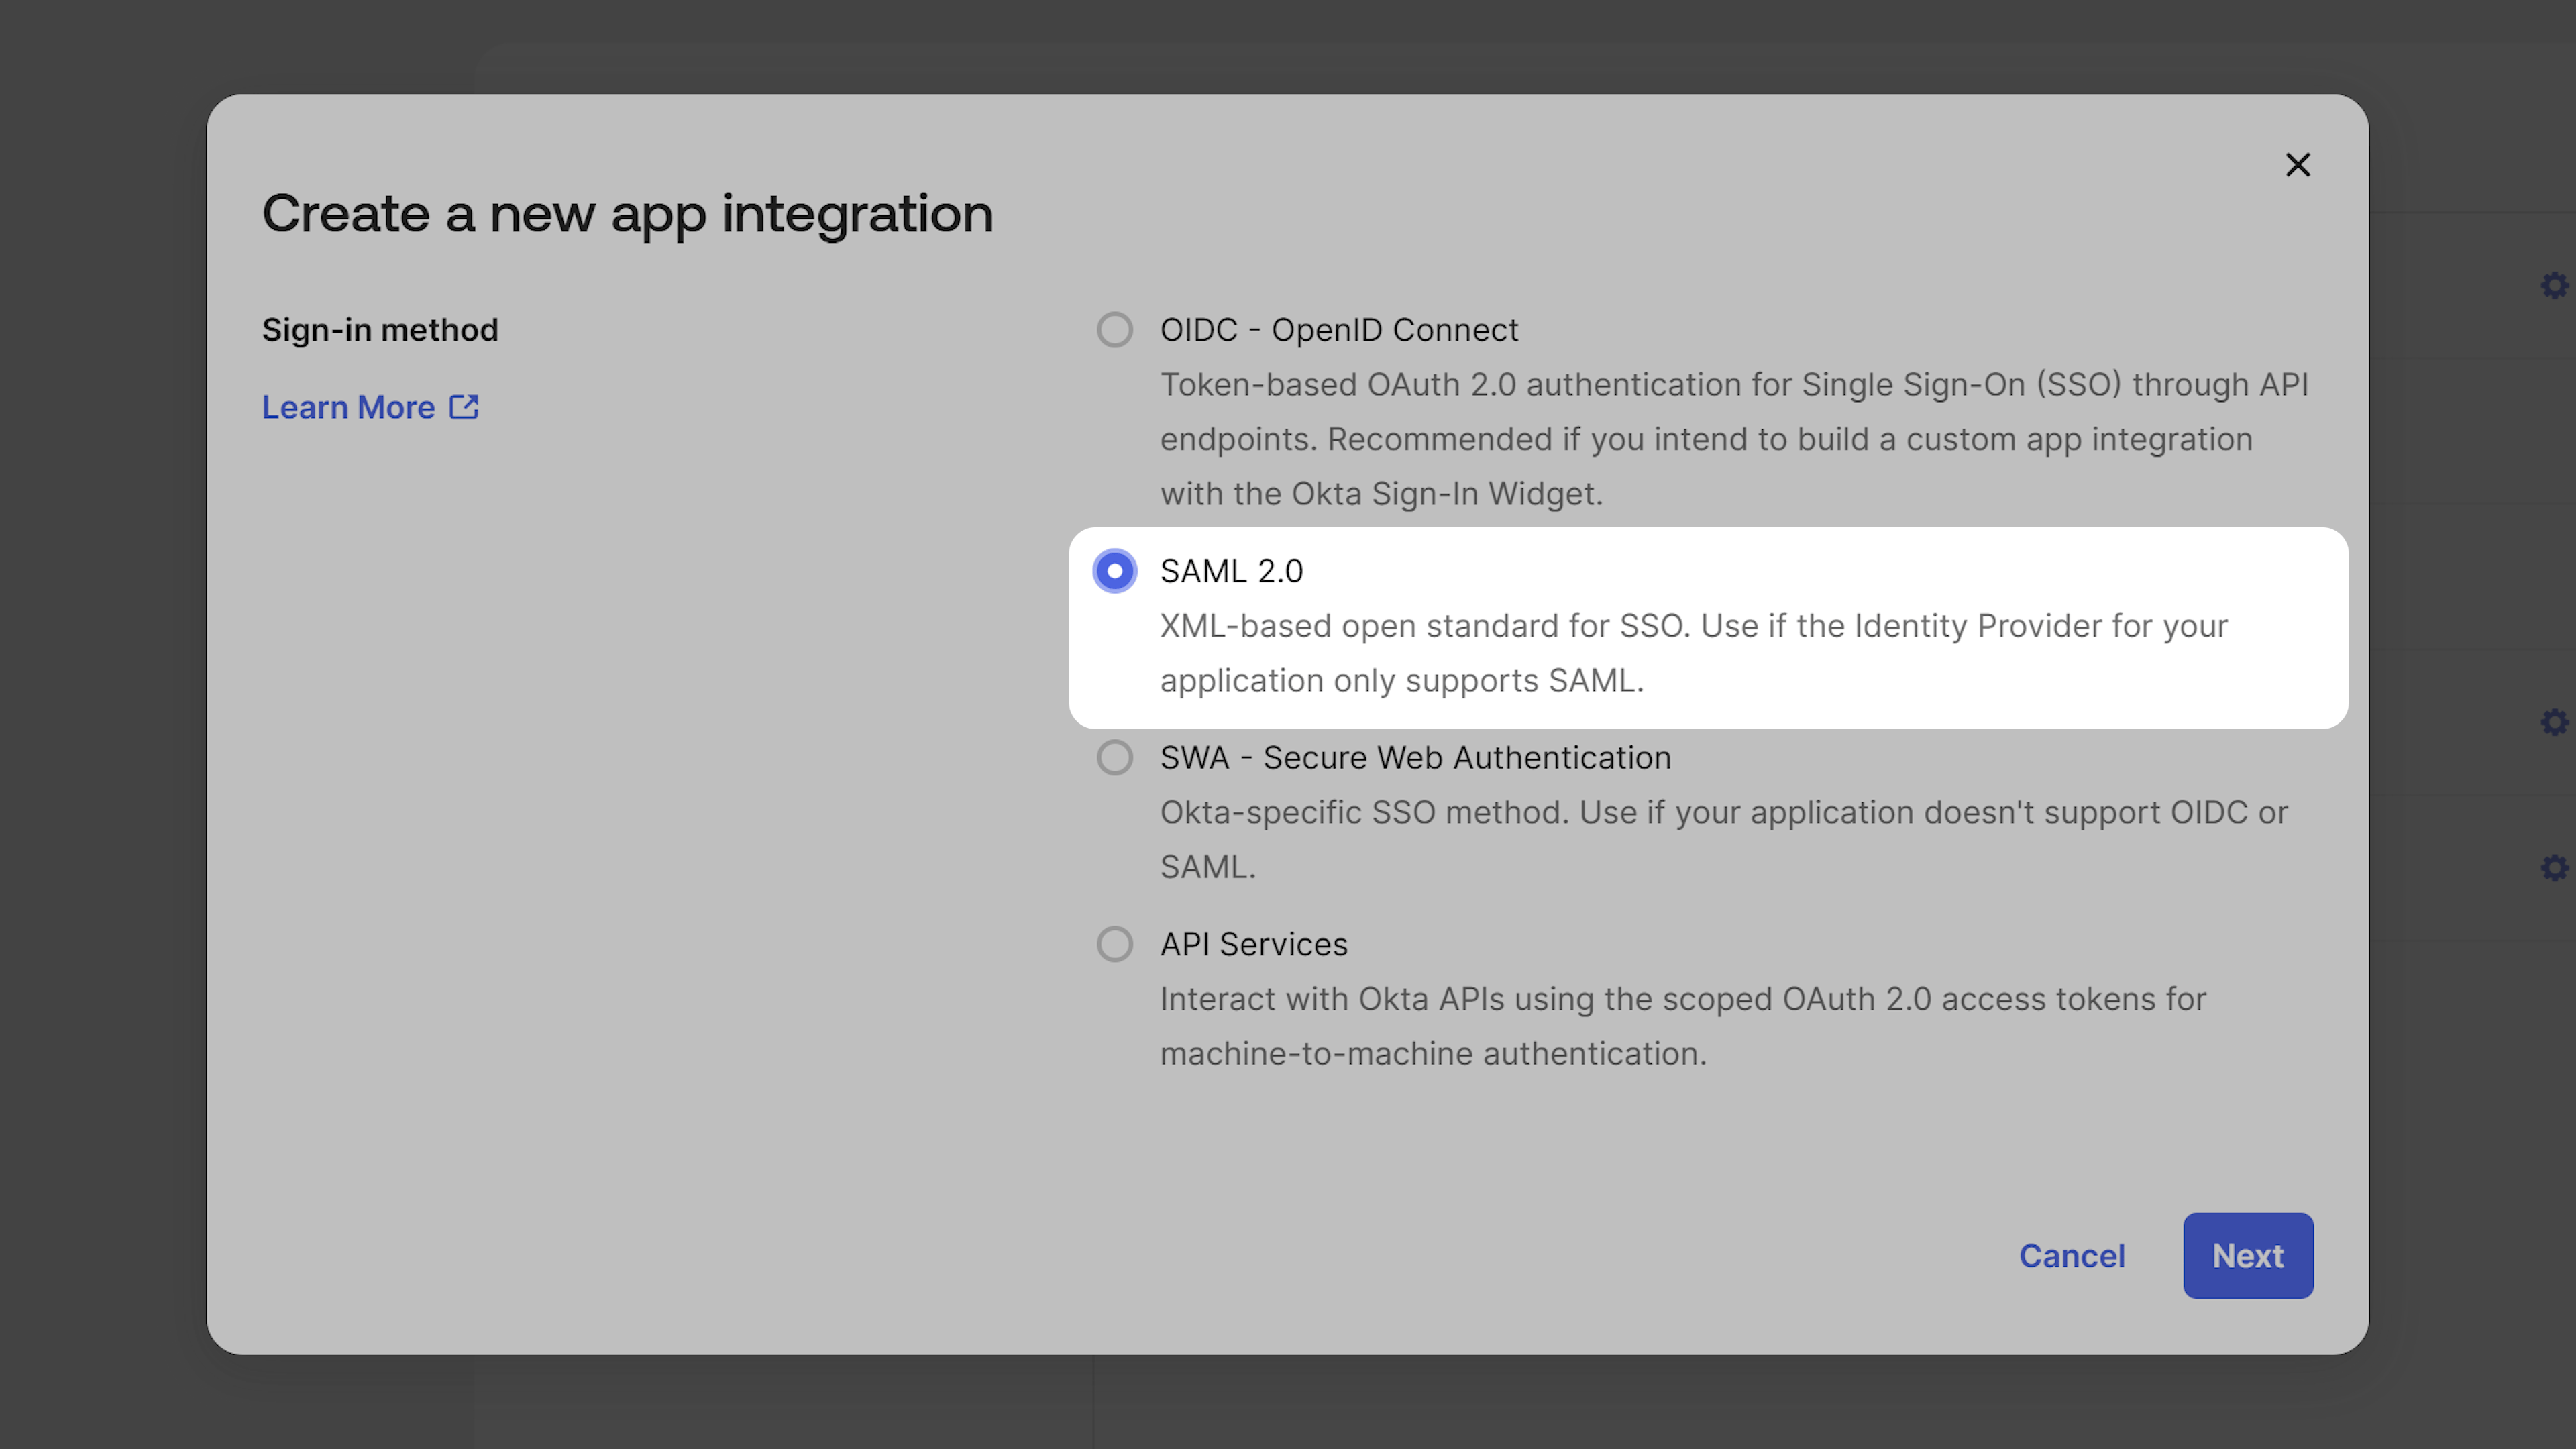
 For the sign-on method, select **SAML 2.0** and click **Next**.
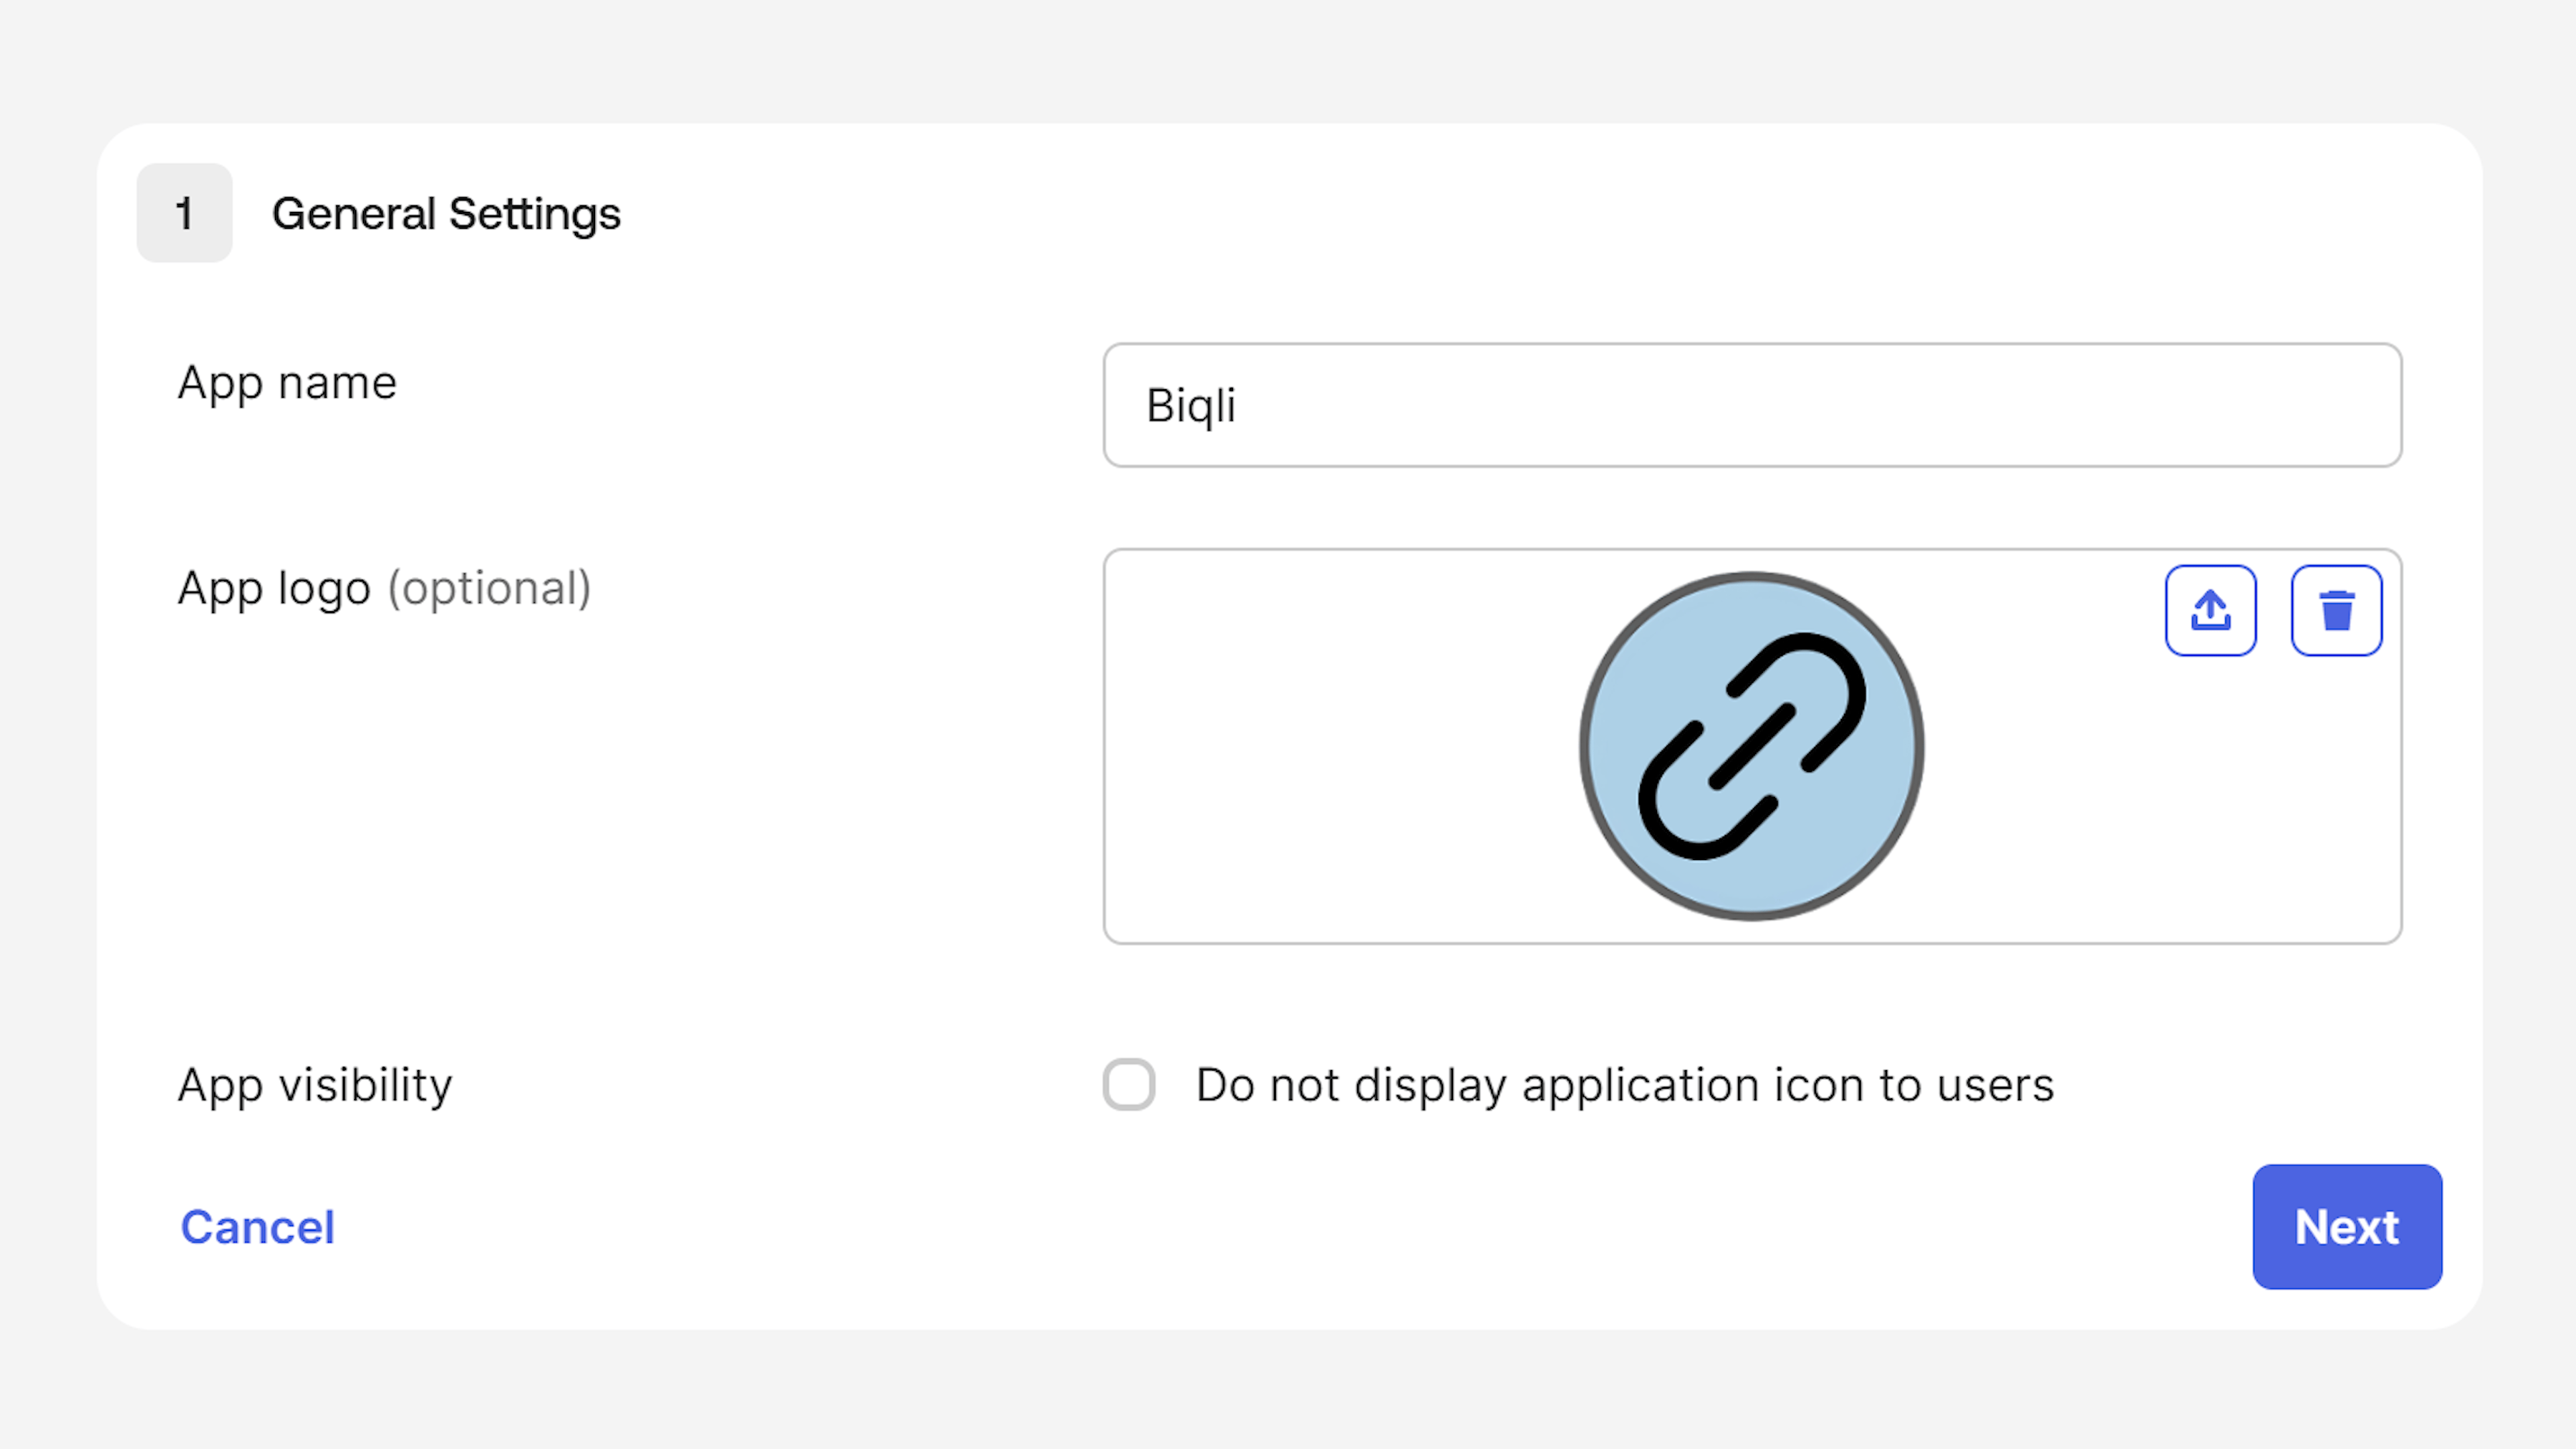
 On the General Settings page, enter **Biqli** for the app name, then click **Next** to continue to the SAML settings.
 ## Step 2: Configure SAML Settings
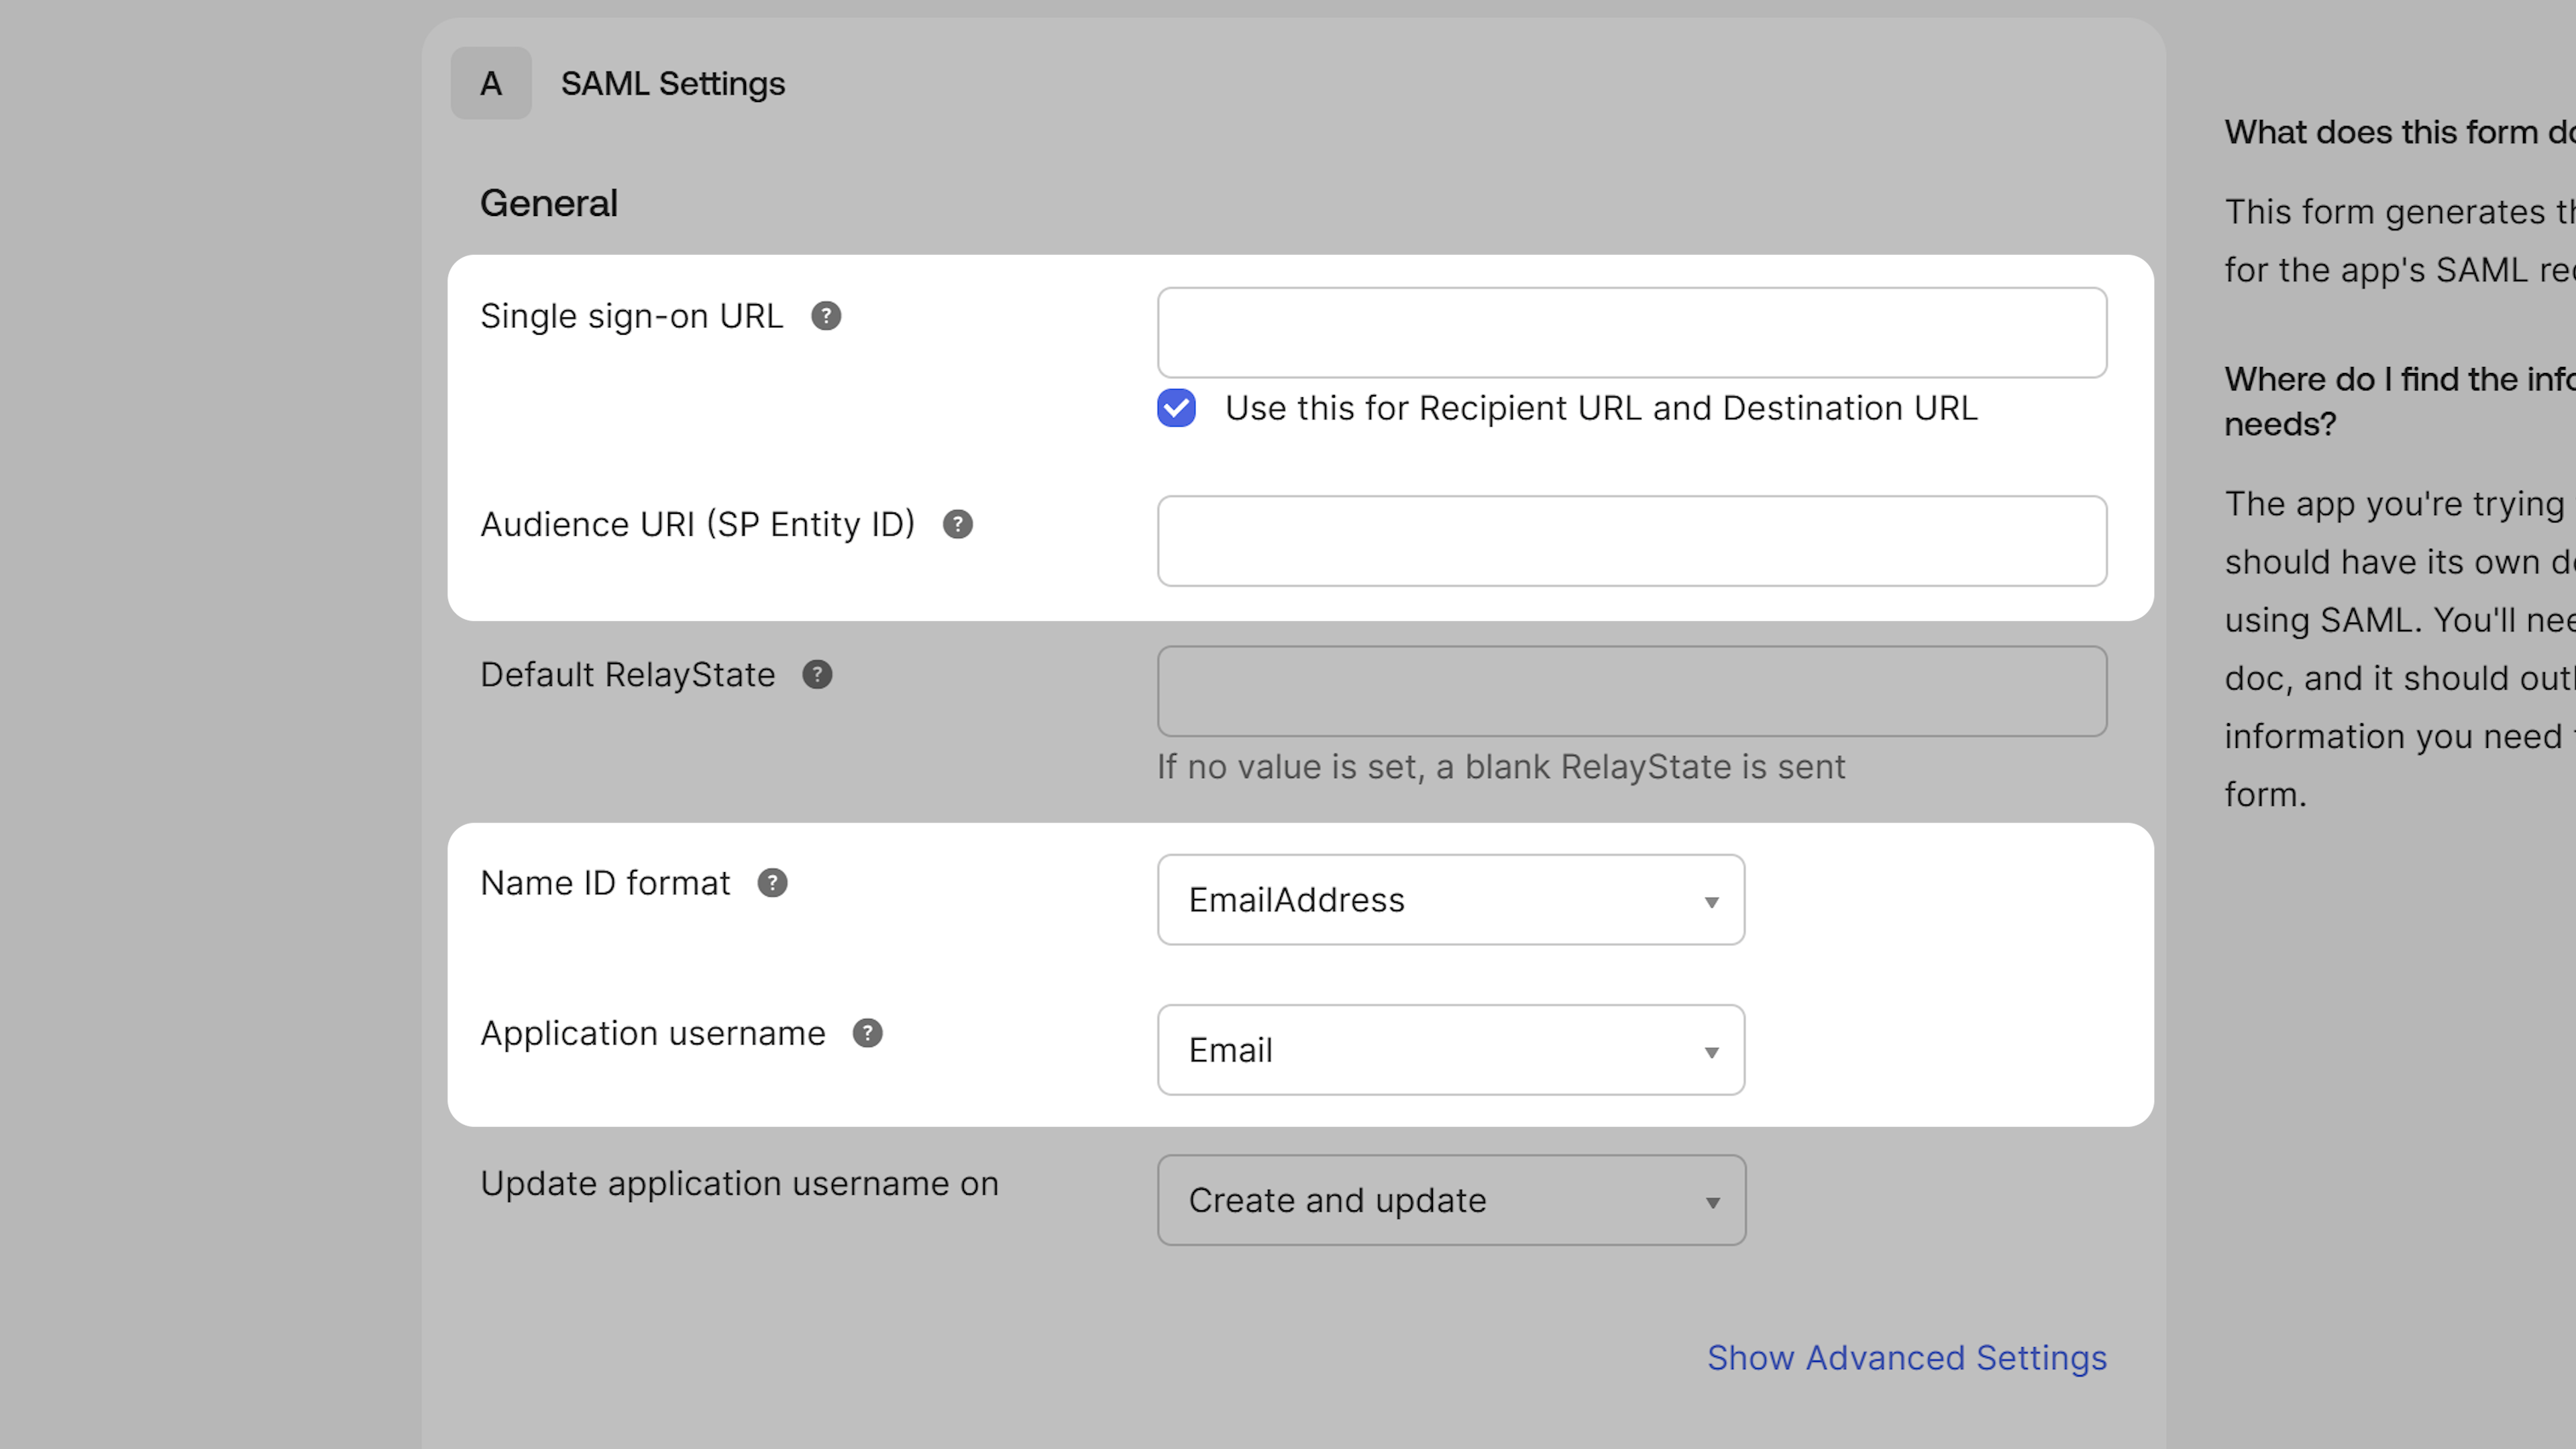
Copy the following values and paste them into the **SAML Settings > General** section:
```text Single sign-on URL theme={null}
https://biq.li/saml/acs
```
```text Audience URI (SP Entity ID) theme={null}
https://biq.li/workspaces/{WORKSPACE_SLUG}
```
Please ensure you replace `{WORKSPACE_SLUG}` with the slug of the specific workspace in which you are activating Okta SAML.
Set the **Name ID format** to `EmailAddress` and the **Application username** to `Email`.
## Step 2: Configure SAML Settings
Copy the following values and paste them into the **SAML Settings > General** section:
```text Single sign-on URL theme={null}
https://biq.li/saml/acs
```
```text Audience URI (SP Entity ID) theme={null}
https://biq.li/workspaces/{WORKSPACE_SLUG}
```
Please ensure you replace `{WORKSPACE_SLUG}` with the slug of the specific workspace in which you are activating Okta SAML.
Set the **Name ID format** to `EmailAddress` and the **Application username** to `Email`.
 ## Step 3: Configure Attribute Statements
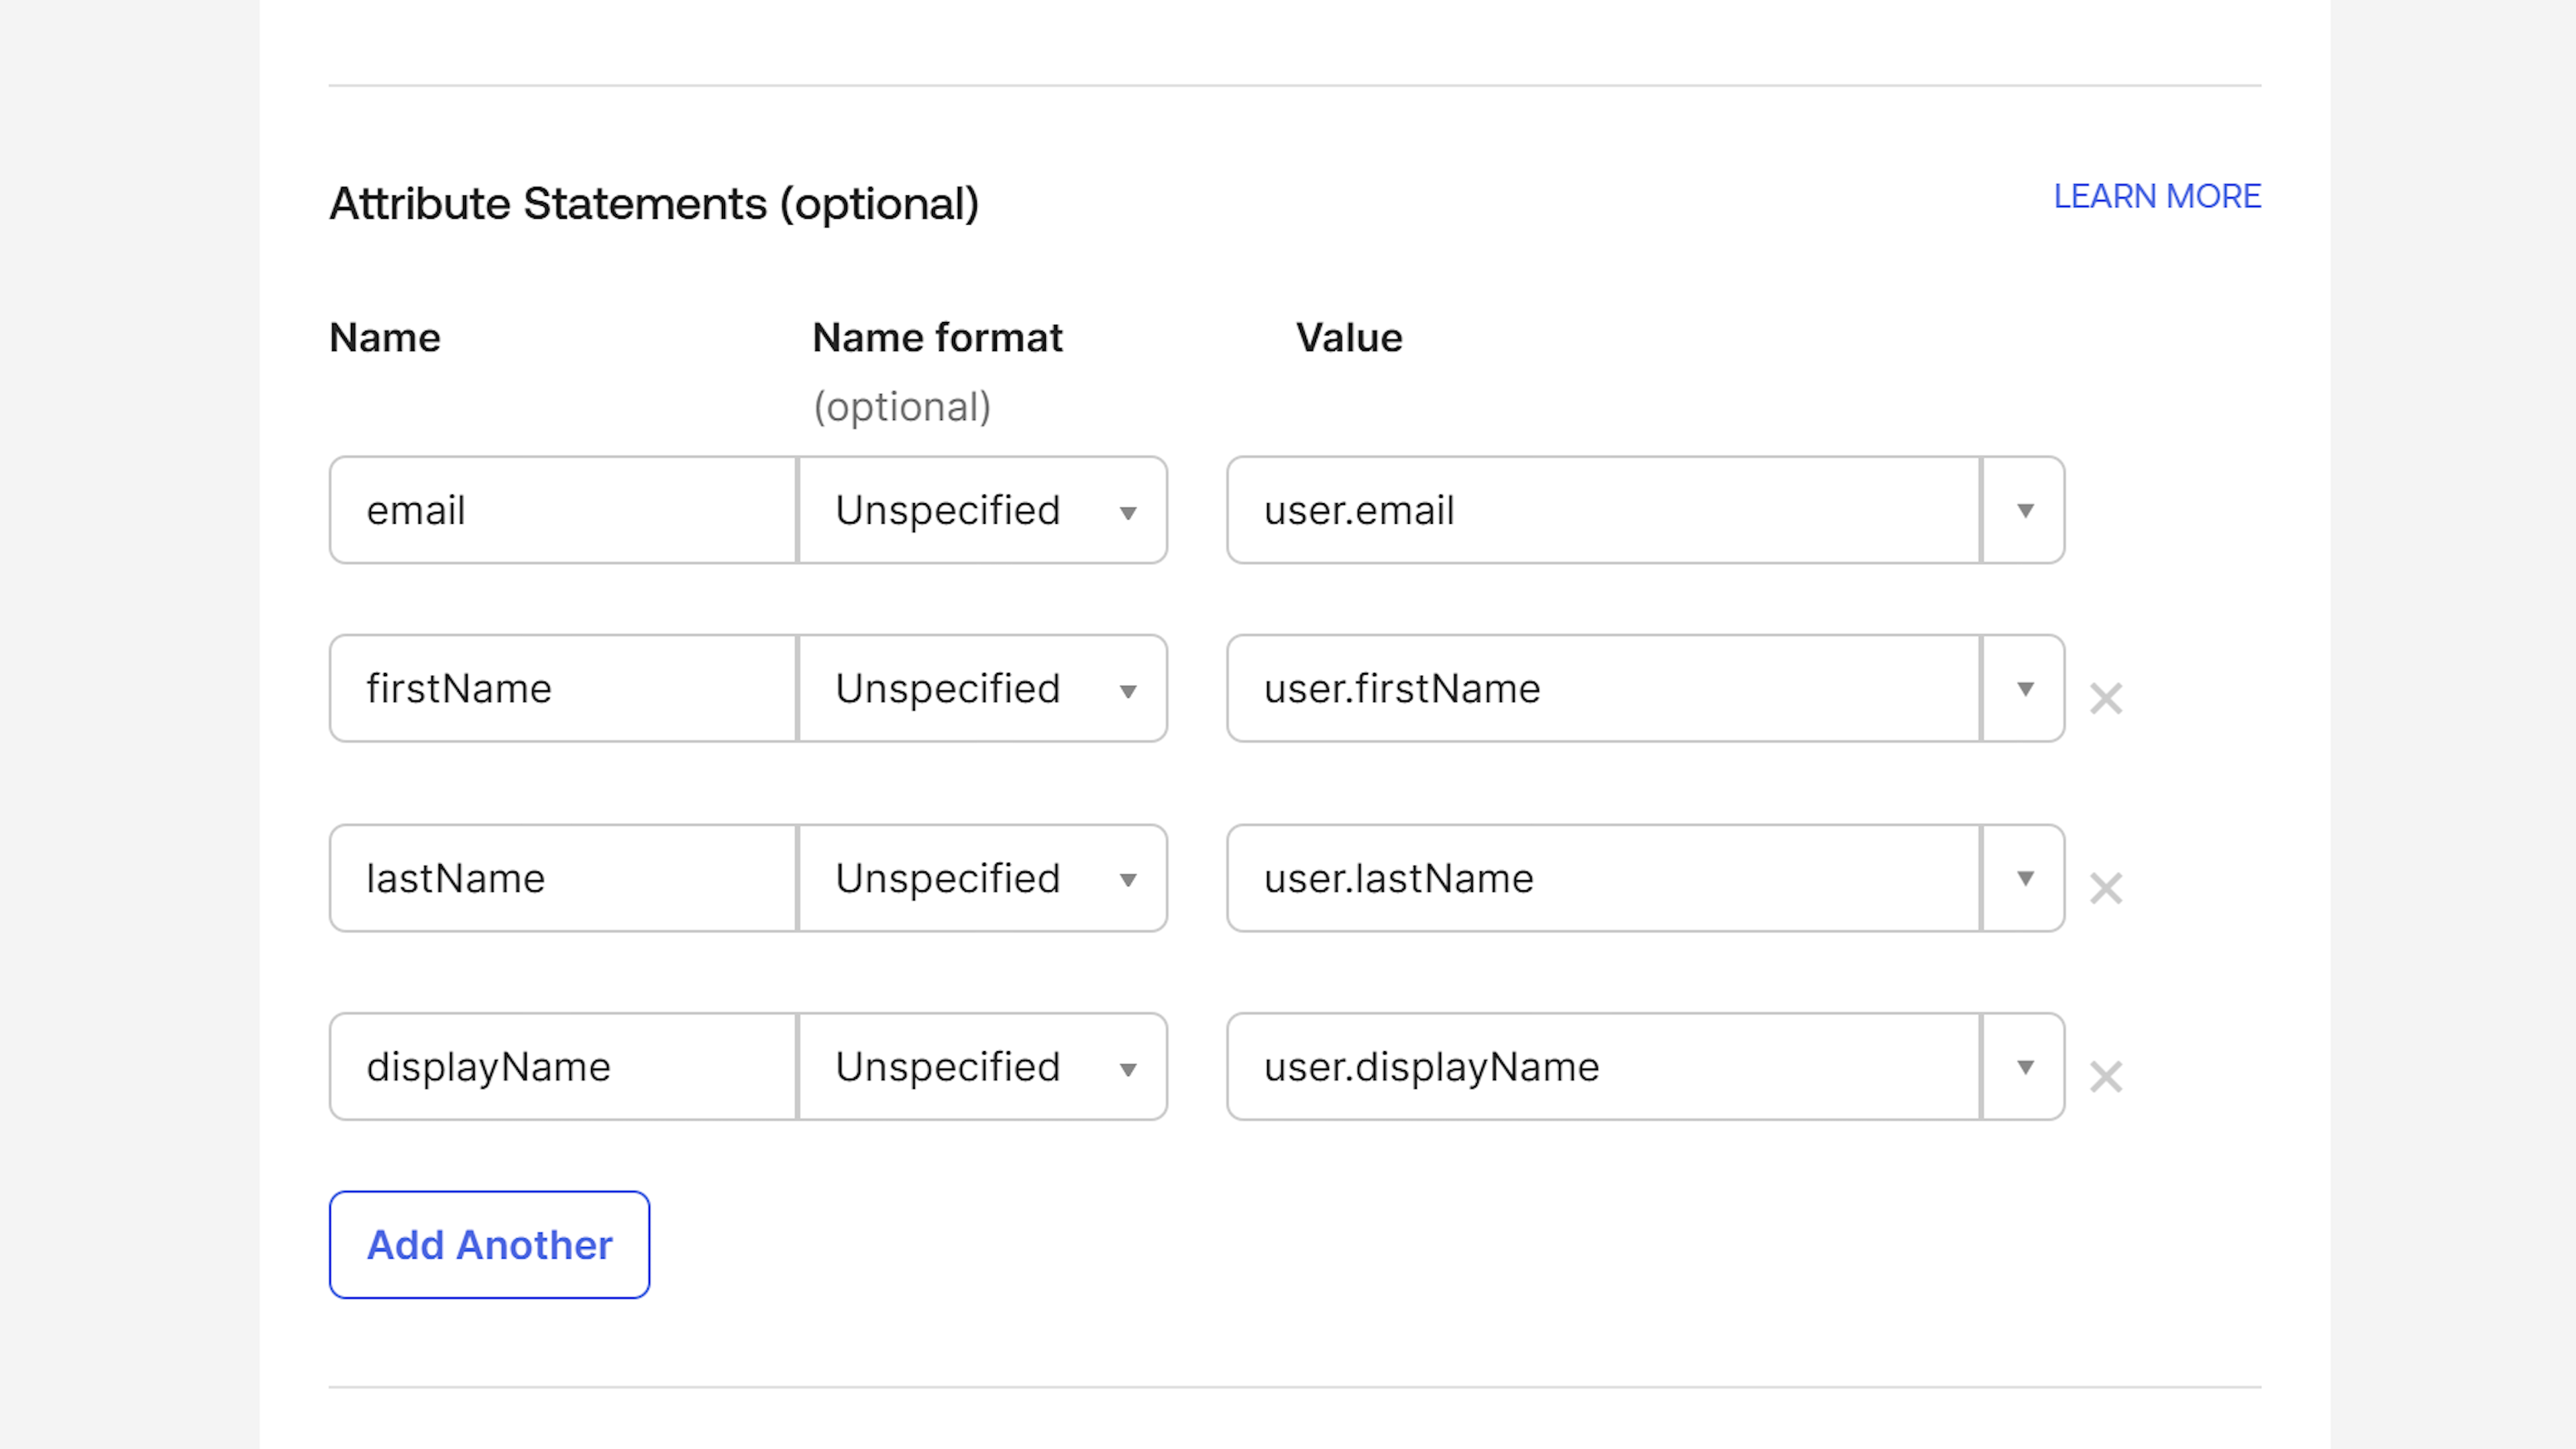
Just below the General section in the SAML Settings, navigate to the **Attribute Statements** section. Add the following four attribute statements:
| Name | Name format | Value |
| :------------ | :---------- | :----------------- |
| `email` | Unspecified | `user.email` |
| `firstName` | Unspecified | `user.firstName` |
| `lastName` | Unspecified | `user.lastName` |
| `displayName` | Unspecified | `user.displayName` |
## Step 3: Configure Attribute Statements
Just below the General section in the SAML Settings, navigate to the **Attribute Statements** section. Add the following four attribute statements:
| Name | Name format | Value |
| :------------ | :---------- | :----------------- |
| `email` | Unspecified | `user.email` |
| `firstName` | Unspecified | `user.firstName` |
| `lastName` | Unspecified | `user.lastName` |
| `displayName` | Unspecified | `user.displayName` |
 ## Step 4: Submit Feedback
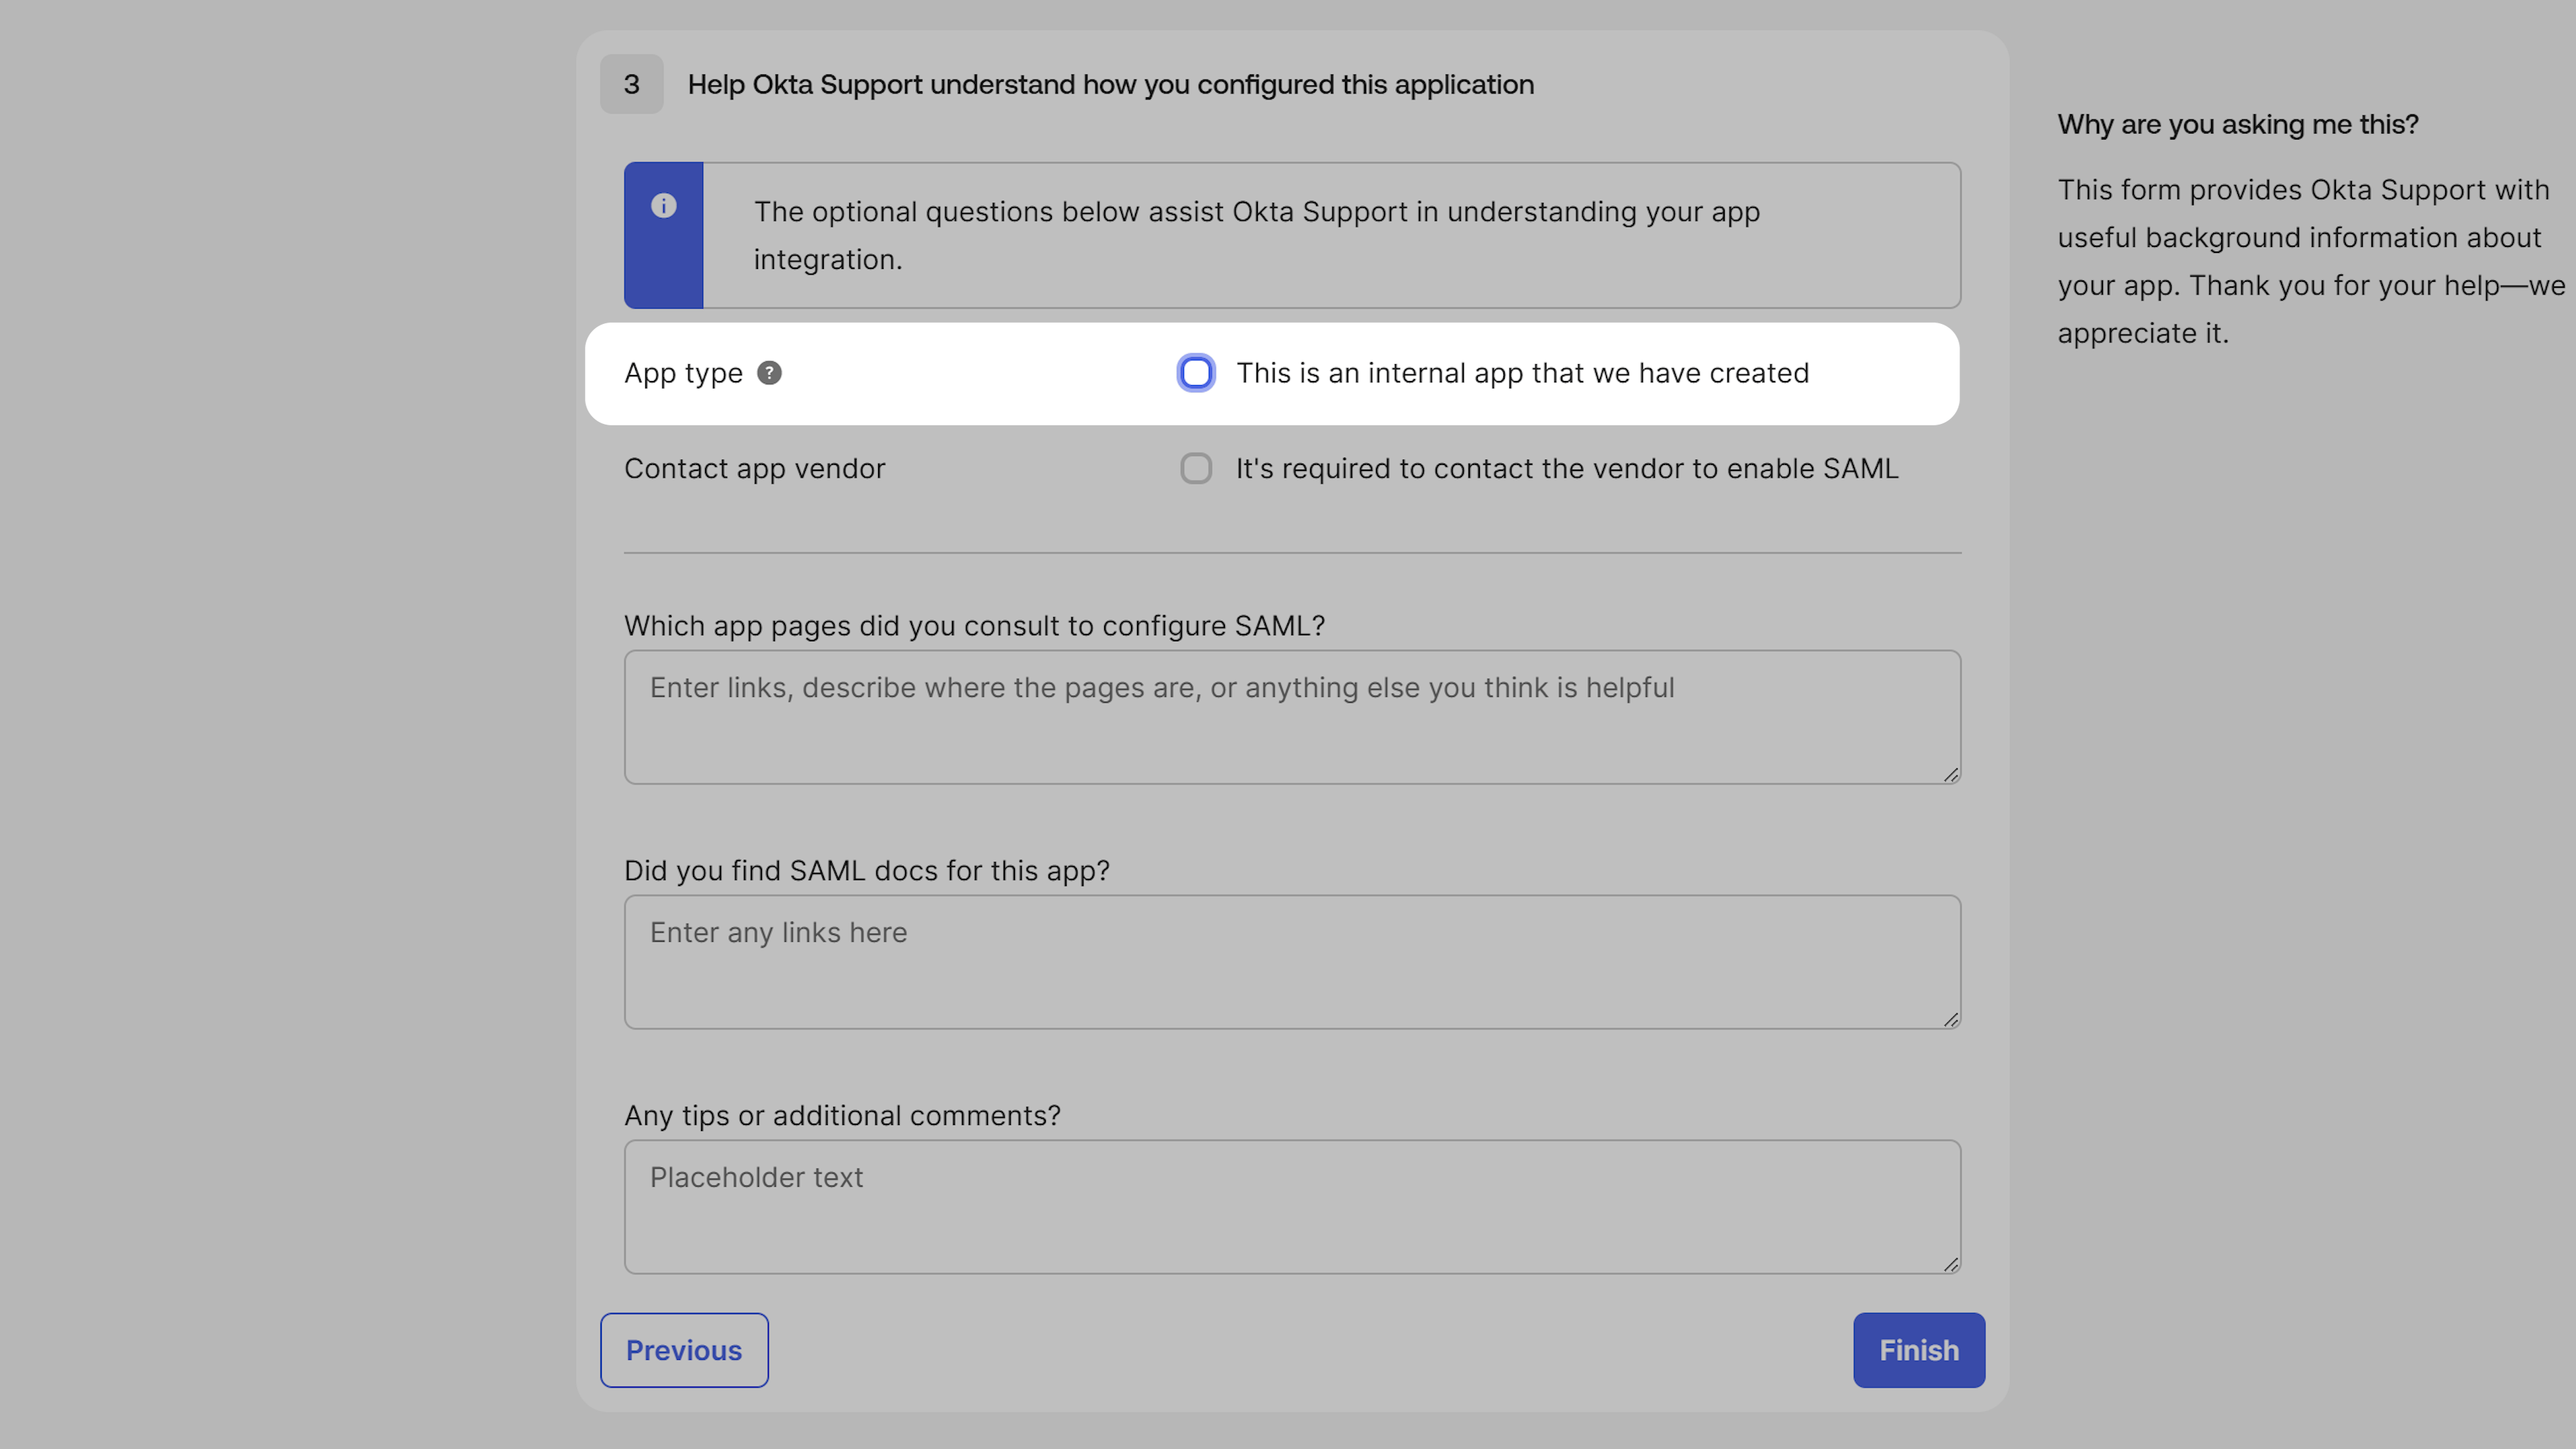
You will then be presented with an Okta Feedback section. Select the option **"This is an internal app we have created"** and click **Finish** to complete the application creation process.
## Step 4: Submit Feedback
You will then be presented with an Okta Feedback section. Select the option **"This is an internal app we have created"** and click **Finish** to complete the application creation process.
 ## Step 5: Copy the Metadata URL
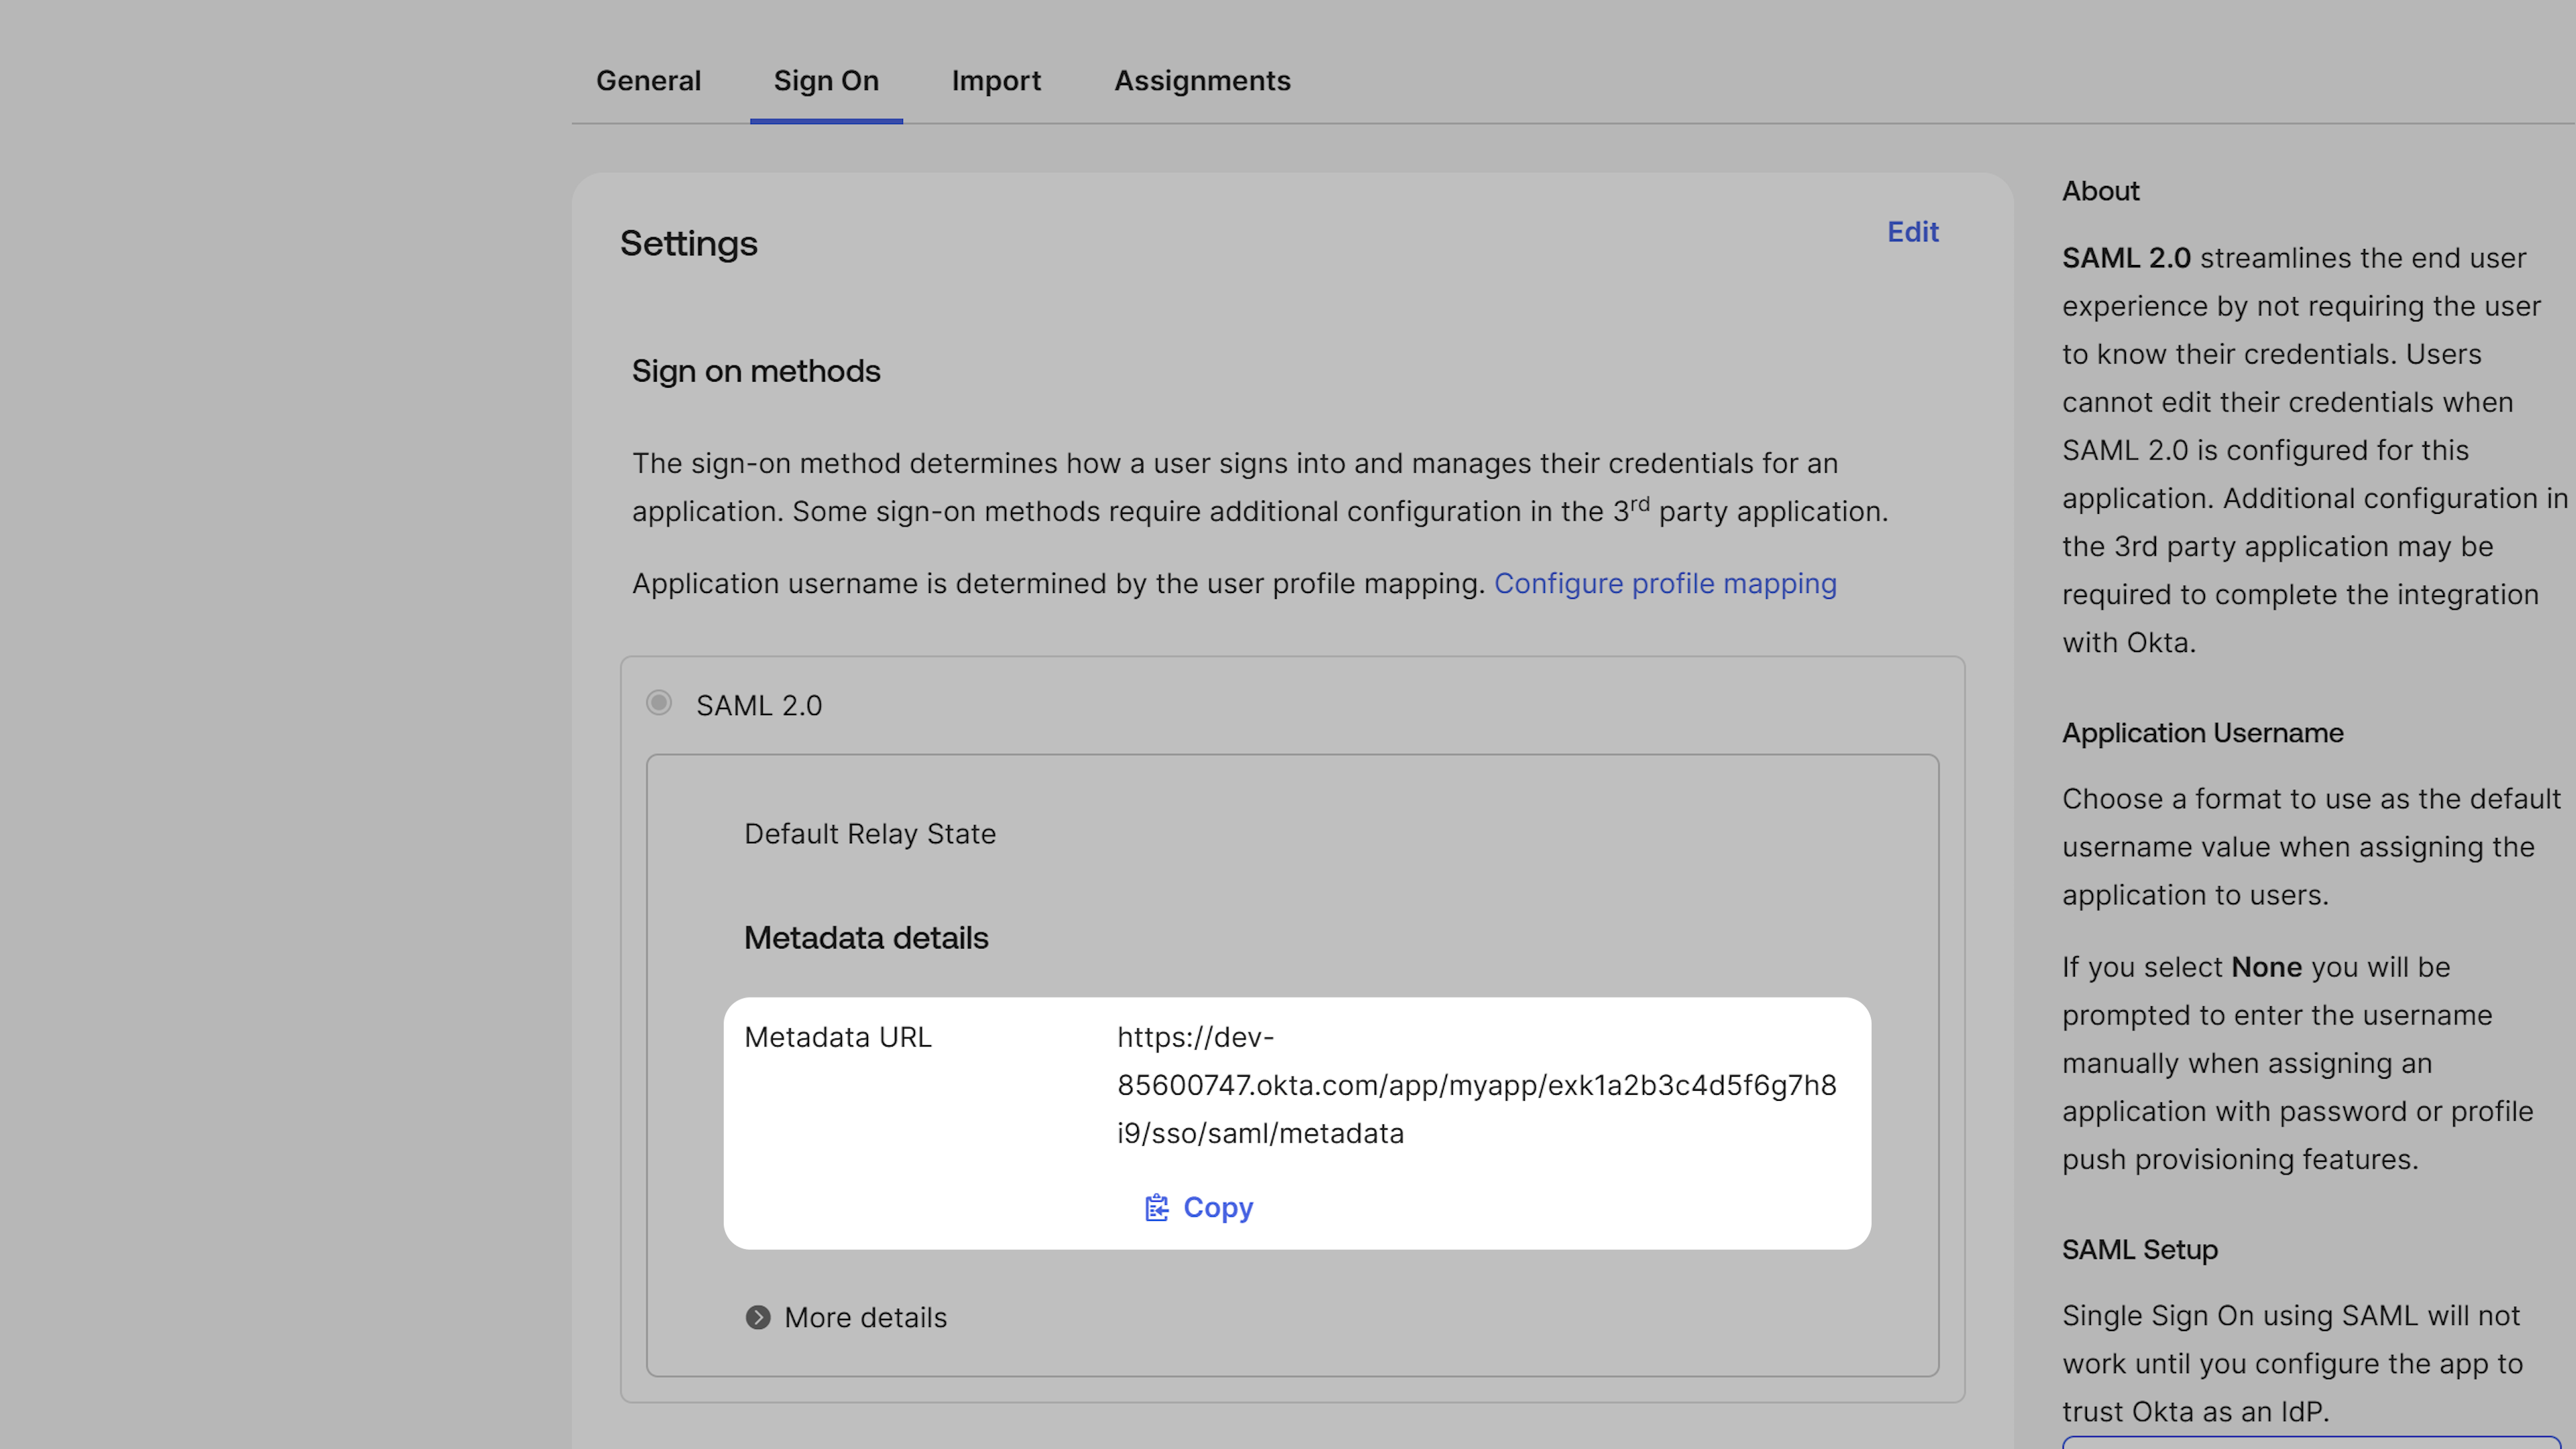
After finishing the setup, you will be taken to the **Sign On** tab for your new application. Under the settings section, locate and copy the **Metadata URL**. You will need this to complete the configuration on Biqli.
## Step 5: Copy the Metadata URL
After finishing the setup, you will be taken to the **Sign On** tab for your new application. Under the settings section, locate and copy the **Metadata URL**. You will need this to complete the configuration on Biqli.
 ## Step 6: Configure SAML SSO on Biqli
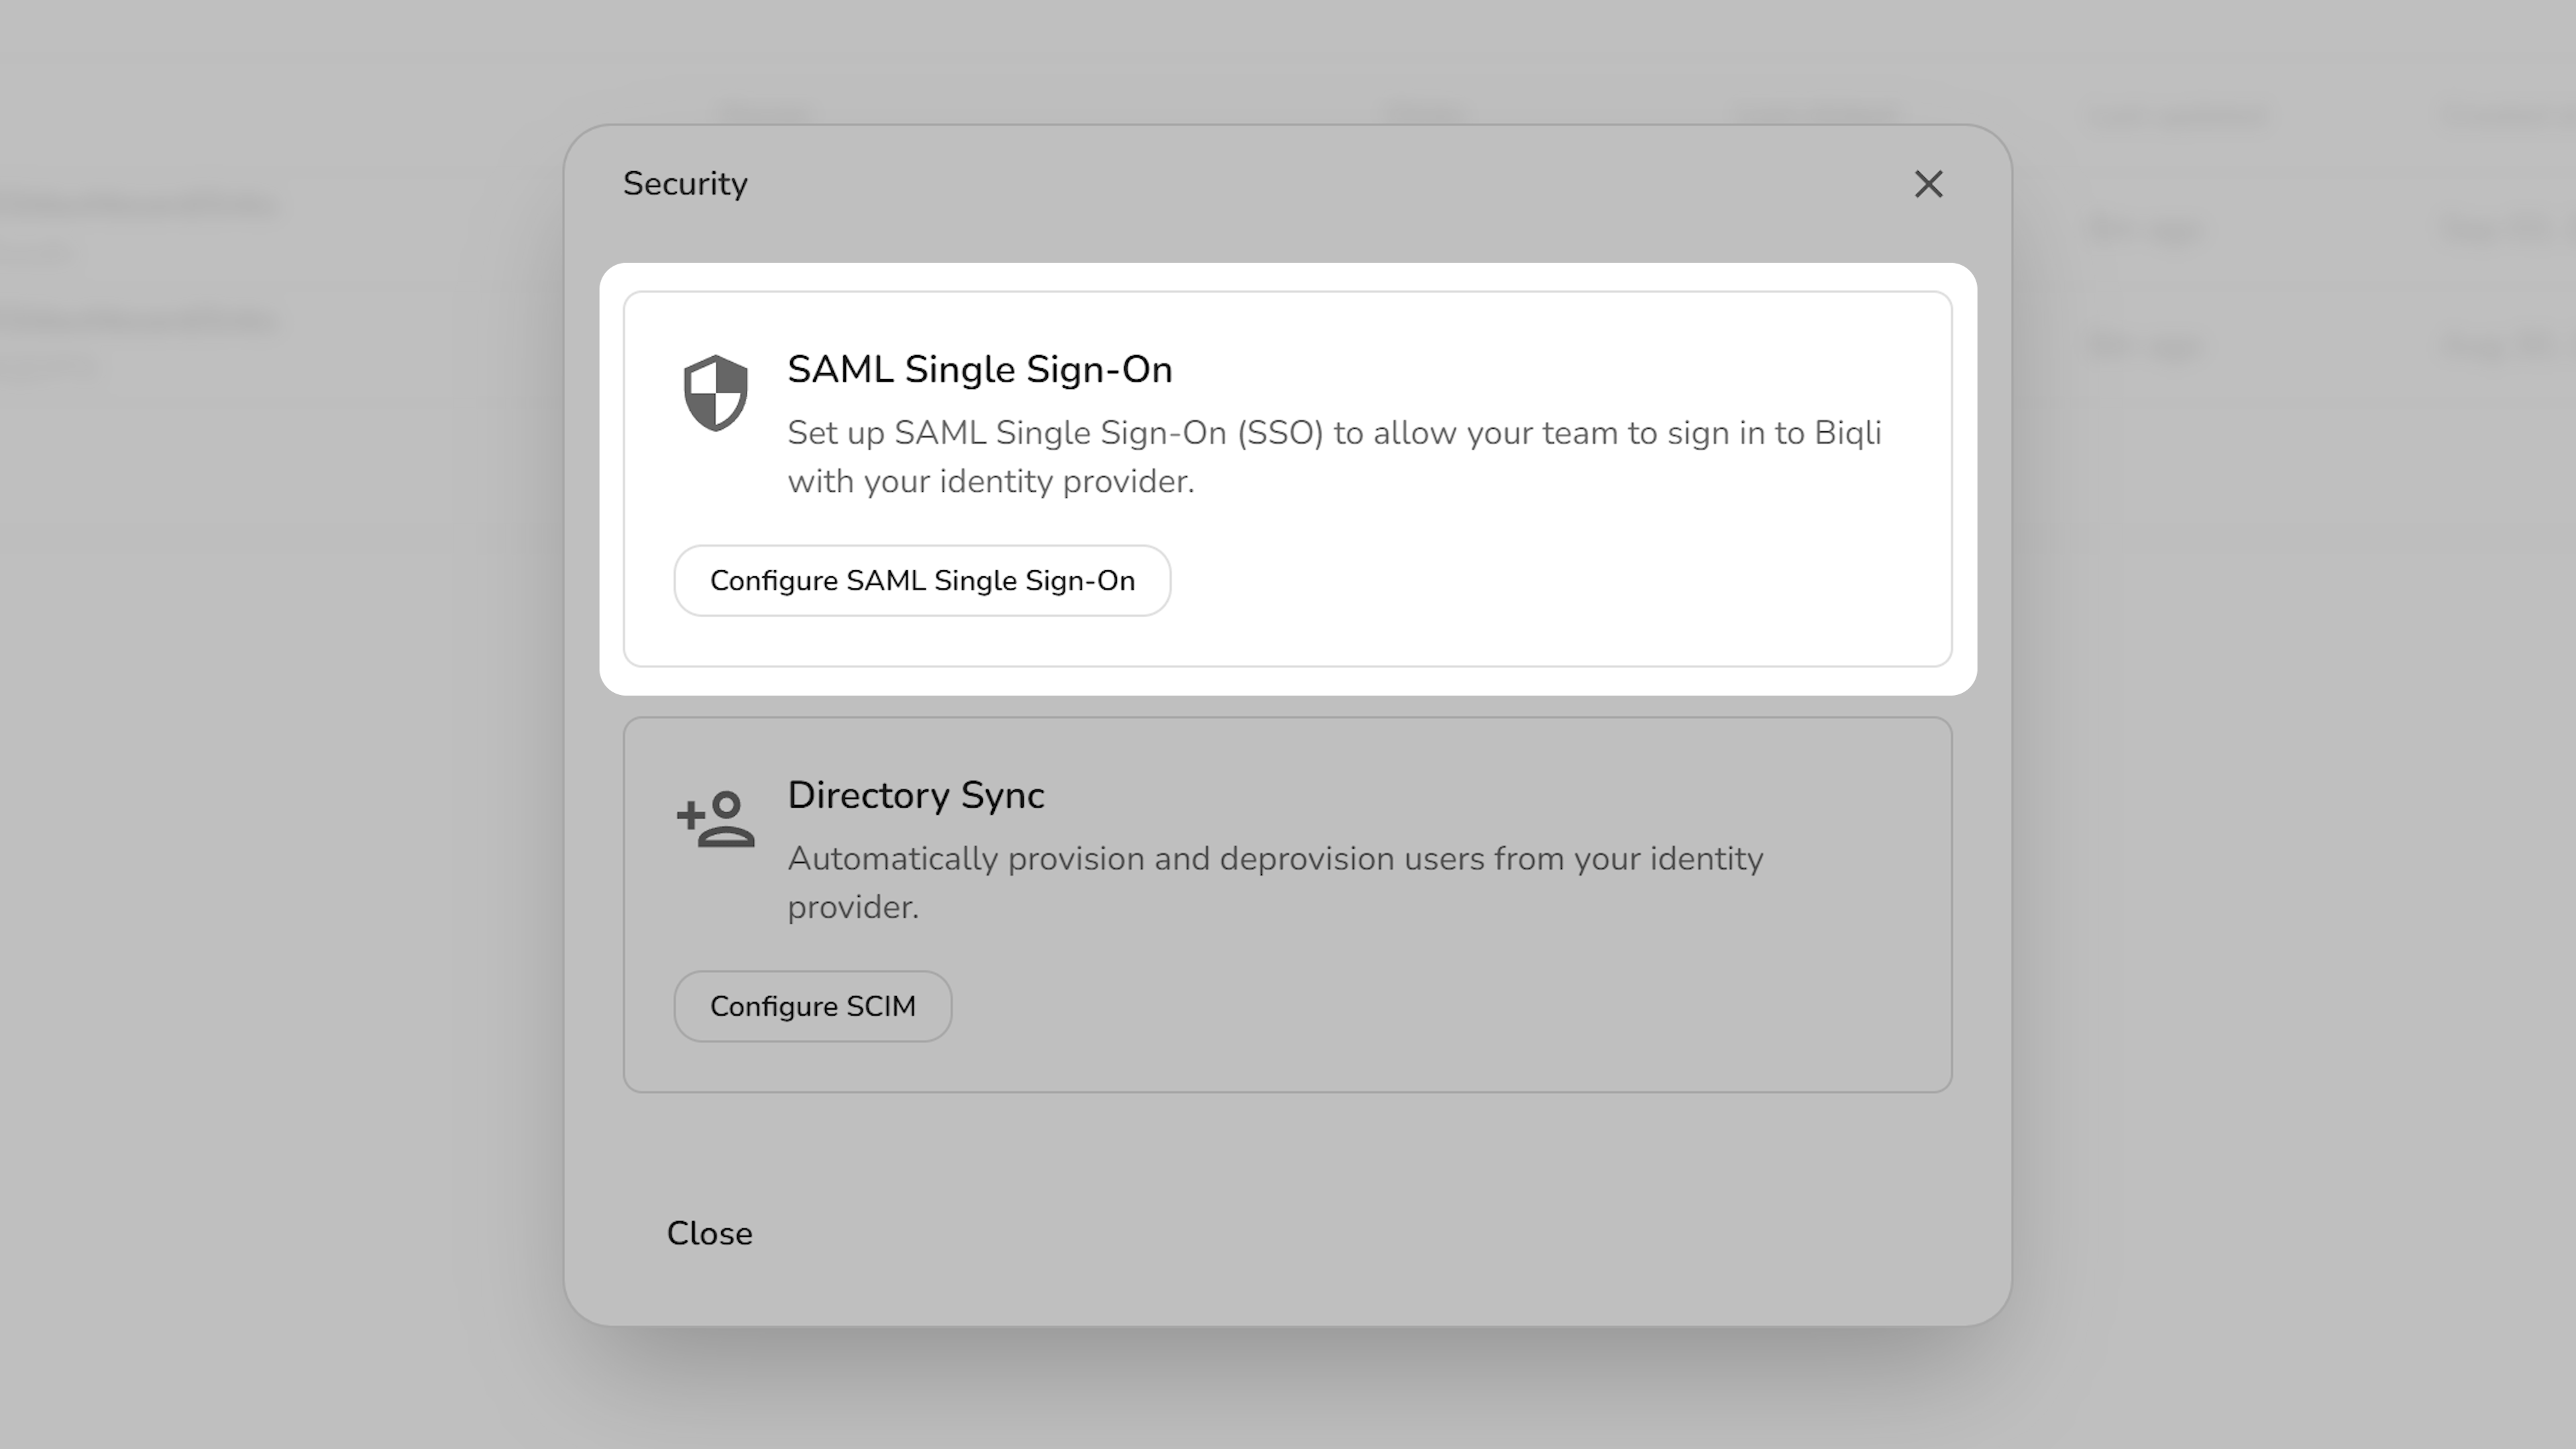
Navigate to your Biqli workspace **Security Settings**. Under the **SAML Single Sign-On** section, click **Configure SAML Single Sign-On**.
## Step 6: Configure SAML SSO on Biqli
Navigate to your Biqli workspace **Security Settings**. Under the **SAML Single Sign-On** section, click **Configure SAML Single Sign-On**.
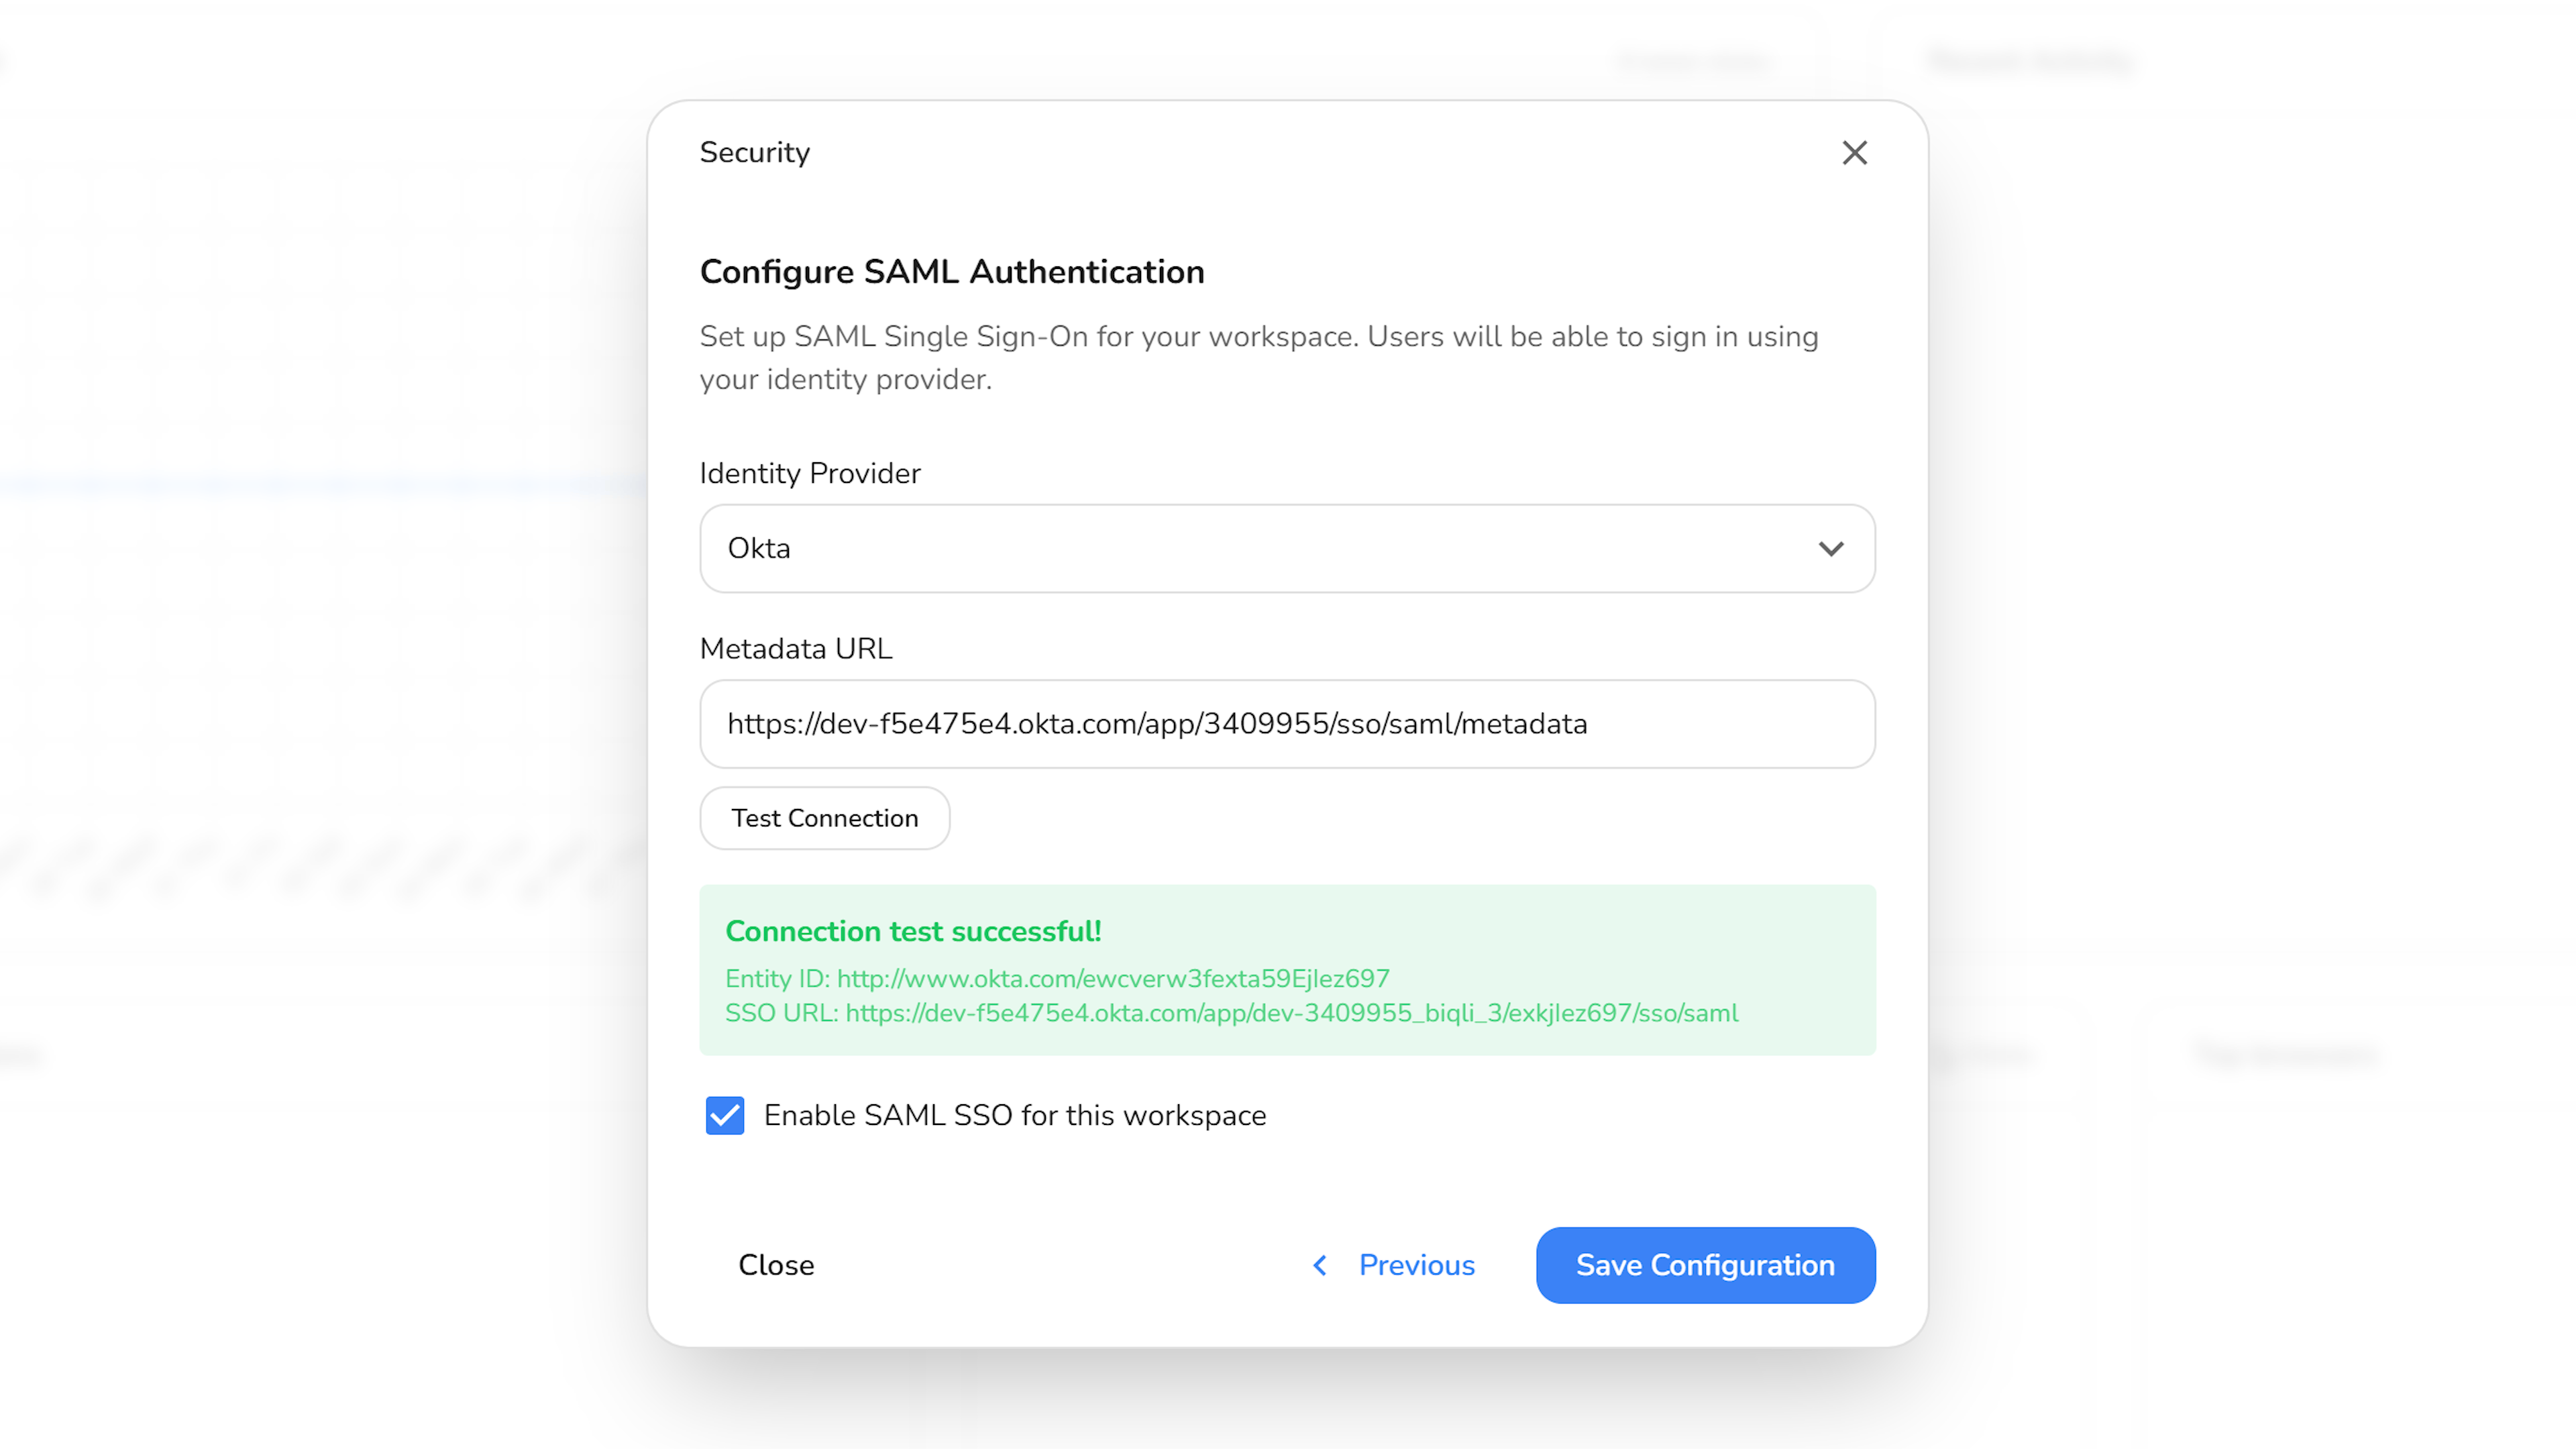
 In the configuration modal:
1. **Select Identity Provider**: Choose **Okta** as your SAML provider.
2. **Metadata URL**: Paste the Metadata URL you copied in Step 5.
3. **Test Connection**: Click to verify your setup.
4. **Enable SAML**: Toggle on SAML authentication for your workspace.
5. **Save Changes**: Click **Save changes** to complete the configuration.
In the configuration modal:
1. **Select Identity Provider**: Choose **Okta** as your SAML provider.
2. **Metadata URL**: Paste the Metadata URL you copied in Step 5.
3. **Test Connection**: Click to verify your setup.
4. **Enable SAML**: Toggle on SAML authentication for your workspace.
5. **Save Changes**: Click **Save changes** to complete the configuration.
 ## Step 7: Assign Users
To assign users, navigate back to your Okta dashboard and open your Biqli application. Under the **Assignments** tab, click **Assign** (you can assign users individually or in bulk by group).
## Step 7: Assign Users
To assign users, navigate back to your Okta dashboard and open your Biqli application. Under the **Assignments** tab, click **Assign** (you can assign users individually or in bulk by group).
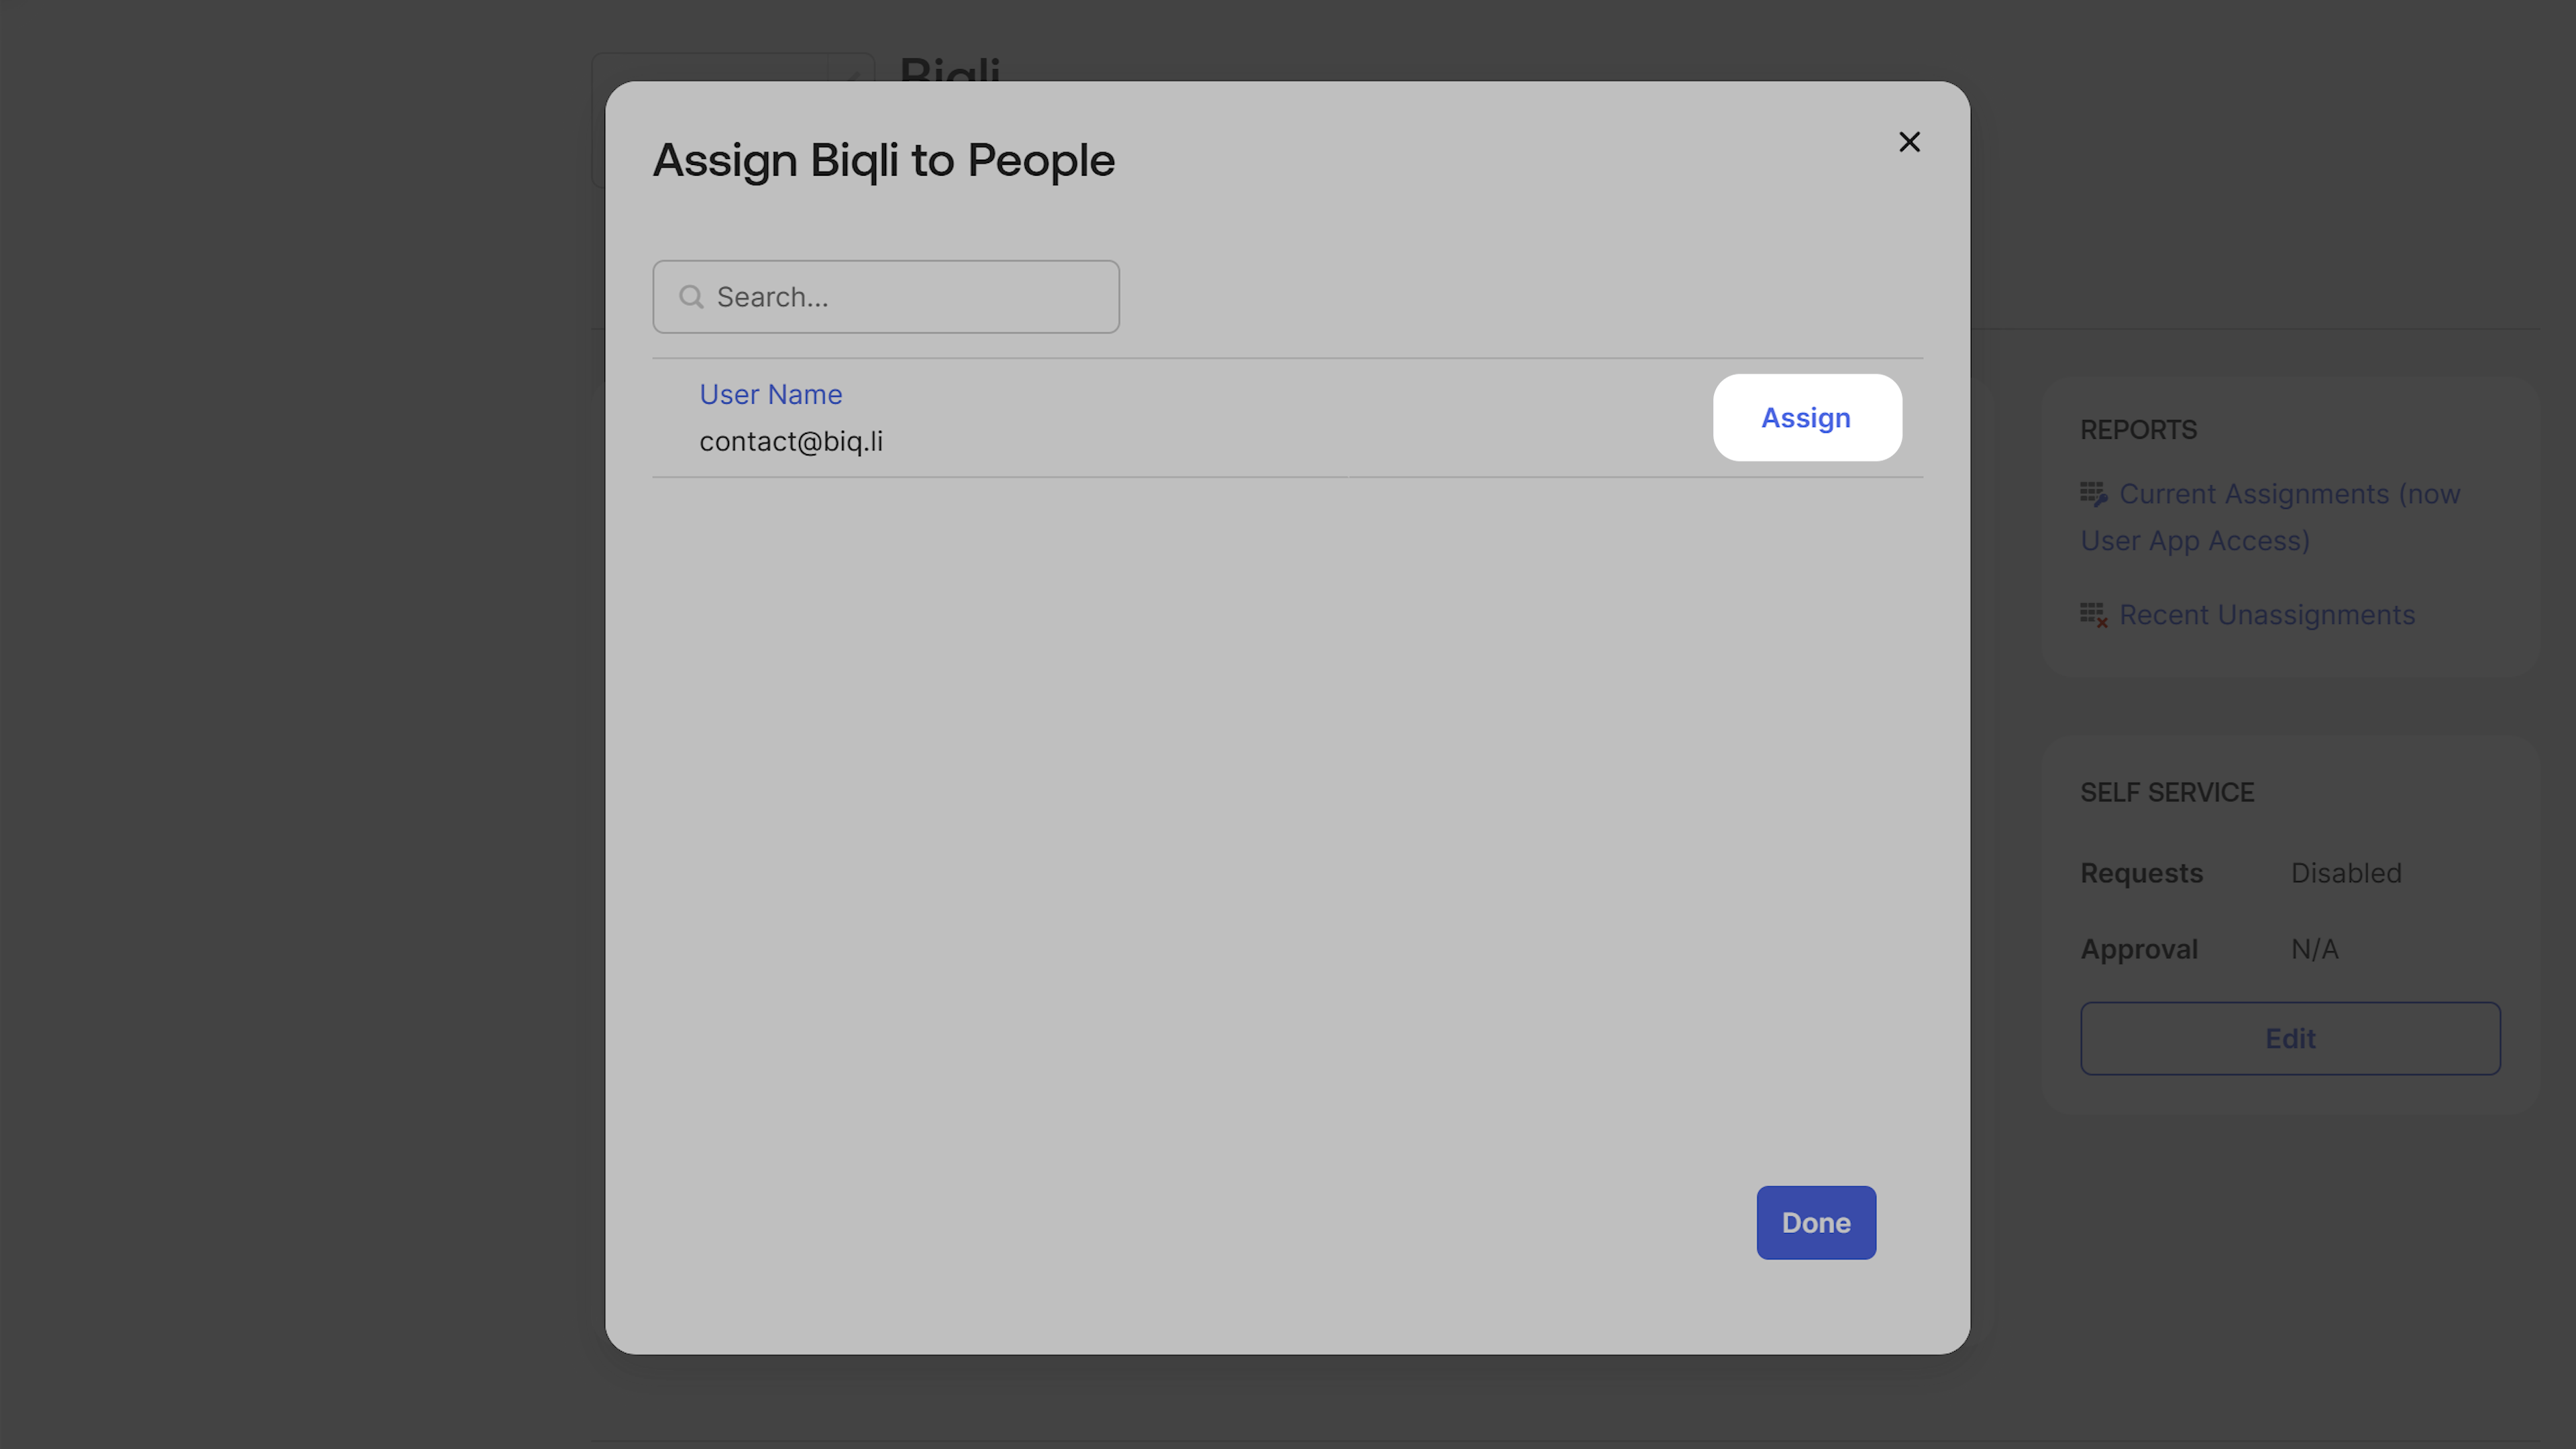
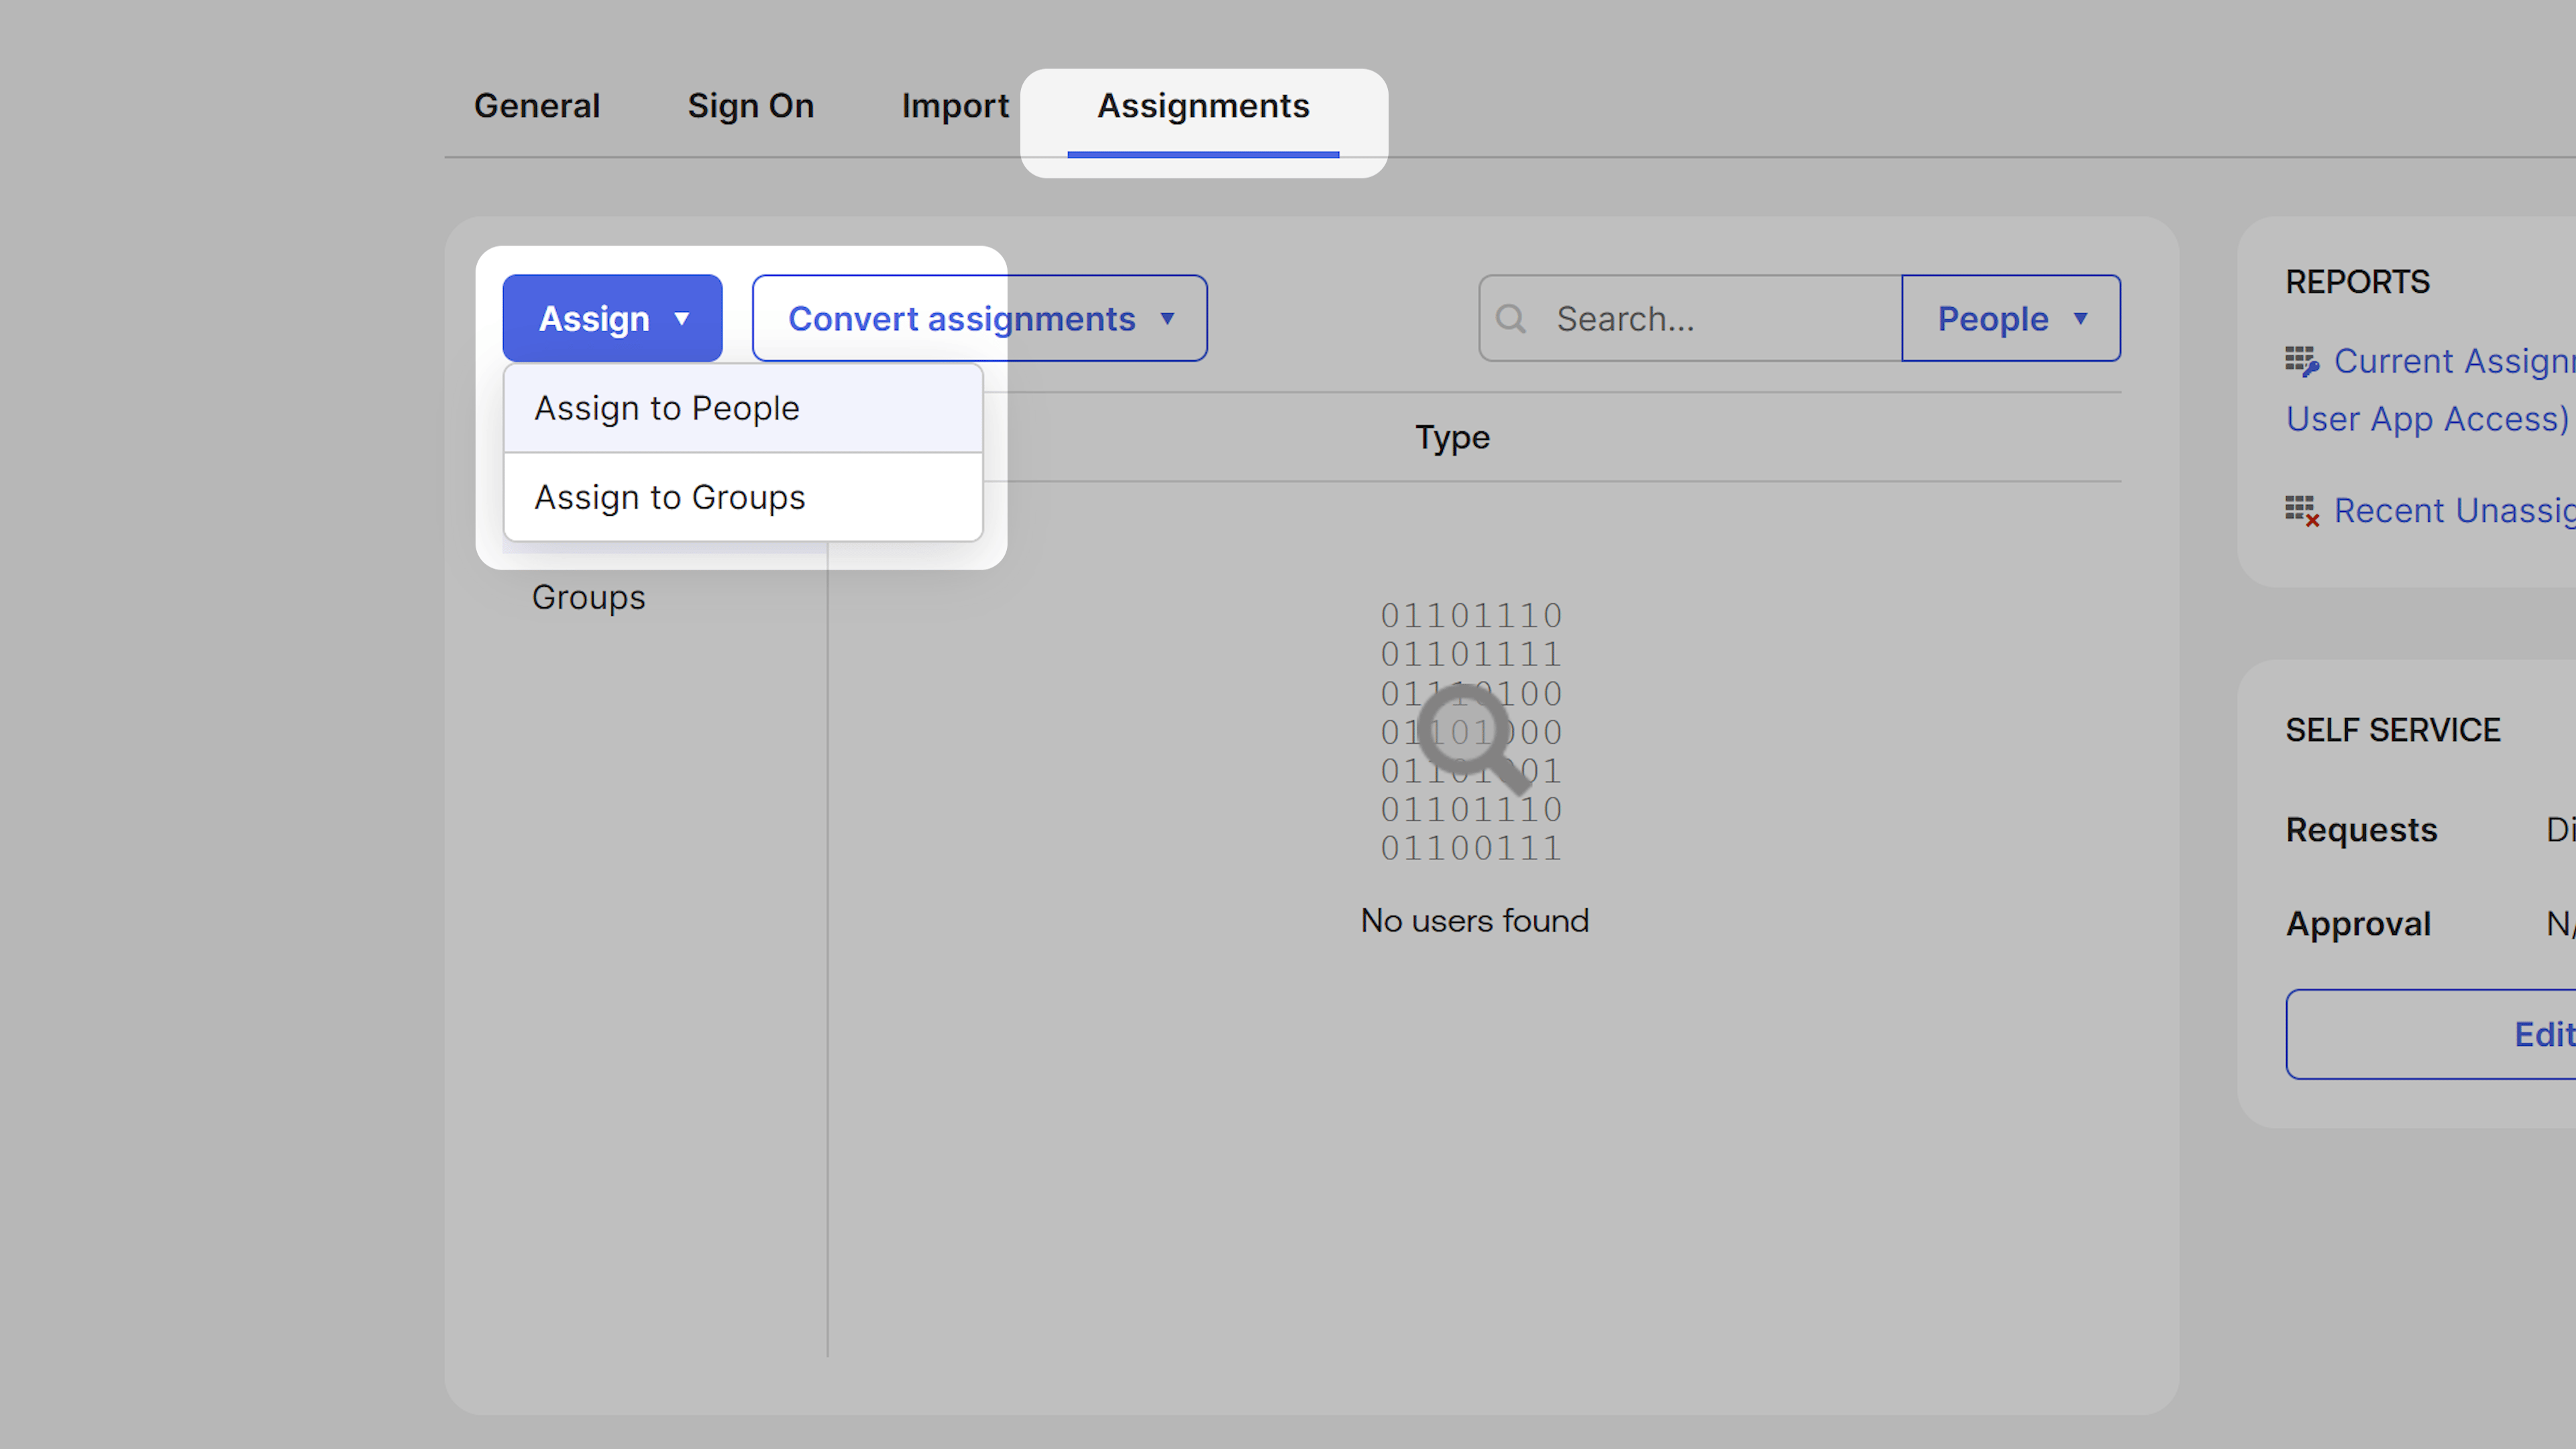 Select the users or groups you want to assign and click **Assign**.
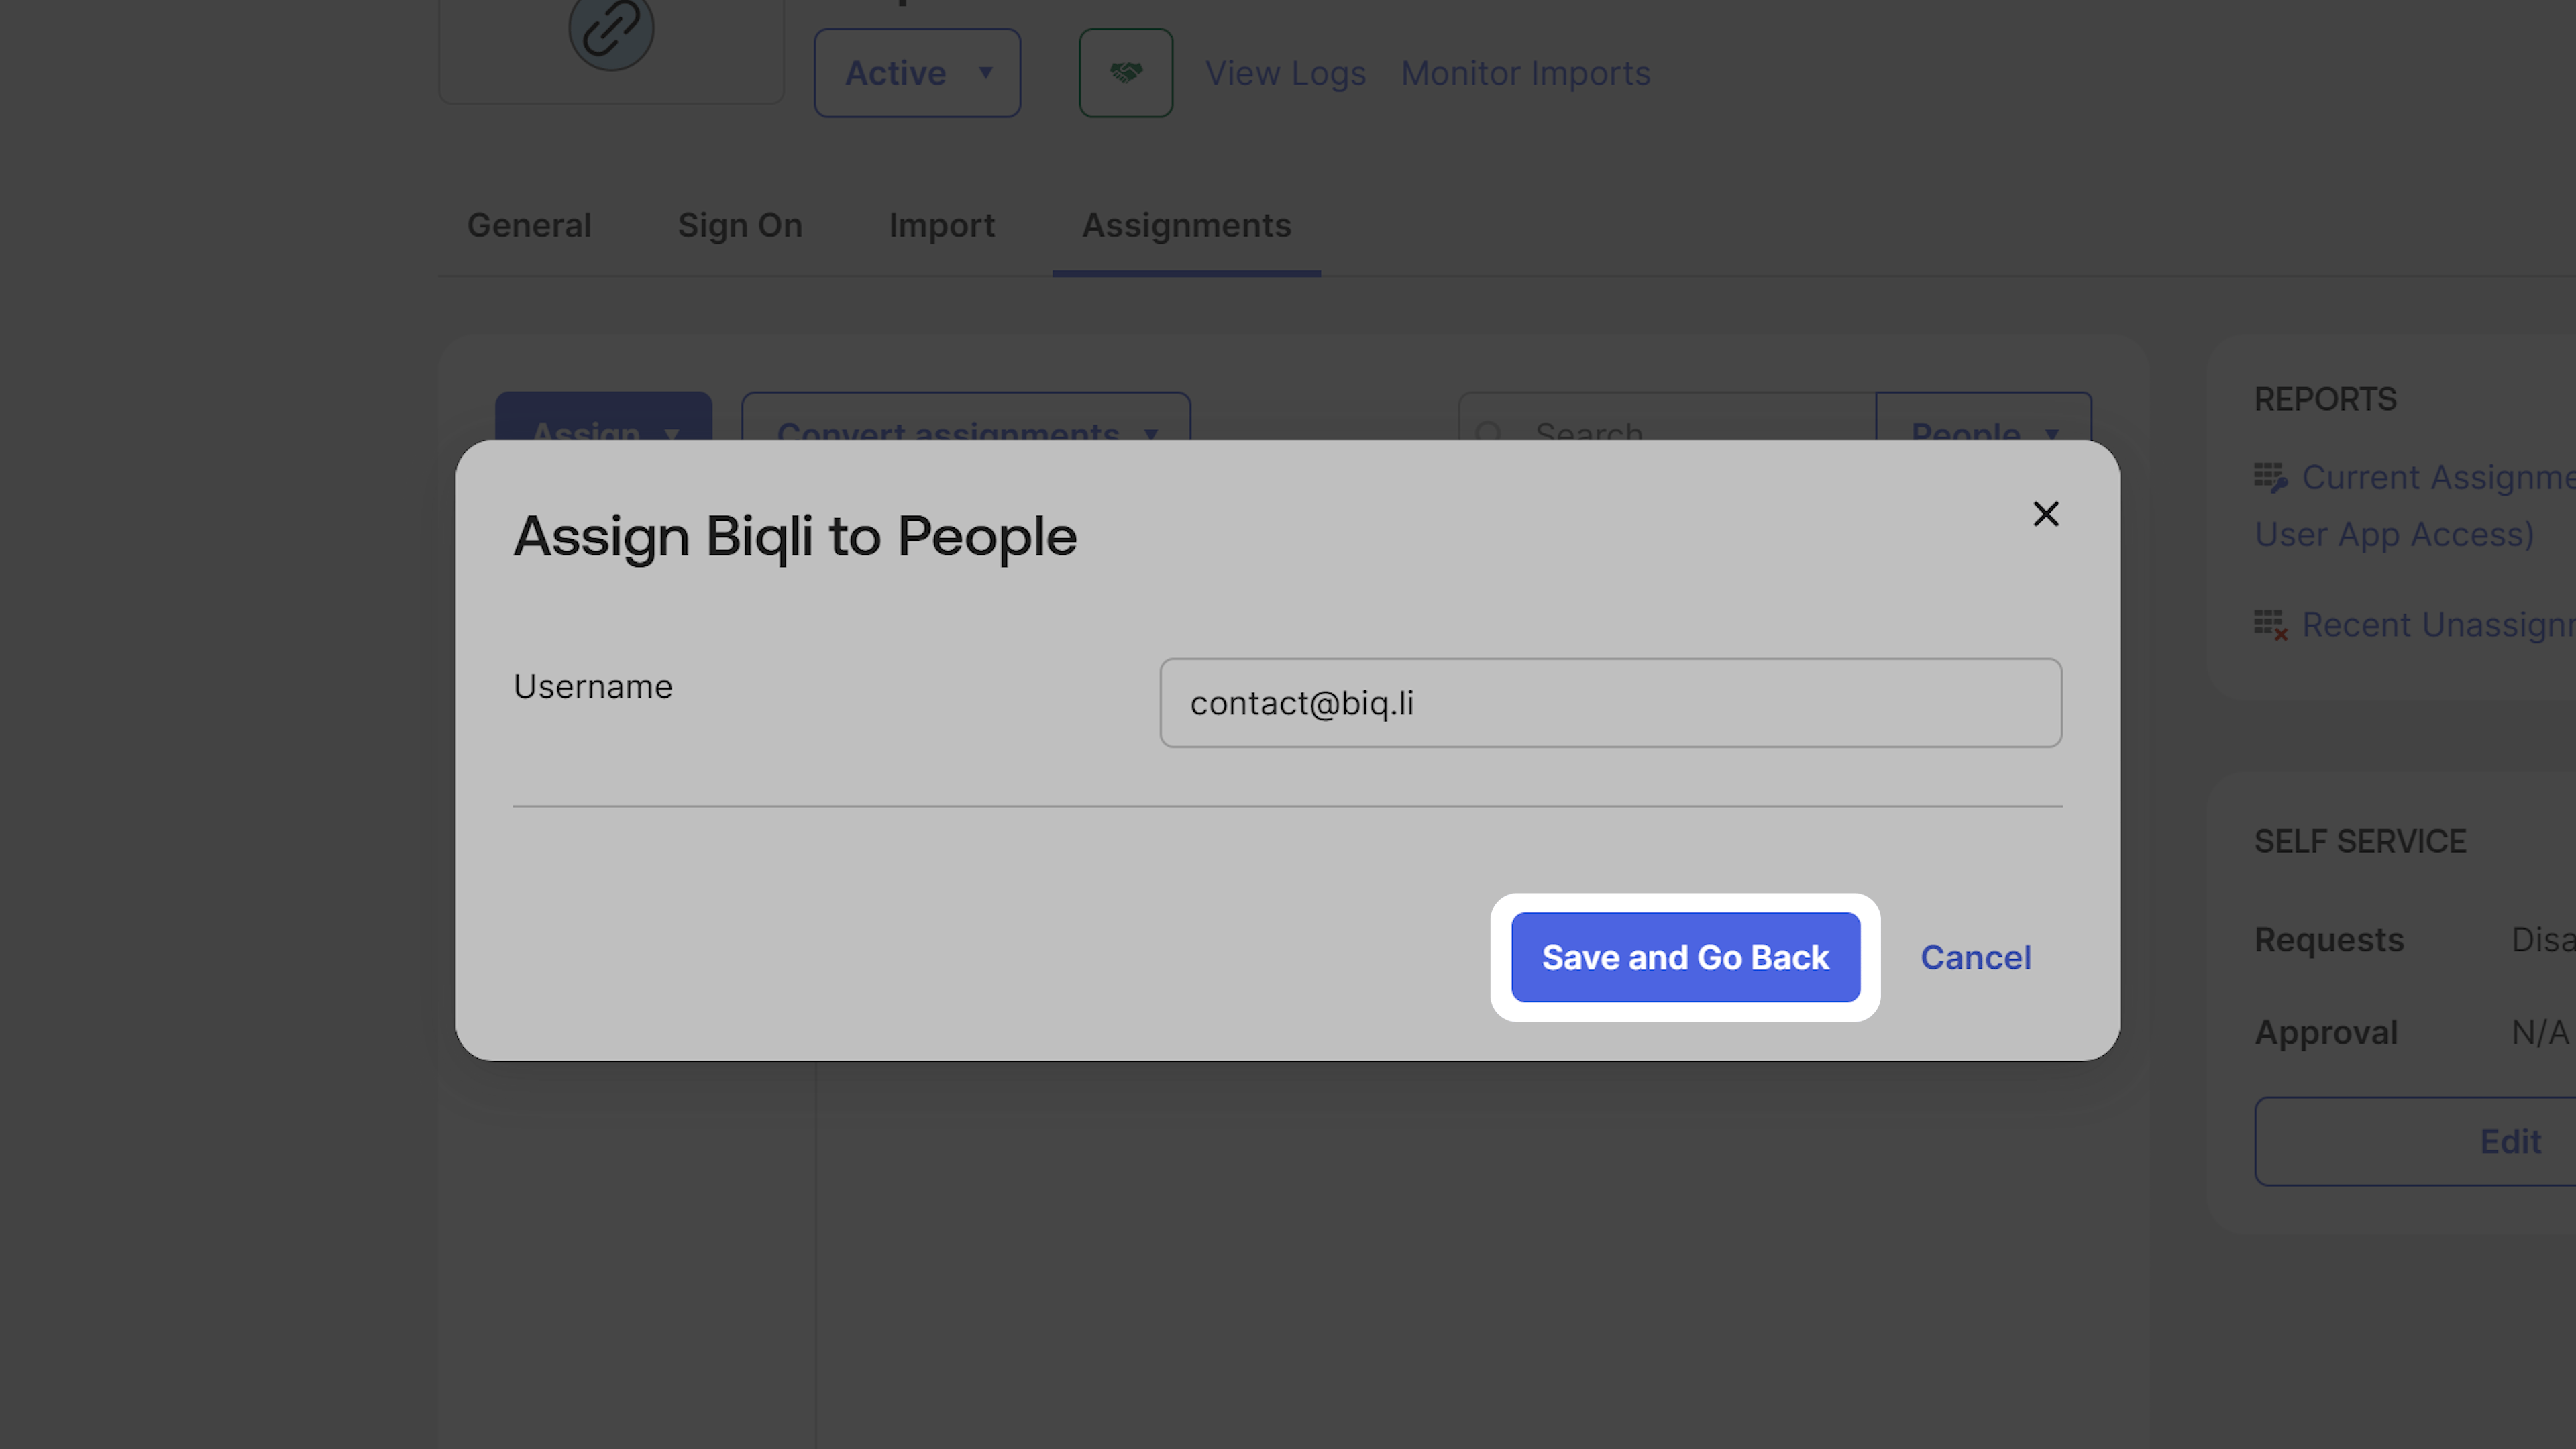
 On the next screen, scroll to the bottom and click **Save and Go Back**.
 The users you assigned will now be able to sign in to Biqli using Okta SSO.
## Technical Notes
**Just-In-Time (JIT) Provisioning**: When users sign in for the first time, their Biqli account will be automatically created and assigned to your workspace.
We highly recommend configuring [SCIM Directory Sync](/workspace/saml-sso/okta-scim) before assigning users & groups to your workspace. This ensures users are automatically added when assigned, and immediately deactivated in Biqli when disabled in Okta.
The users you assigned will now be able to sign in to Biqli using Okta SSO.
## Technical Notes
**Just-In-Time (JIT) Provisioning**: When users sign in for the first time, their Biqli account will be automatically created and assigned to your workspace.
We highly recommend configuring [SCIM Directory Sync](/workspace/saml-sso/okta-scim) before assigning users & groups to your workspace. This ensures users are automatically added when assigned, and immediately deactivated in Biqli when disabled in Okta.