> ## Documentation Index
> Fetch the complete documentation index at: https://learn.biq.li/llms.txt
> Use this file to discover all available pages before exploring further.
# Configuring SAML SSO with Google Workspace
> For Biqli Enterprise users, securely manage your team's access to Biqli using Google Workspace SAML SSO.
**Enterprise Plan Feature**: SAML Single Sign-On is available exclusively for workspaces on the **Enterprise plan**.
For Biqli Enterprise users, you can securely manage your team's access to Biqli using Google Workspace SAML SSO.
## Step 1: Create SAML Integration
In your Google Admin dashboard, navigate to **Apps** in the left sidebar and select **Web and mobile apps** from the list.
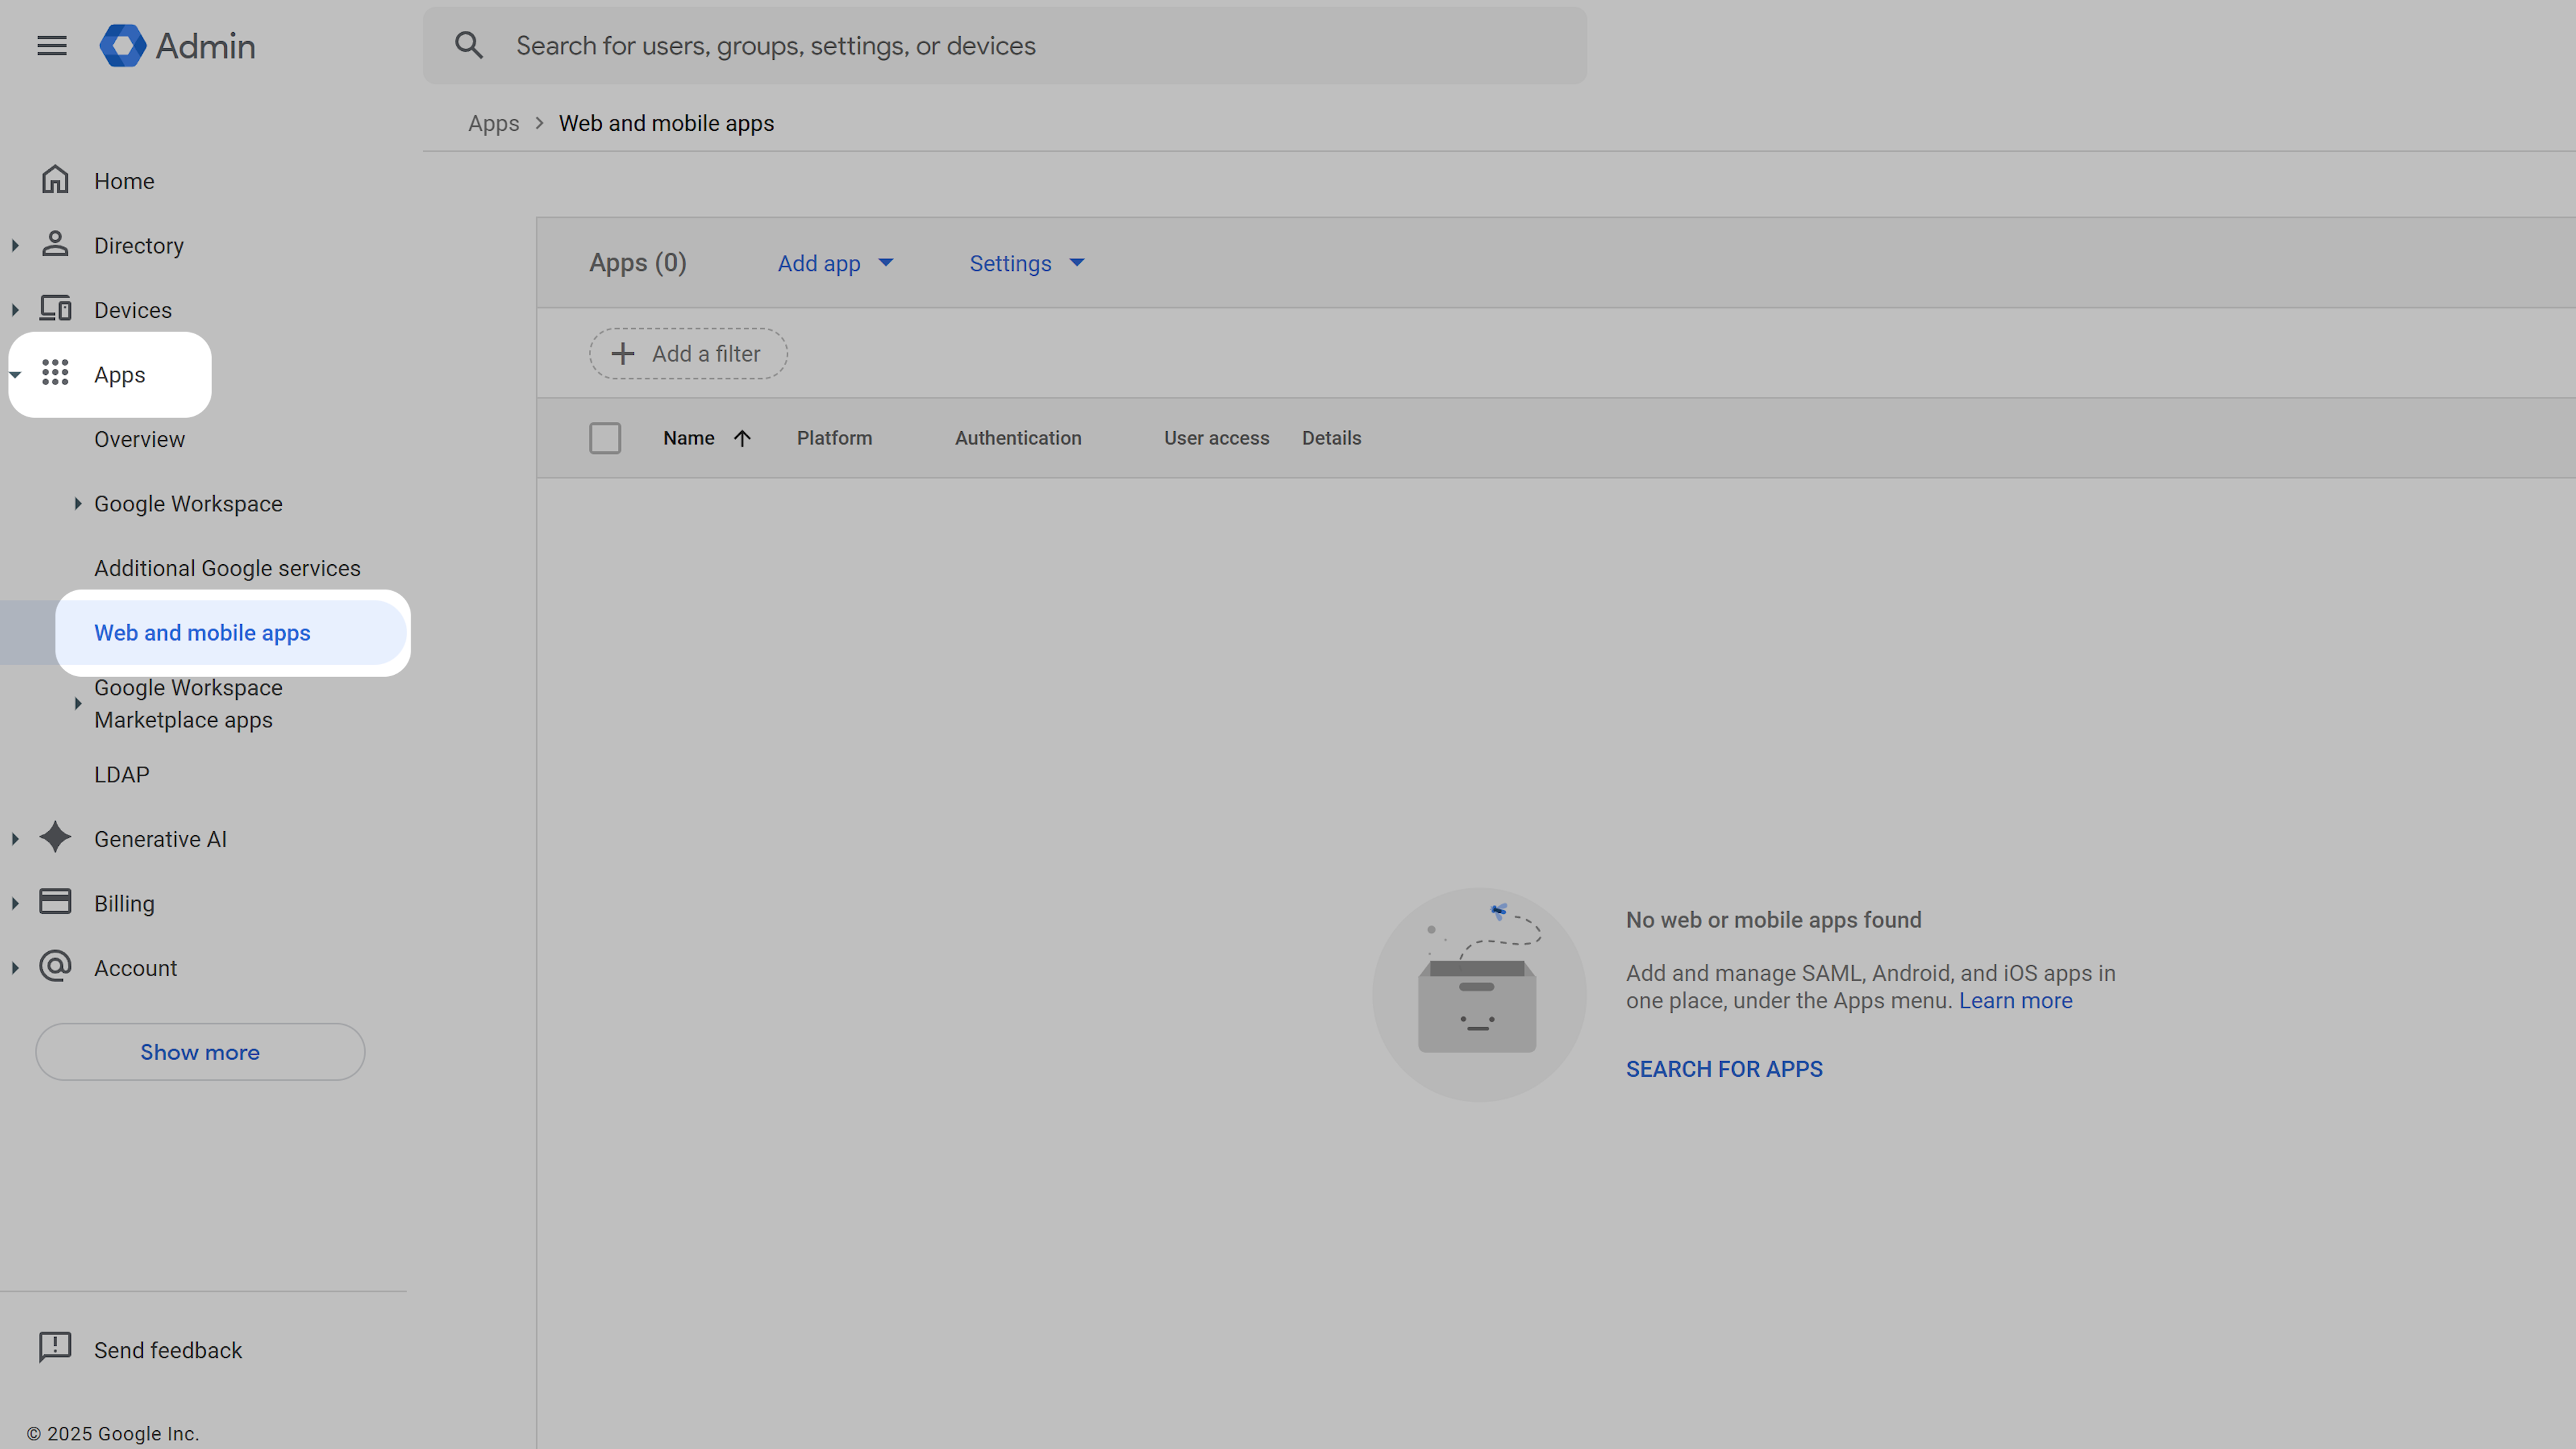 Click **Add app** and select **Add custom SAML app** from the dropdown menu.
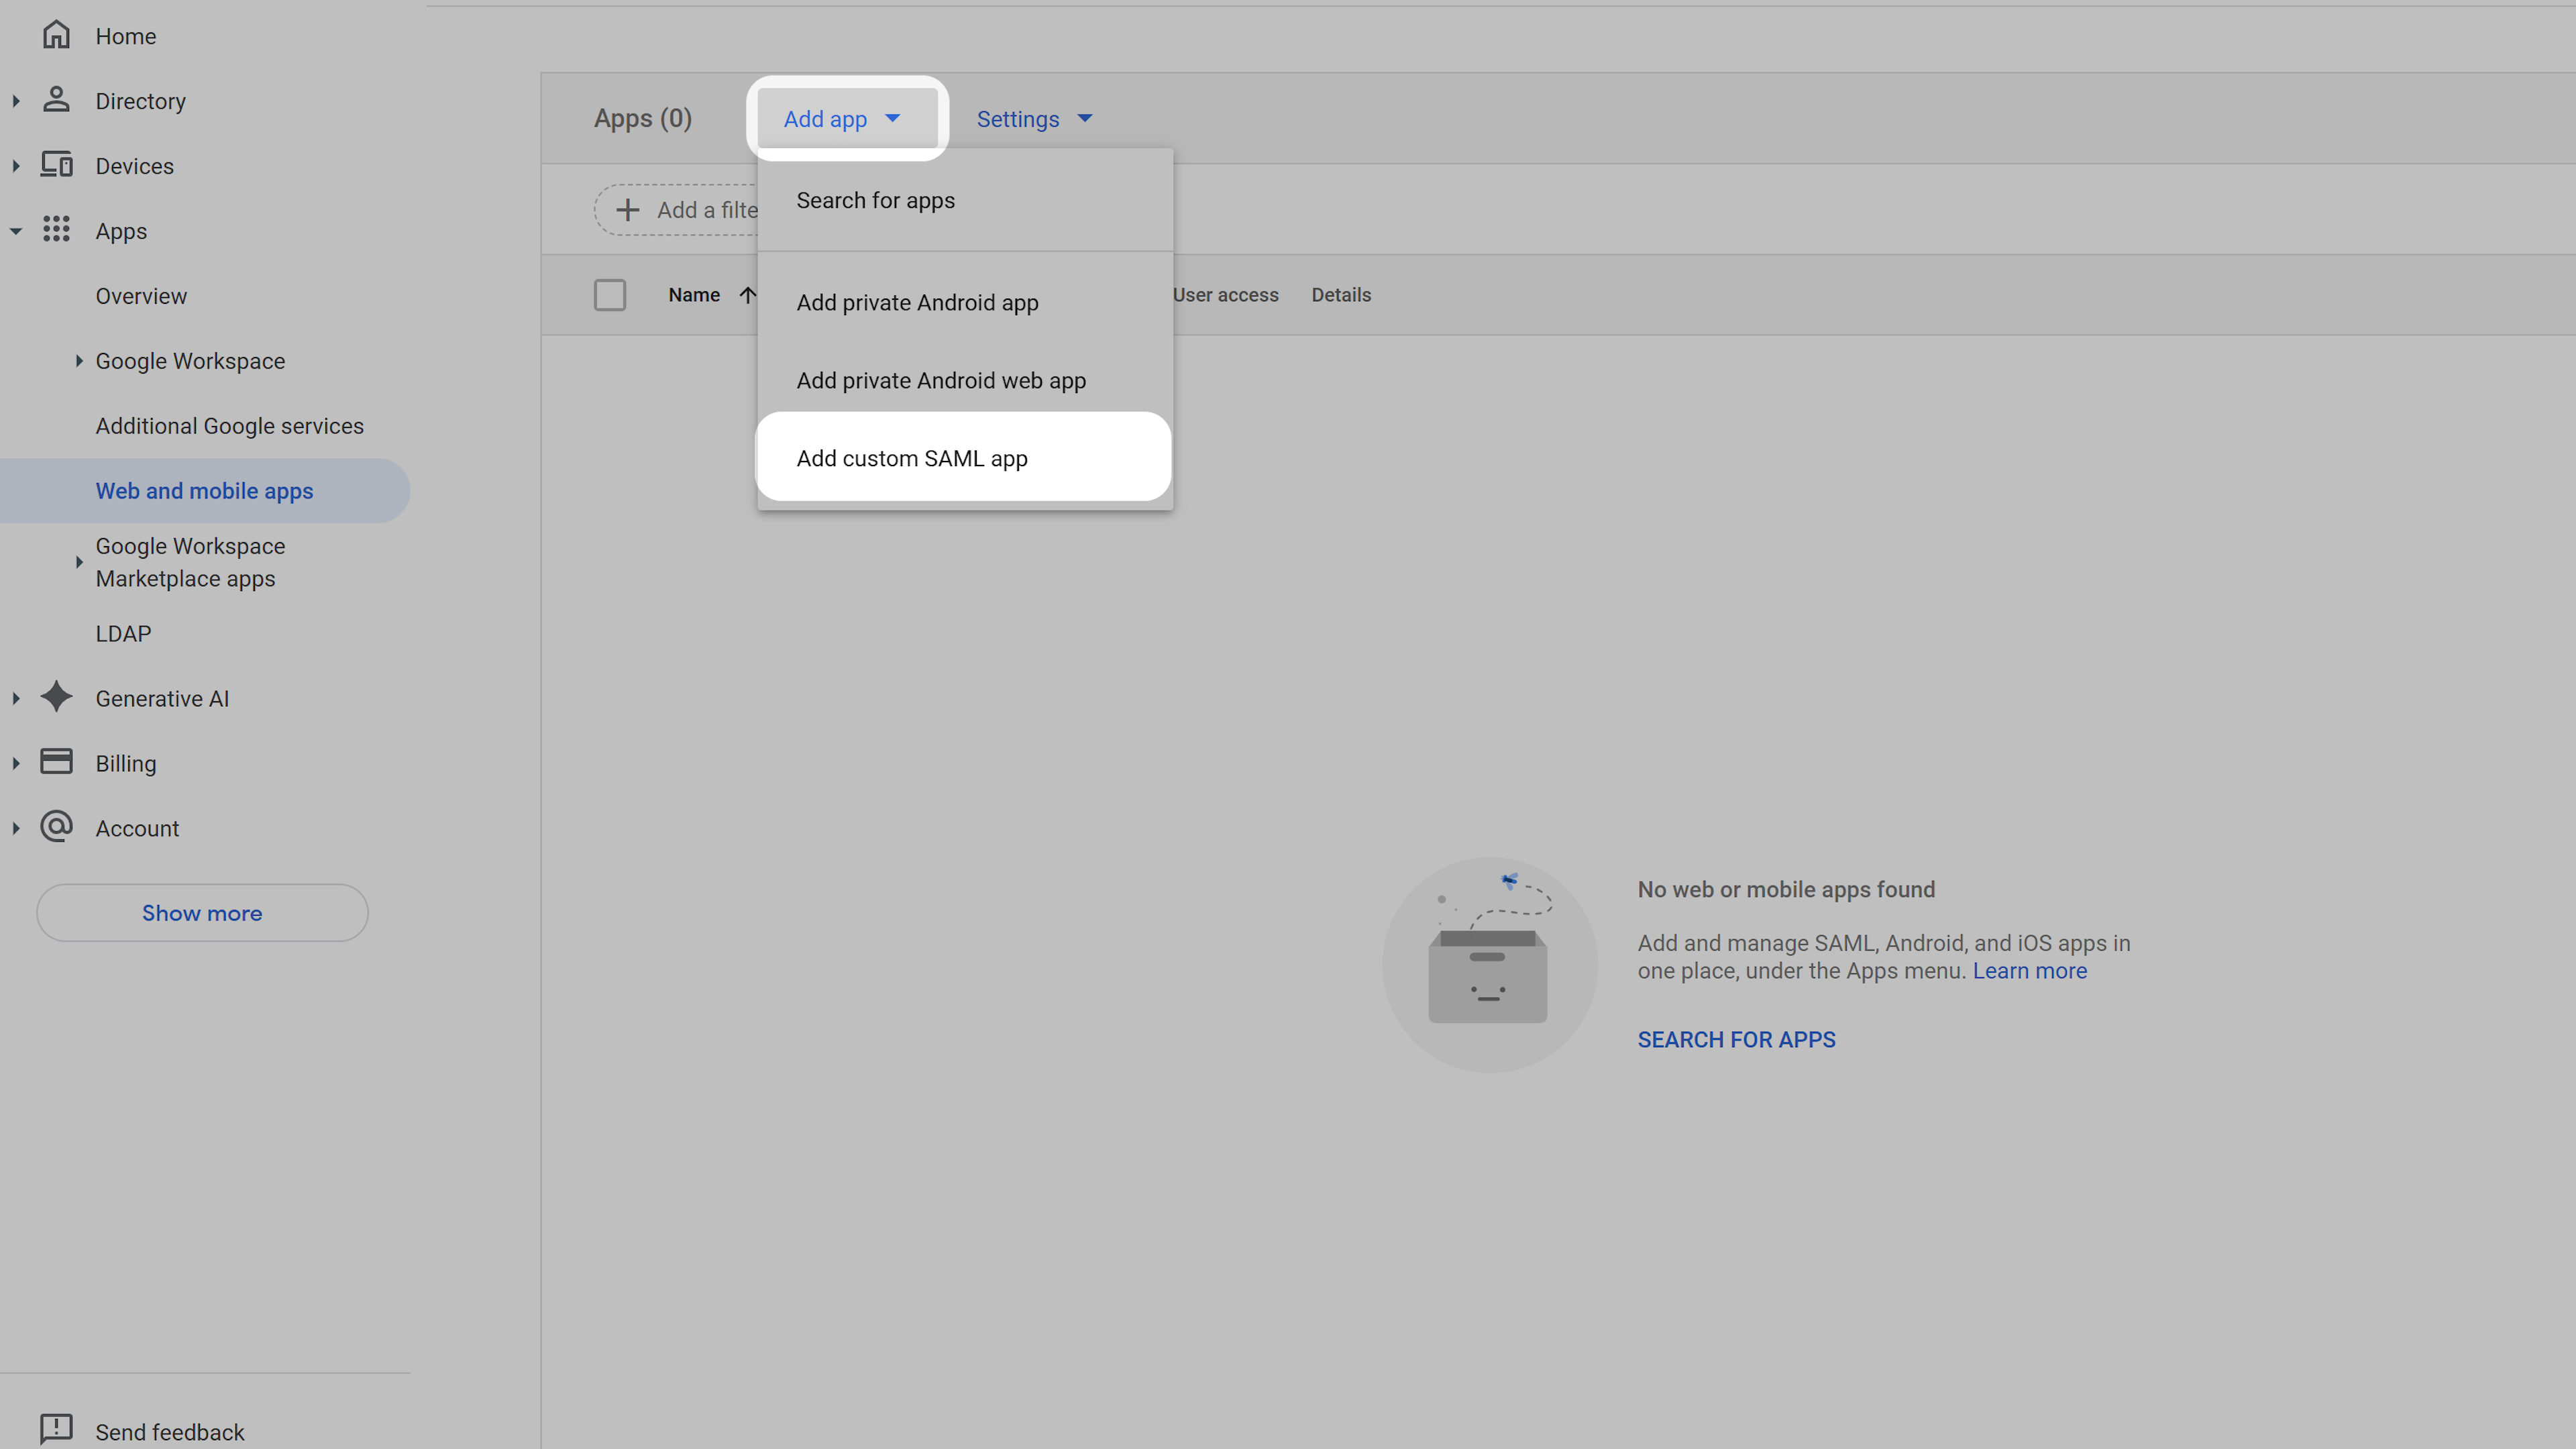 Enter the **App name** (e.g. **Biqli**) and click **Continue**.
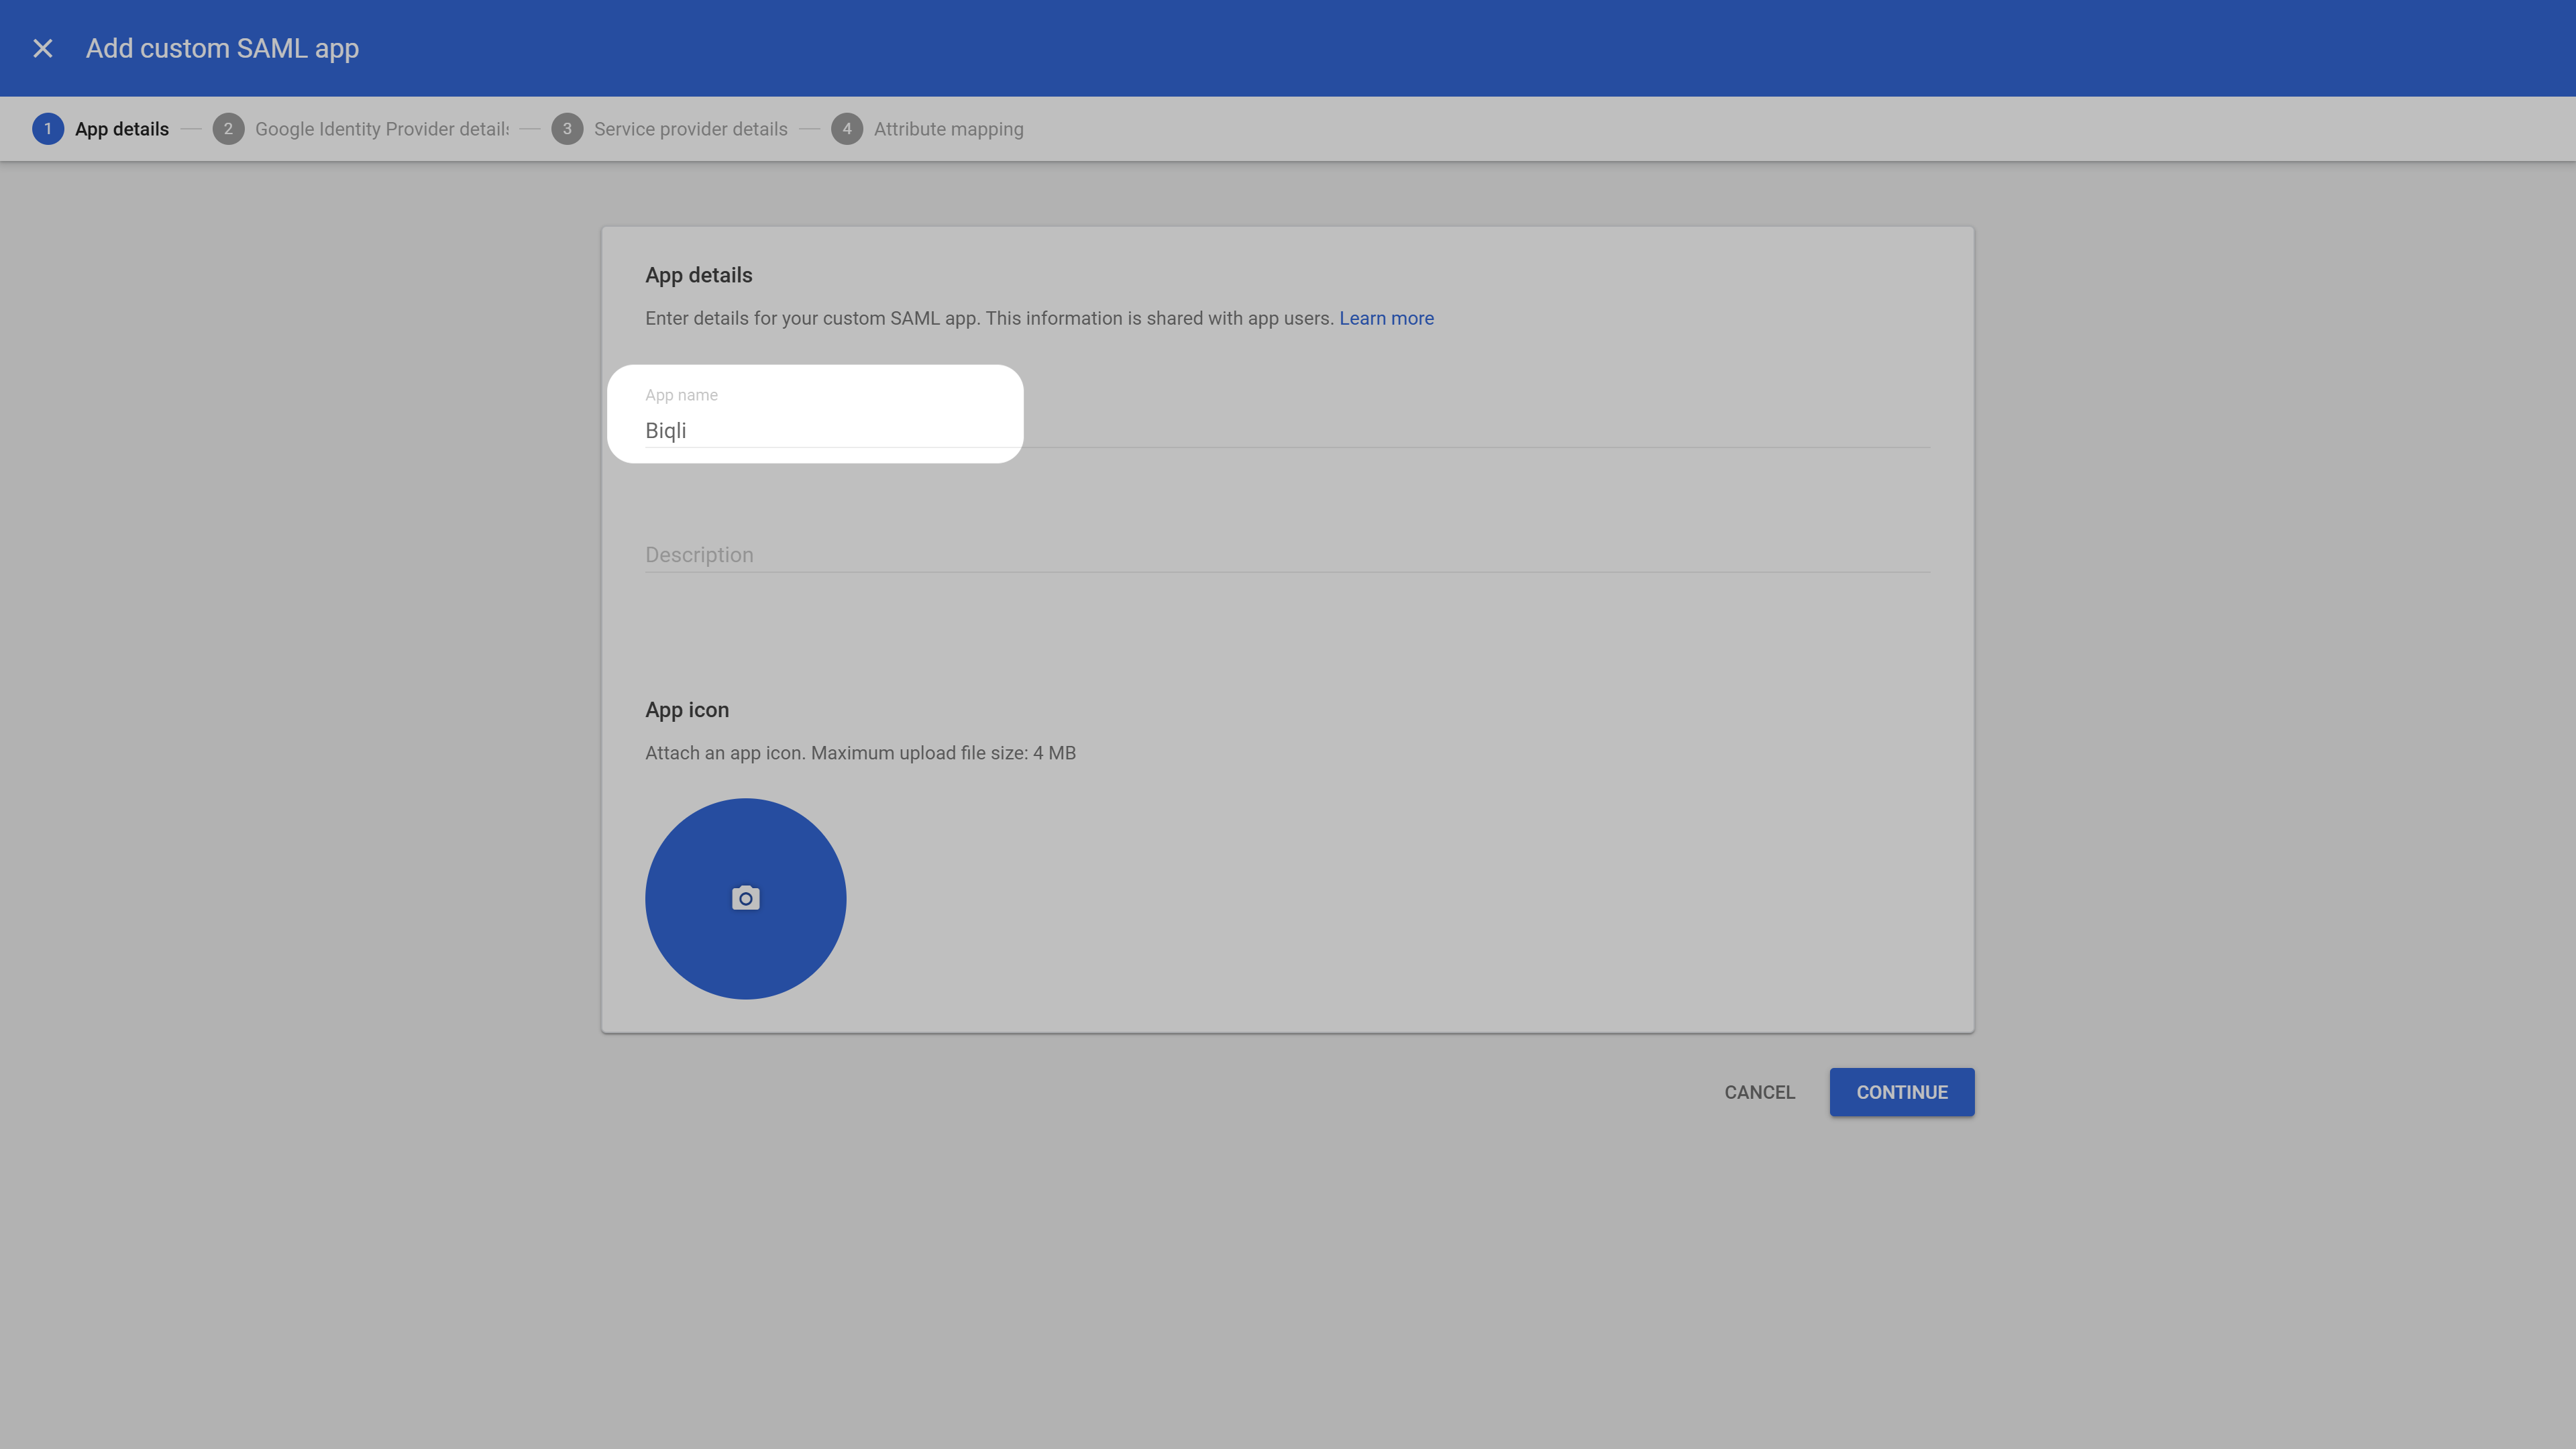 In the next screen, click **Download Metadata** to download the metadata XML file, then click **Continue**. You will need this file in Step 3.
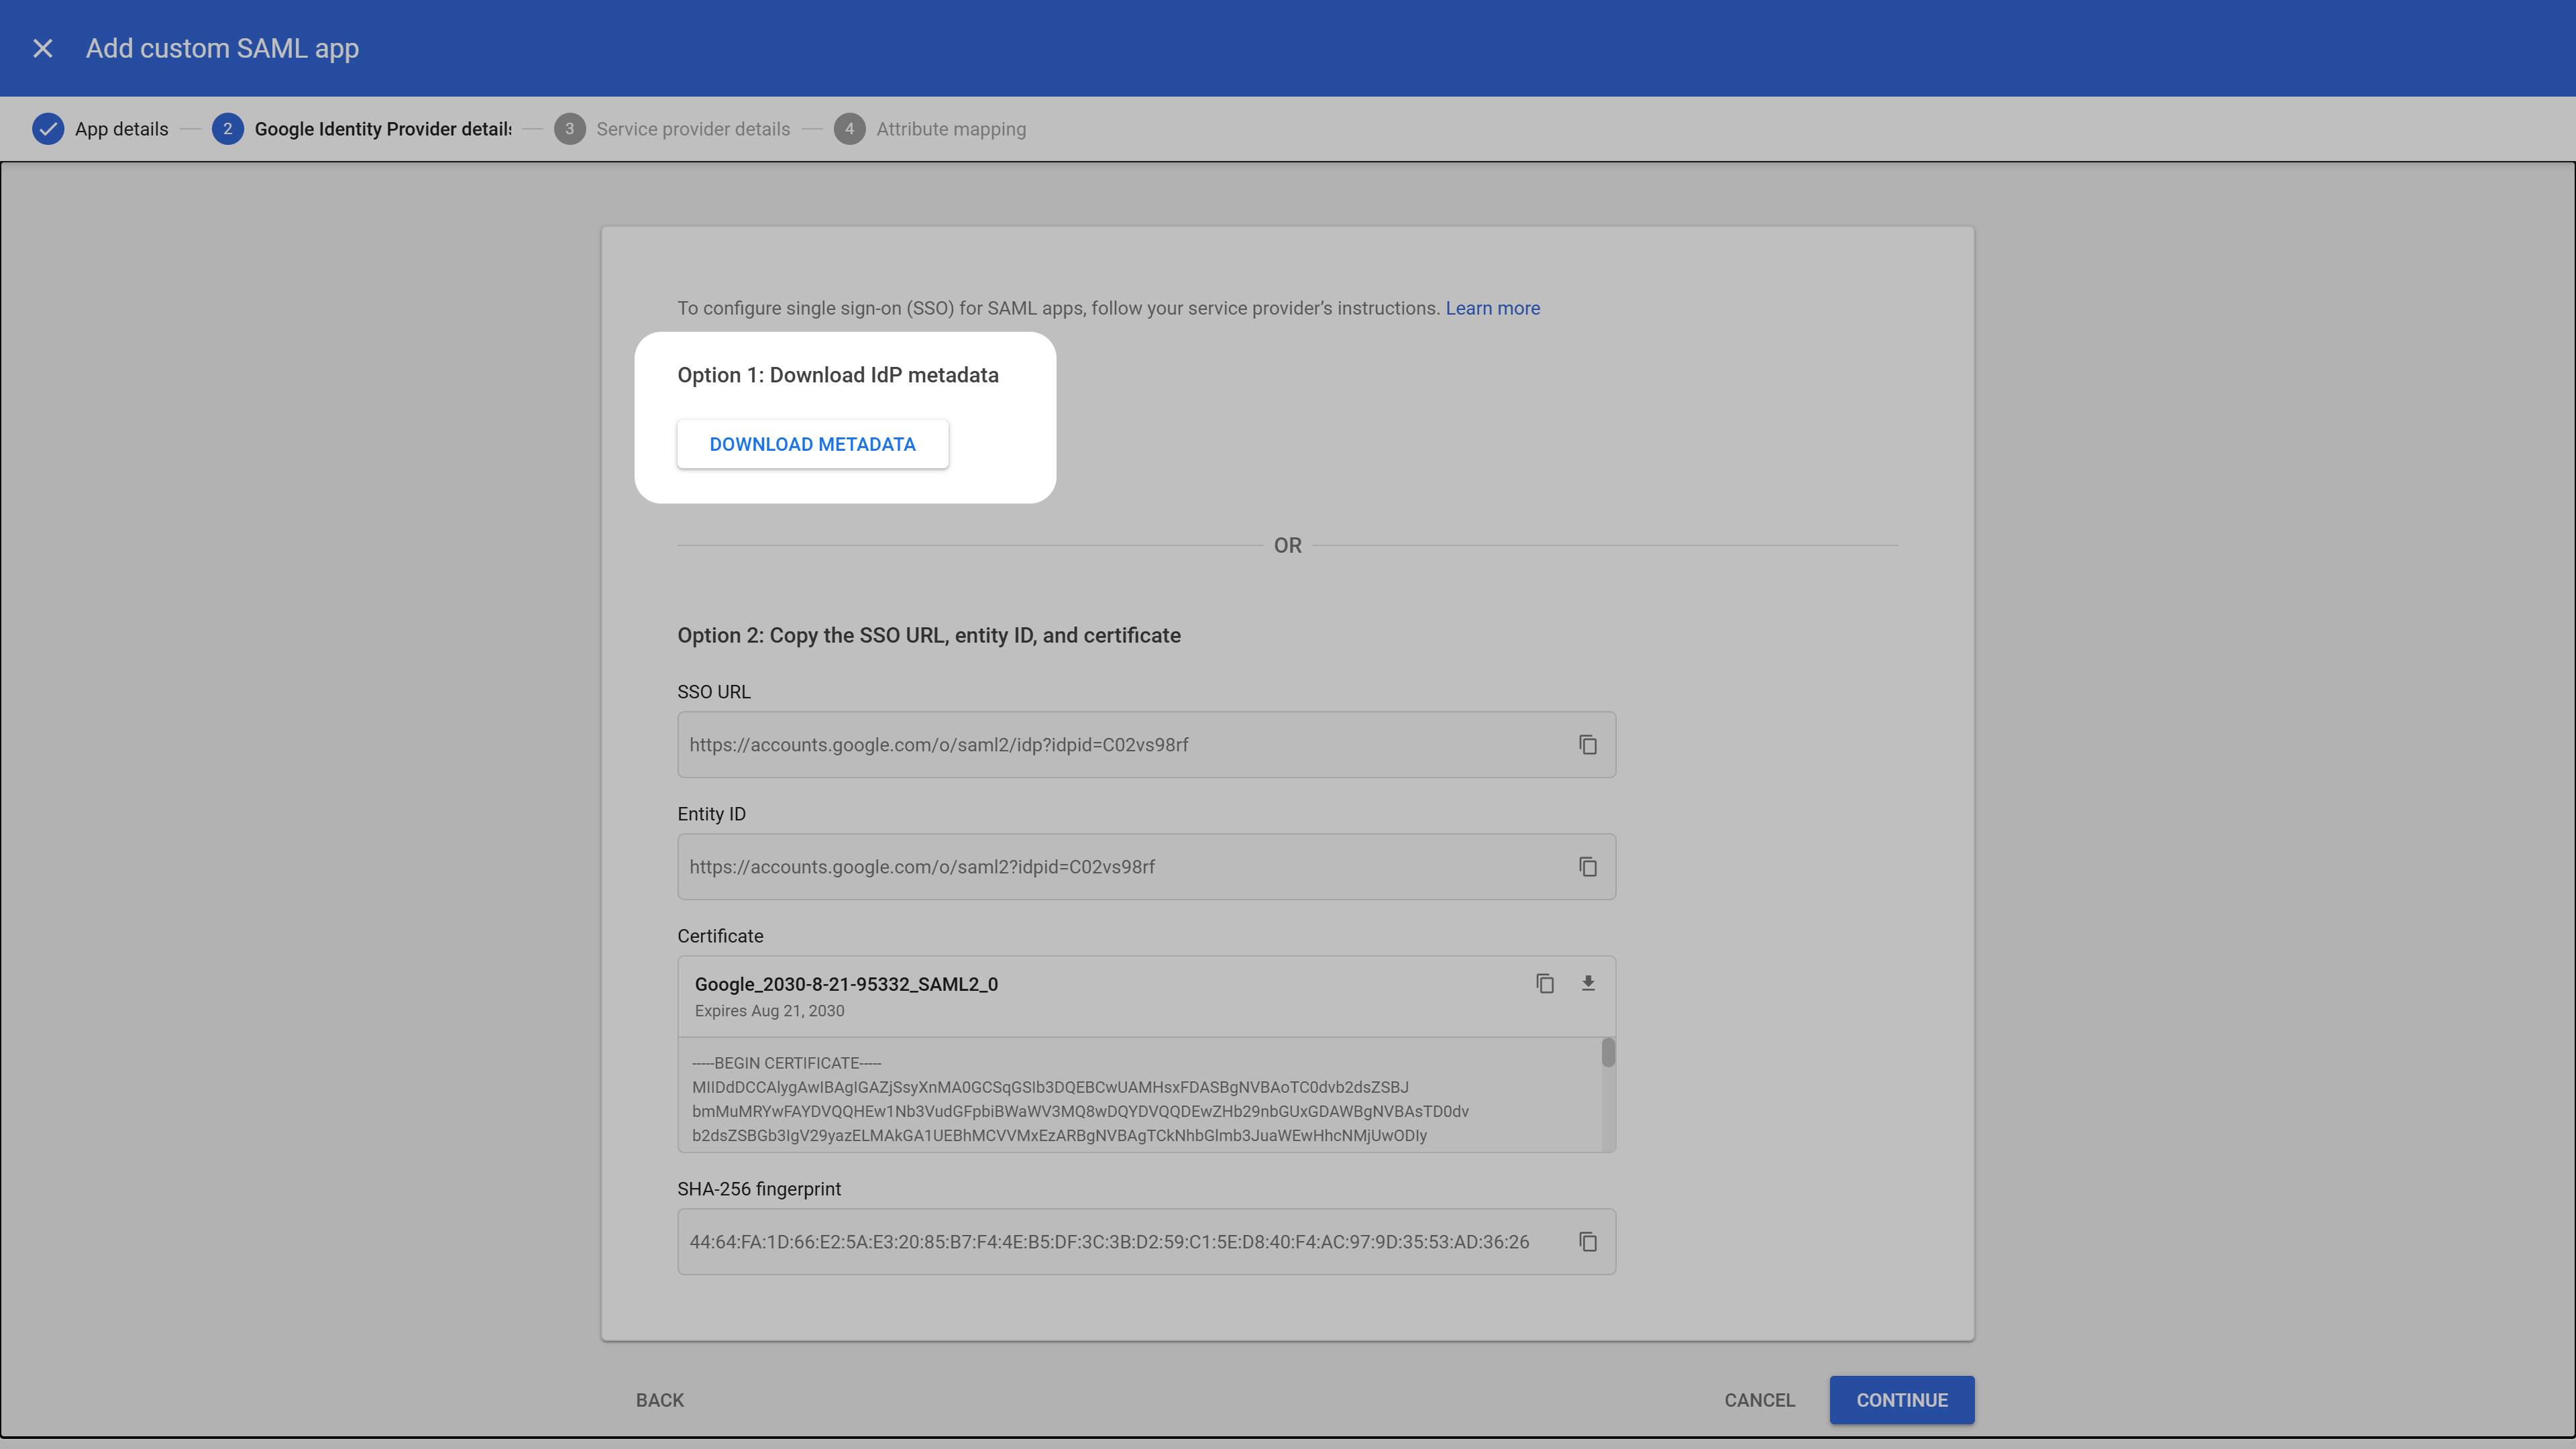 Under **Service provider details**, copy the following values and paste them into their respective fields:
```text ACS URL theme={null}
https://biq.li/saml/acs
```
```text Entity ID theme={null}
https://biq.li/workspaces/{WORKSPACE_SLUG}
```
Please ensure you replace `{WORKSPACE_SLUG}` with the slug of the specific workspace in which you are activating Google Workspace SAML SSO.
Under **Name ID**, set the **Name ID format** to `Email` and the **Name ID** mapping to `Basic Information > Primary email`.
Under **Service provider details**, copy the following values and paste them into their respective fields:
```text ACS URL theme={null}
https://biq.li/saml/acs
```
```text Entity ID theme={null}
https://biq.li/workspaces/{WORKSPACE_SLUG}
```
Please ensure you replace `{WORKSPACE_SLUG}` with the slug of the specific workspace in which you are activating Google Workspace SAML SSO.
Under **Name ID**, set the **Name ID format** to `Email` and the **Name ID** mapping to `Basic Information > Primary email`.
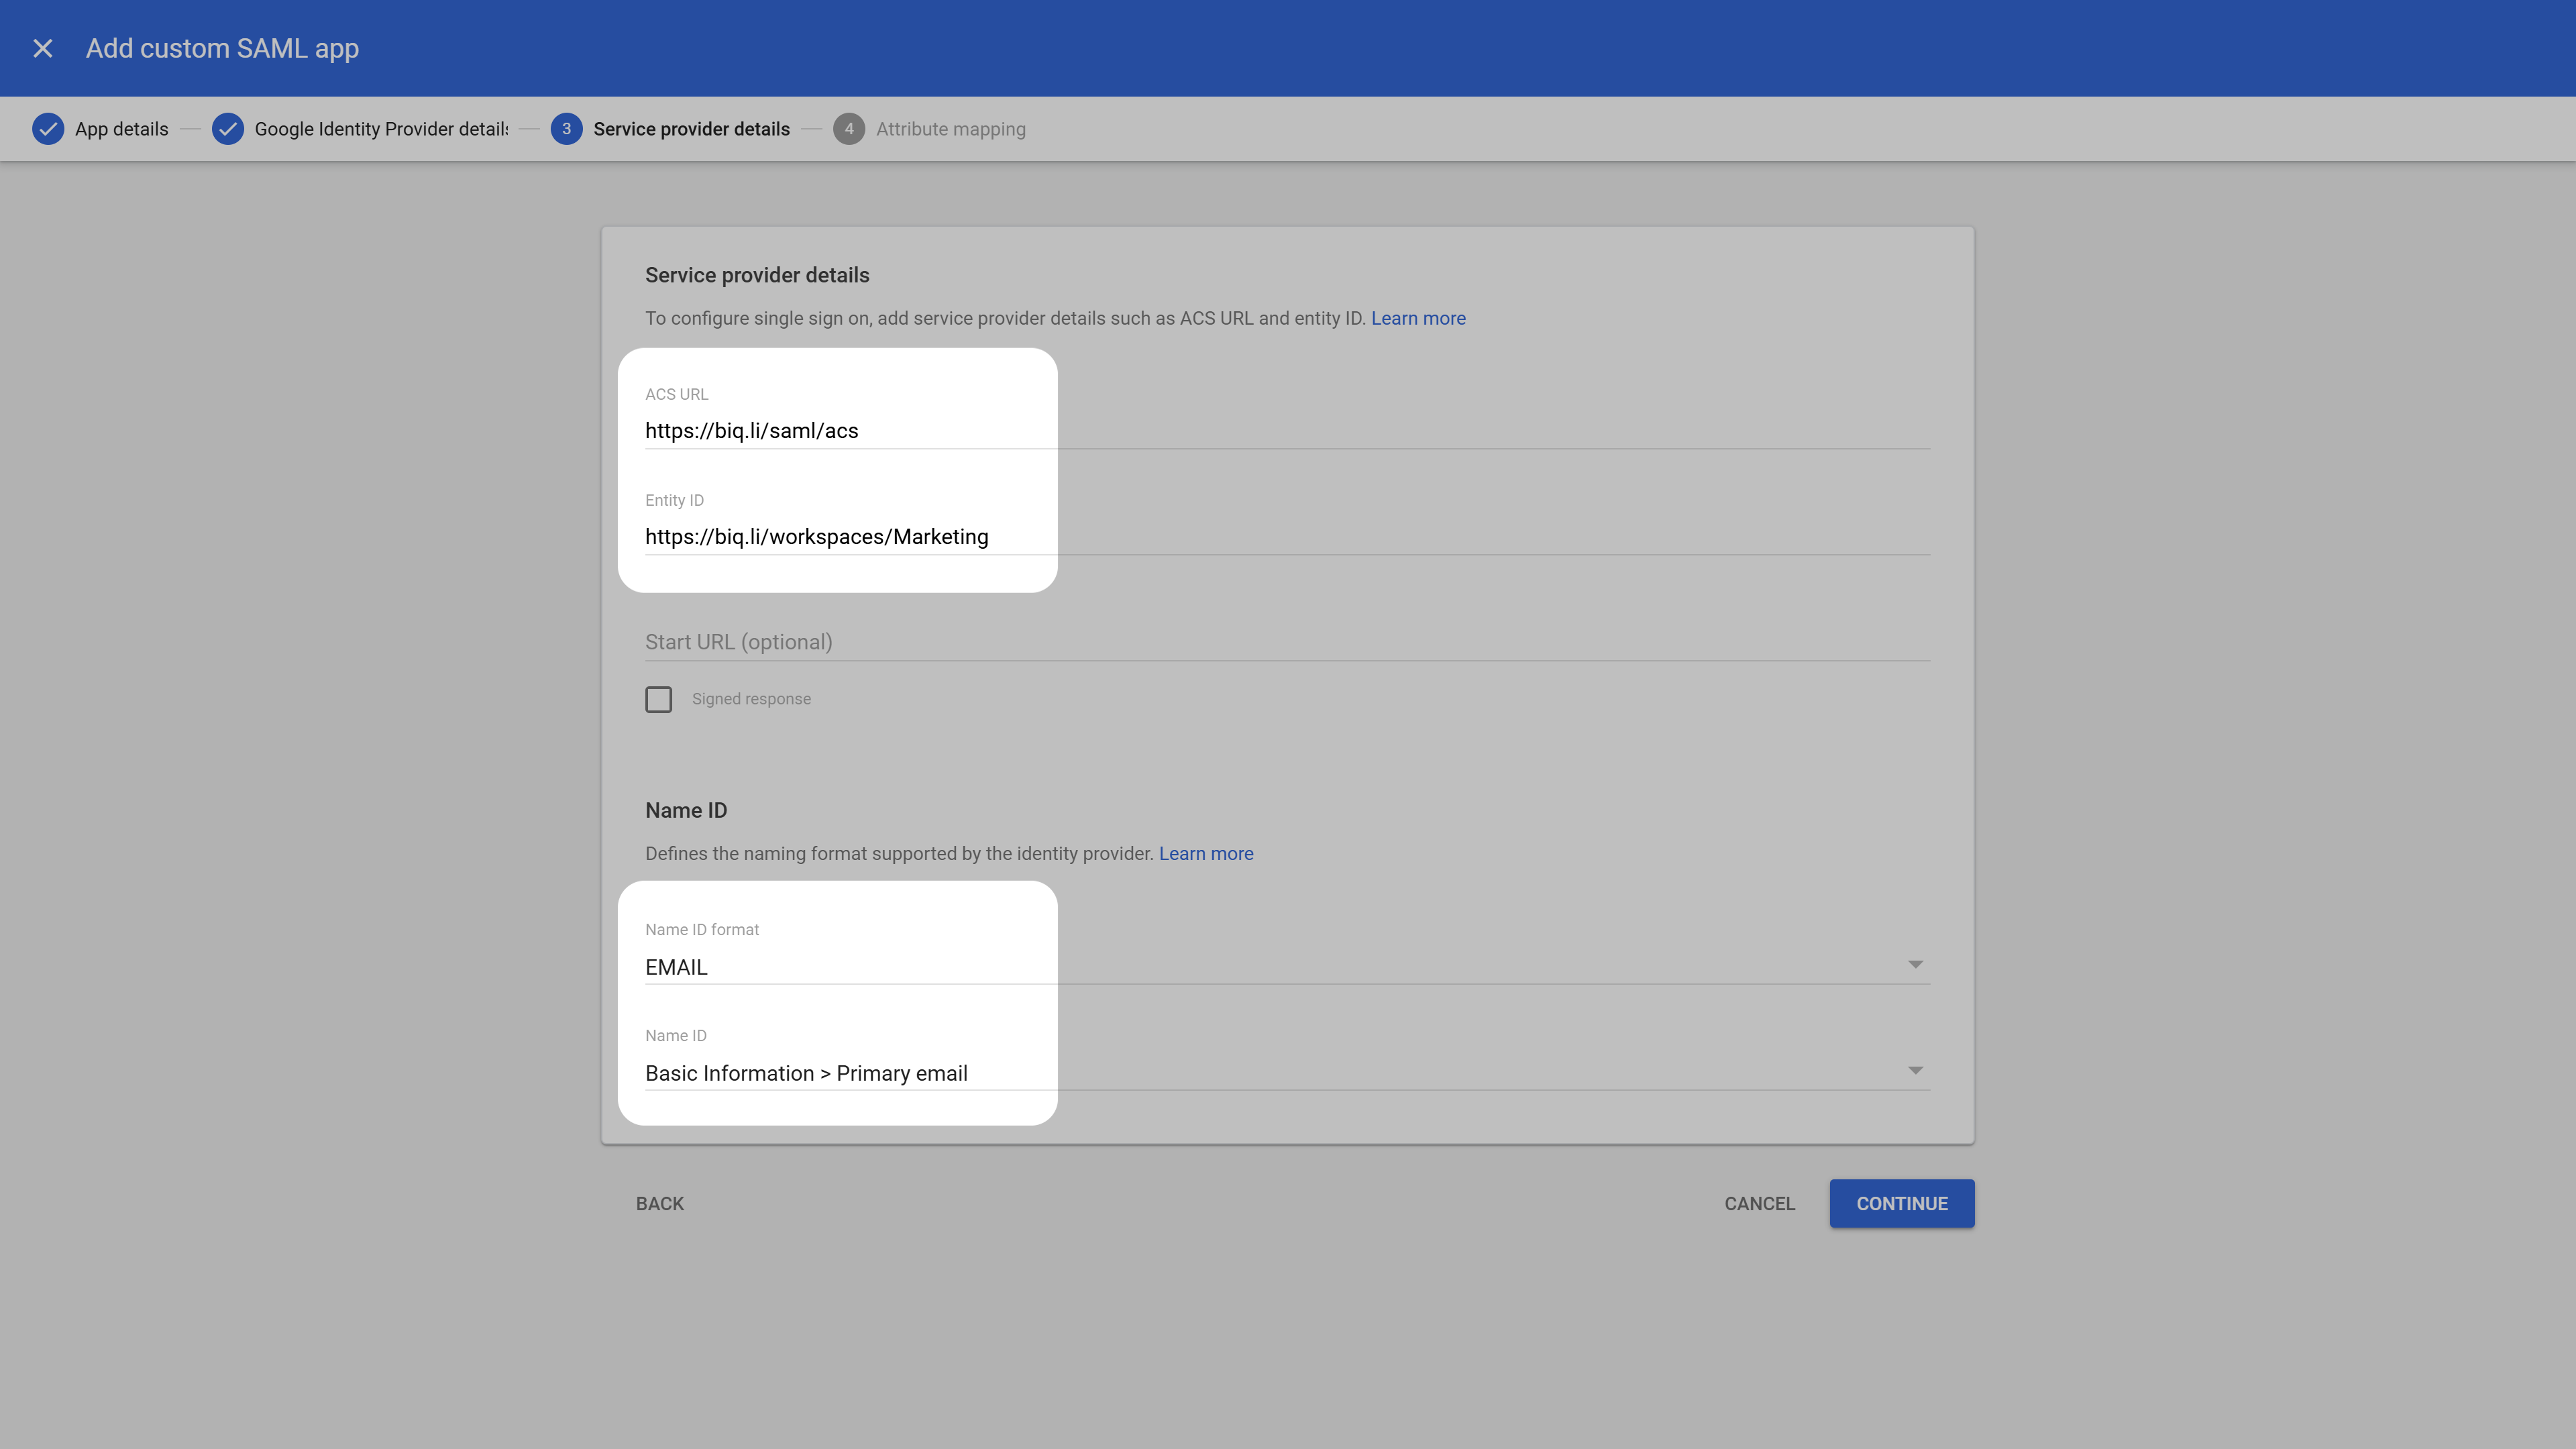 Click **Continue** to proceed to the next step.
## Step 2: Configure Attribute Mapping
On the next screen under the **Attributes** section, click **Add Mapping** and configure the following attribute mappings:
| Google Directory Attribute | App Attribute |
| :------------------------- | :------------ |
| **Primary email** | `email` |
| **First name** | `firstName` |
| **Last name** | `lastName` |
| **Primary email** | `name` |
You can copy the App Attributes directly from below:
```text email theme={null}
email
```
```text firstName theme={null}
firstName
```
```text lastName theme={null}
lastName
```
```text name theme={null}
name
```
Click **Continue** to proceed to the next step.
## Step 2: Configure Attribute Mapping
On the next screen under the **Attributes** section, click **Add Mapping** and configure the following attribute mappings:
| Google Directory Attribute | App Attribute |
| :------------------------- | :------------ |
| **Primary email** | `email` |
| **First name** | `firstName` |
| **Last name** | `lastName` |
| **Primary email** | `name` |
You can copy the App Attributes directly from below:
```text email theme={null}
email
```
```text firstName theme={null}
firstName
```
```text lastName theme={null}
lastName
```
```text name theme={null}
name
```
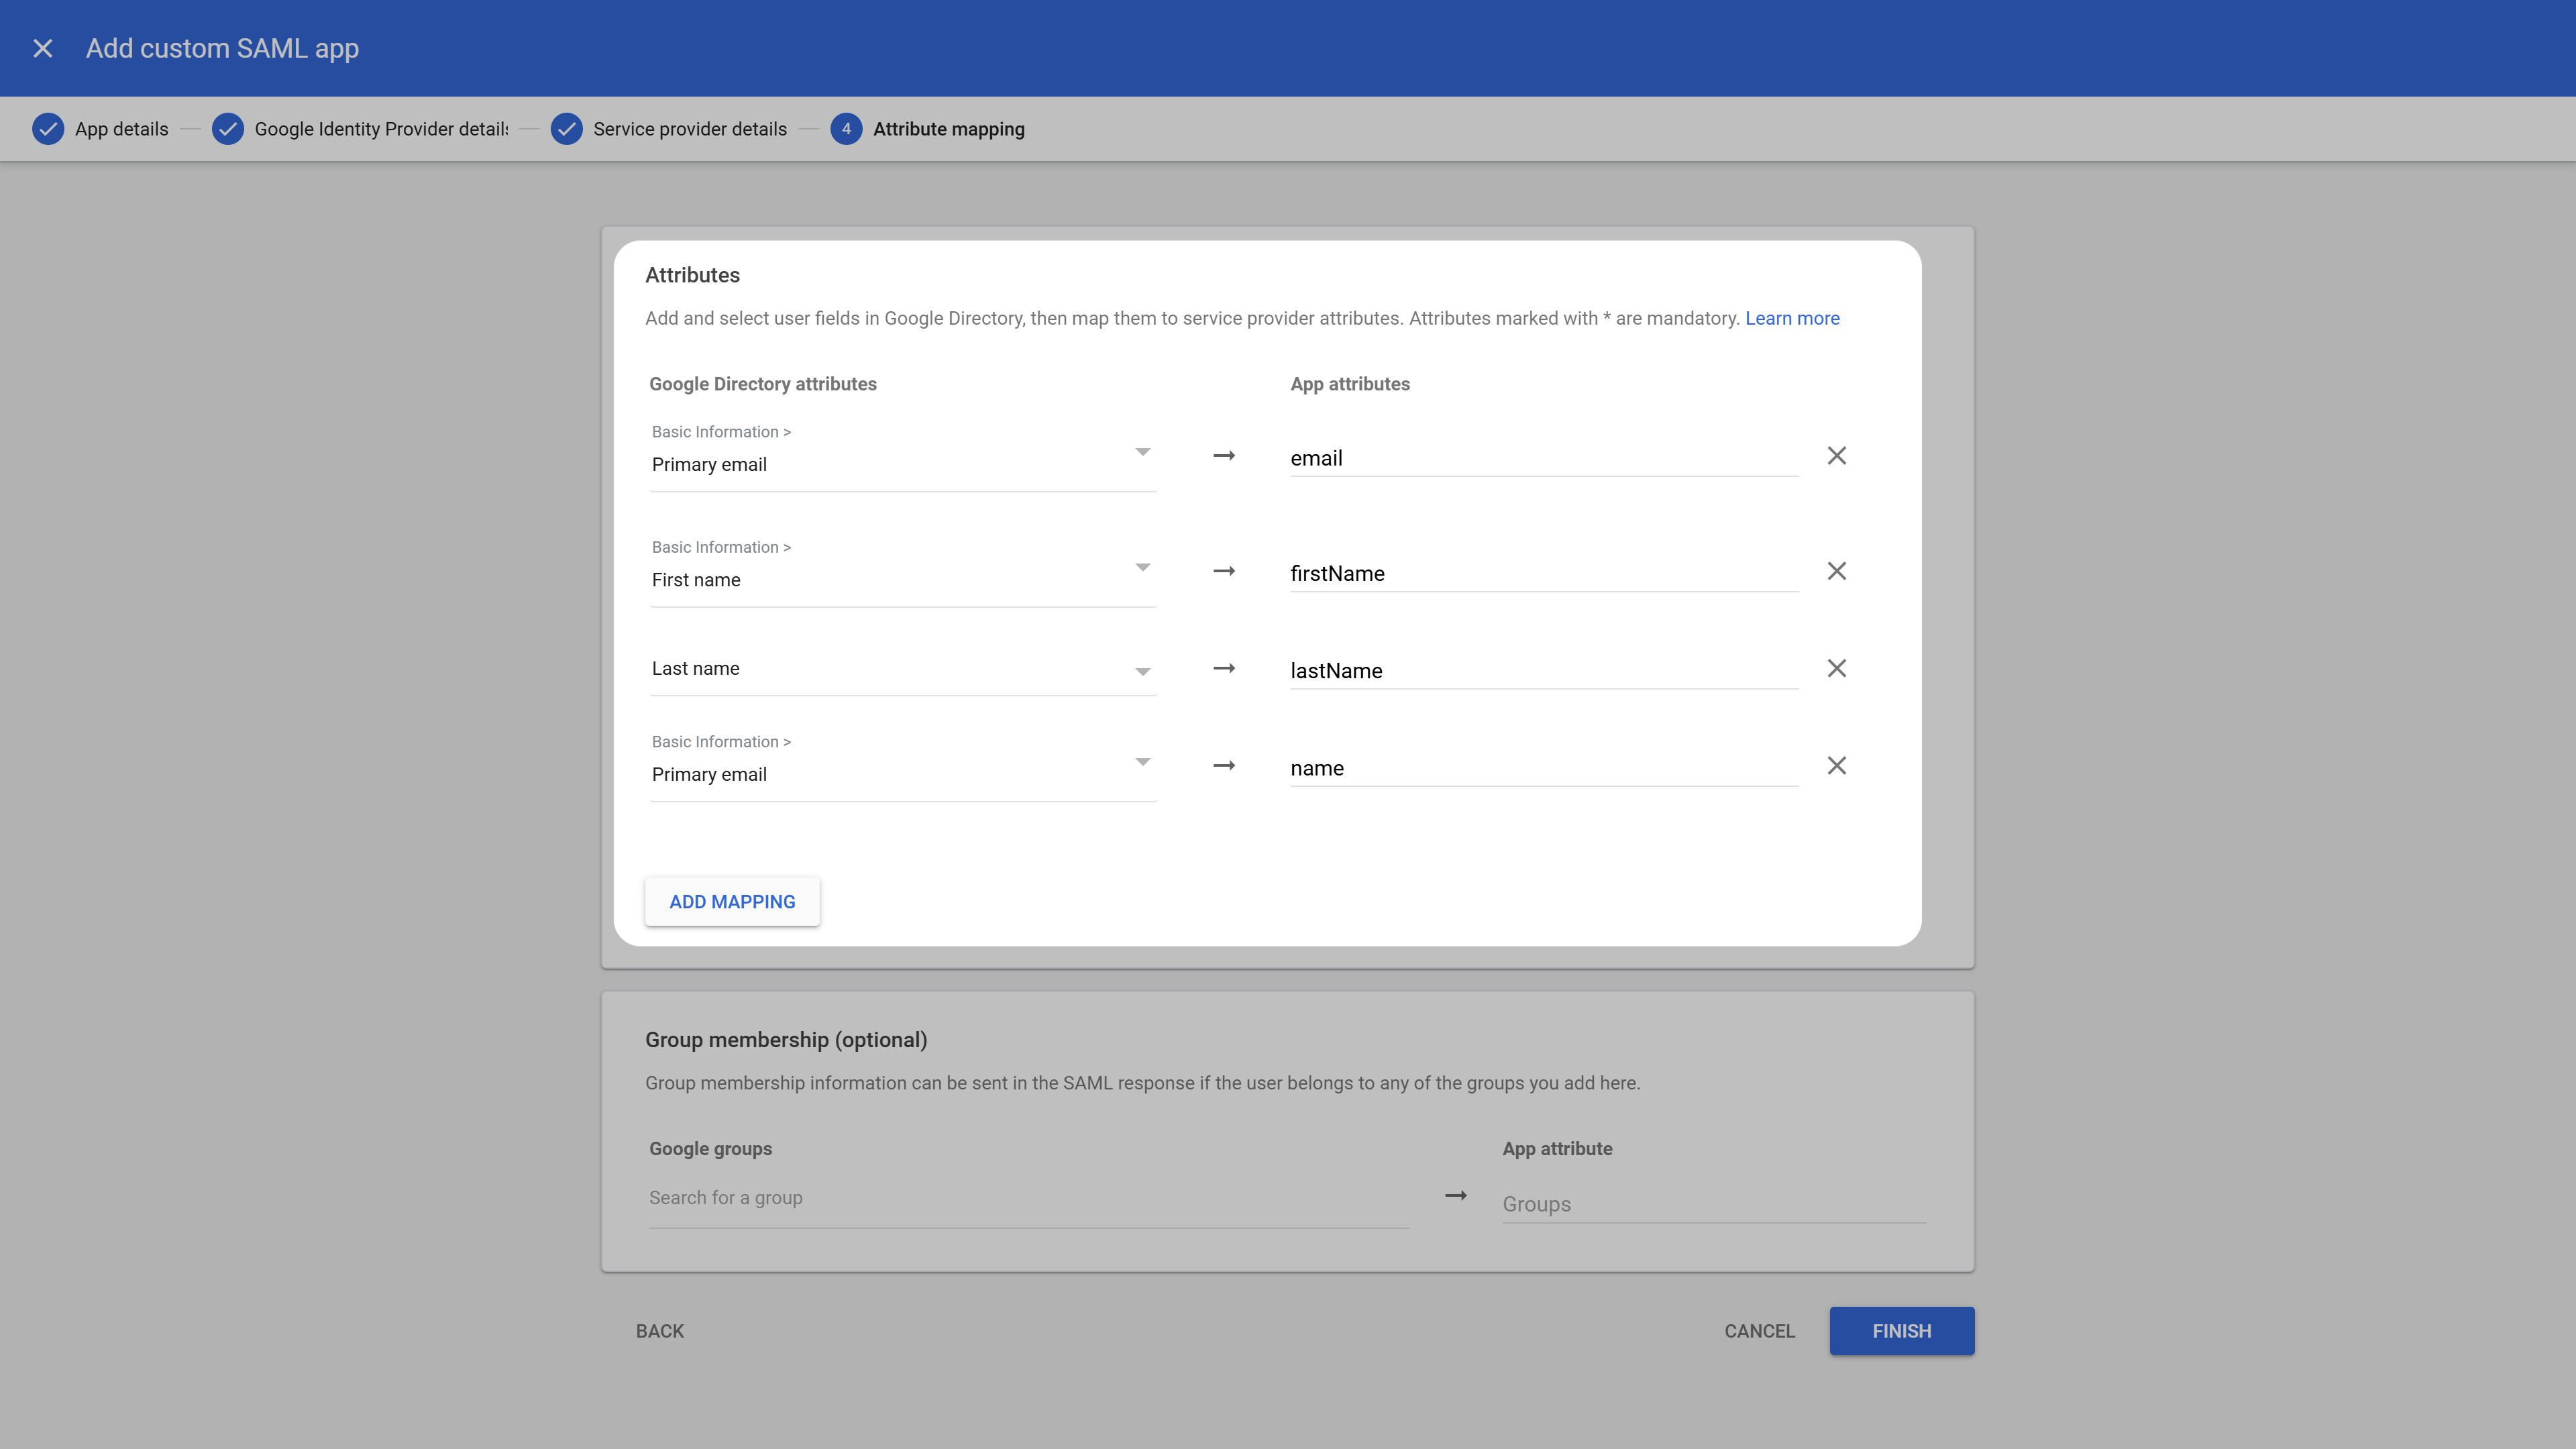 Click **Finish** to complete the SAML app setup.
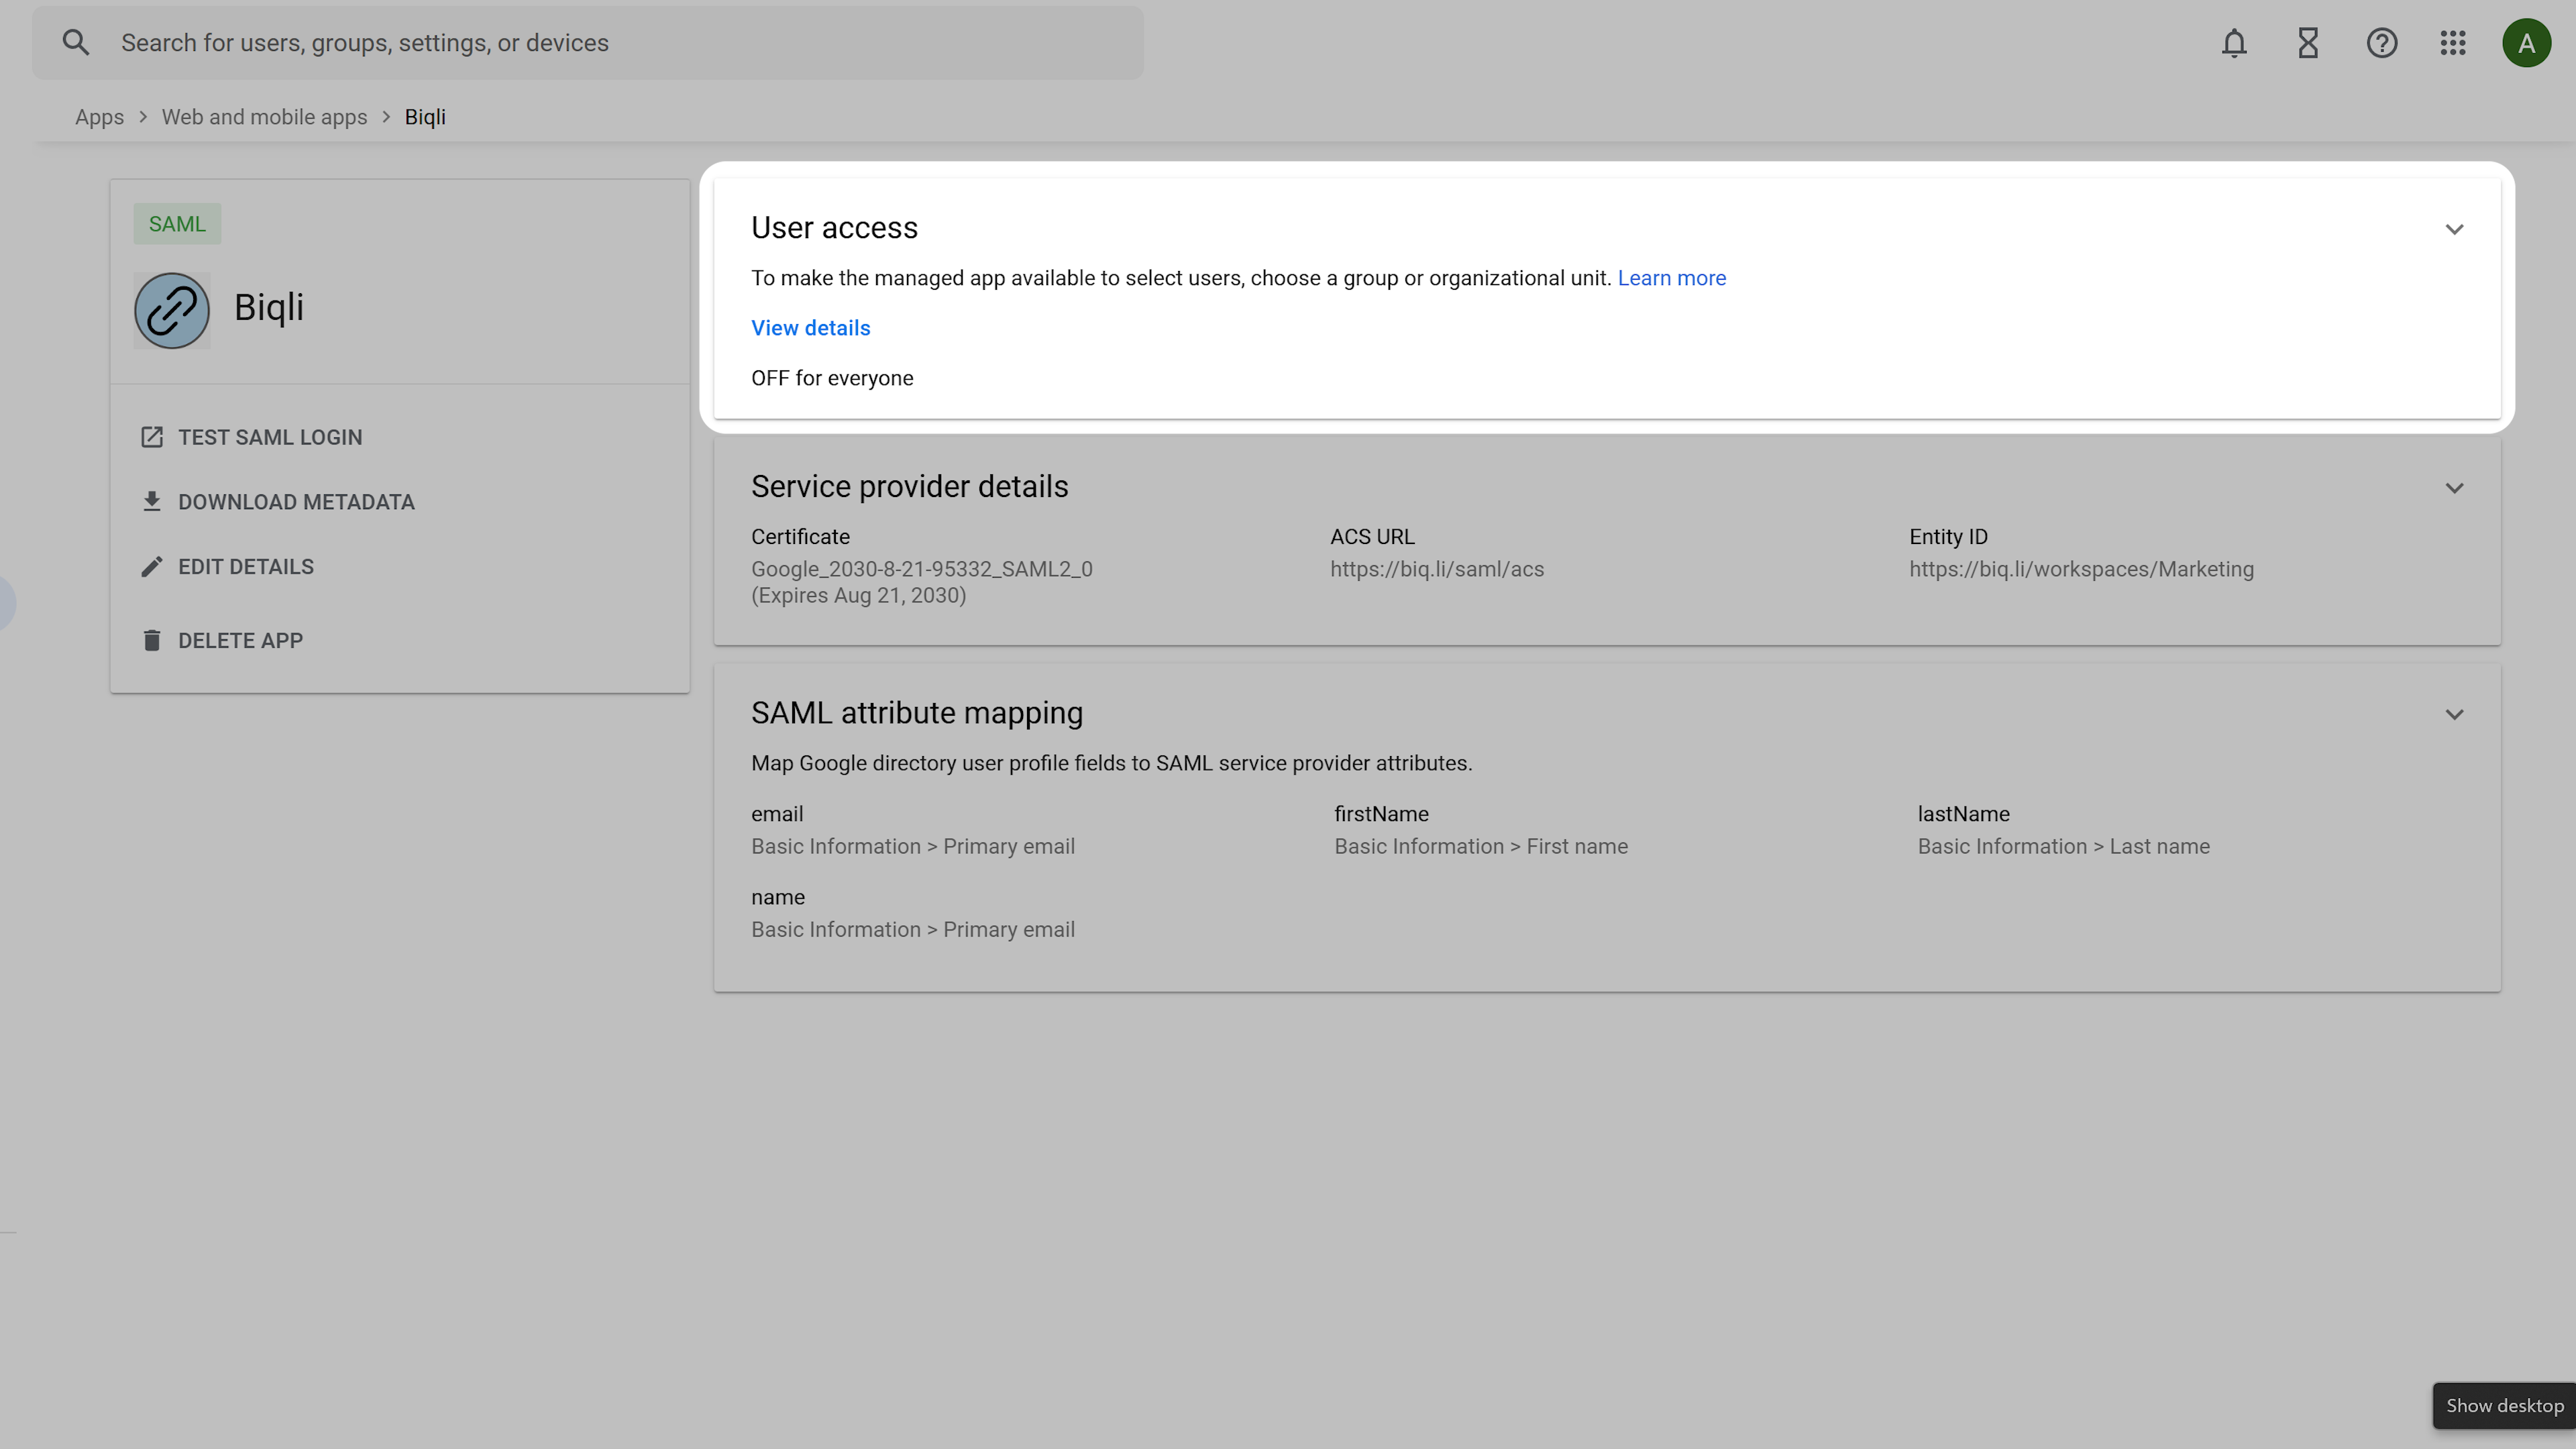
On the application overview screen, select **User access** to configure login permissions.
Click **Finish** to complete the SAML app setup.
On the application overview screen, select **User access** to configure login permissions.
 Select **ON for everyone** (or assign to specific groups) and click **Save**.
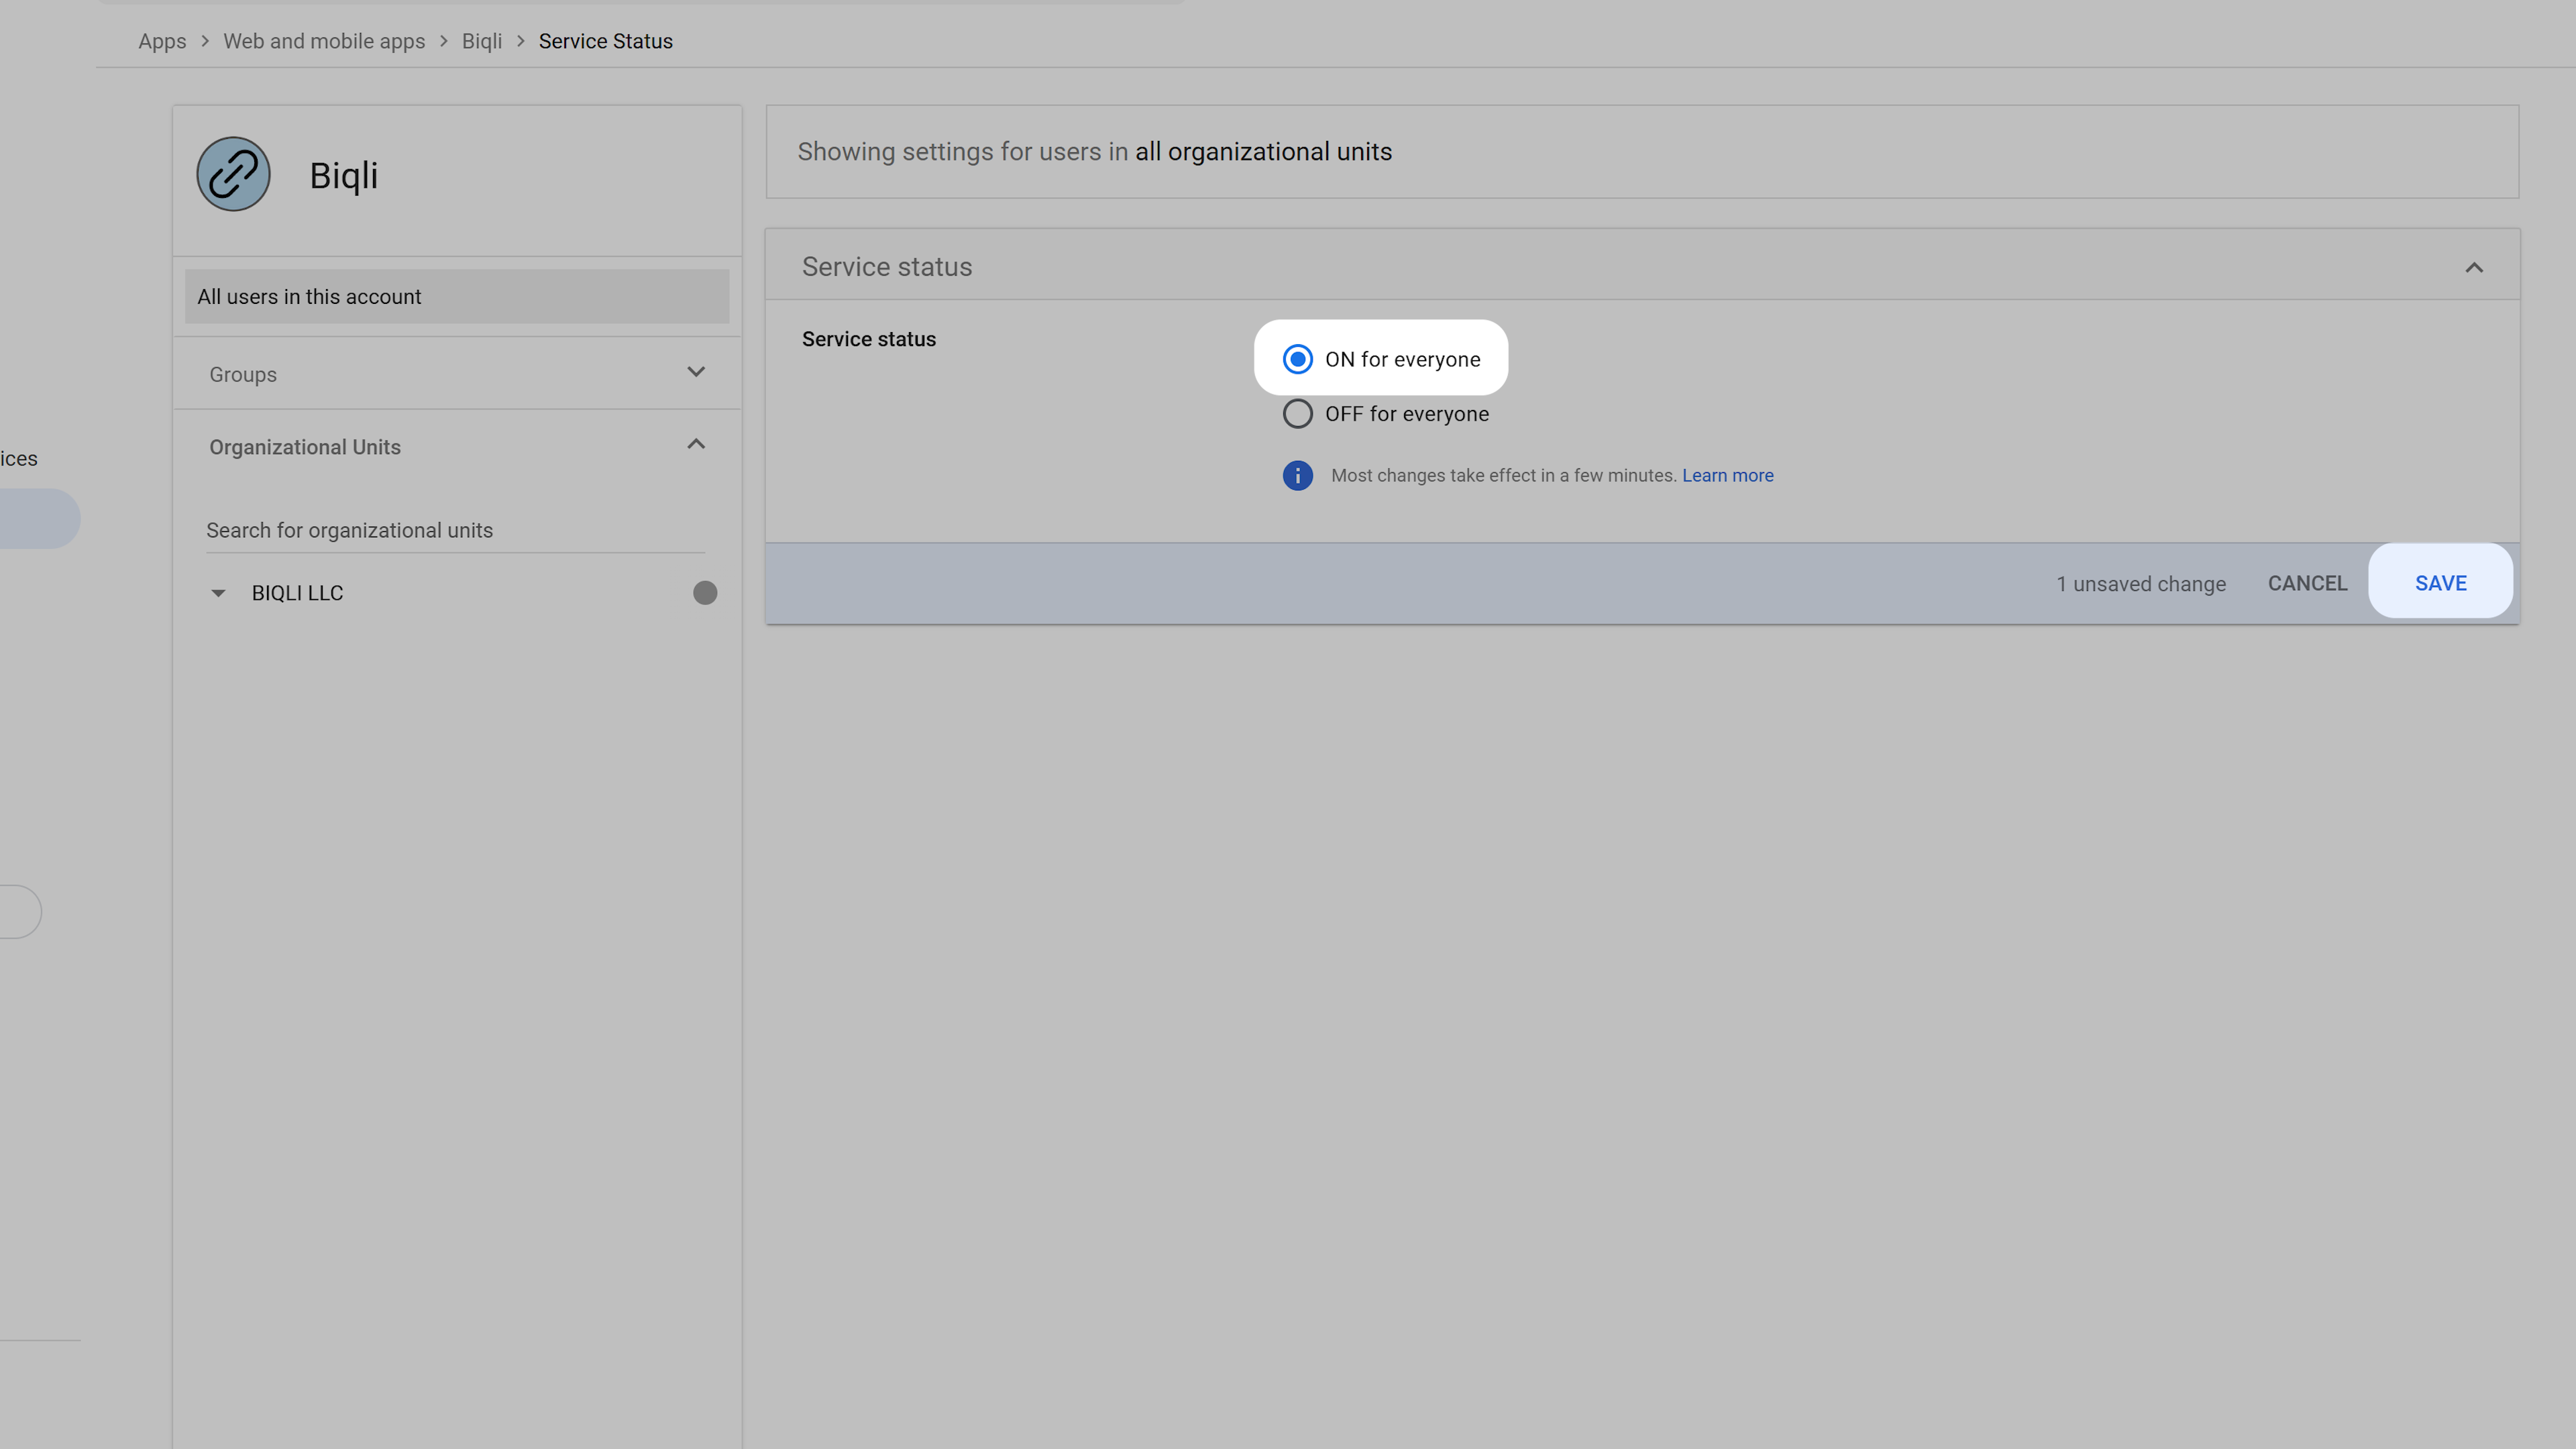 This enables your Google Workspace users to seamlessly sign in to Biqli using Google SAML SSO. Next, return to the Biqli dashboard to finish configuring the SAML SSO settings.
## Step 3: Configure Biqli SAML SSO Settings
Navigate to your workspace **Security Settings** in Biqli. Under the **SAML Single Sign-On** section, click **Configure SAML Single Sign-On**.
This enables your Google Workspace users to seamlessly sign in to Biqli using Google SAML SSO. Next, return to the Biqli dashboard to finish configuring the SAML SSO settings.
## Step 3: Configure Biqli SAML SSO Settings
Navigate to your workspace **Security Settings** in Biqli. Under the **SAML Single Sign-On** section, click **Configure SAML Single Sign-On**.
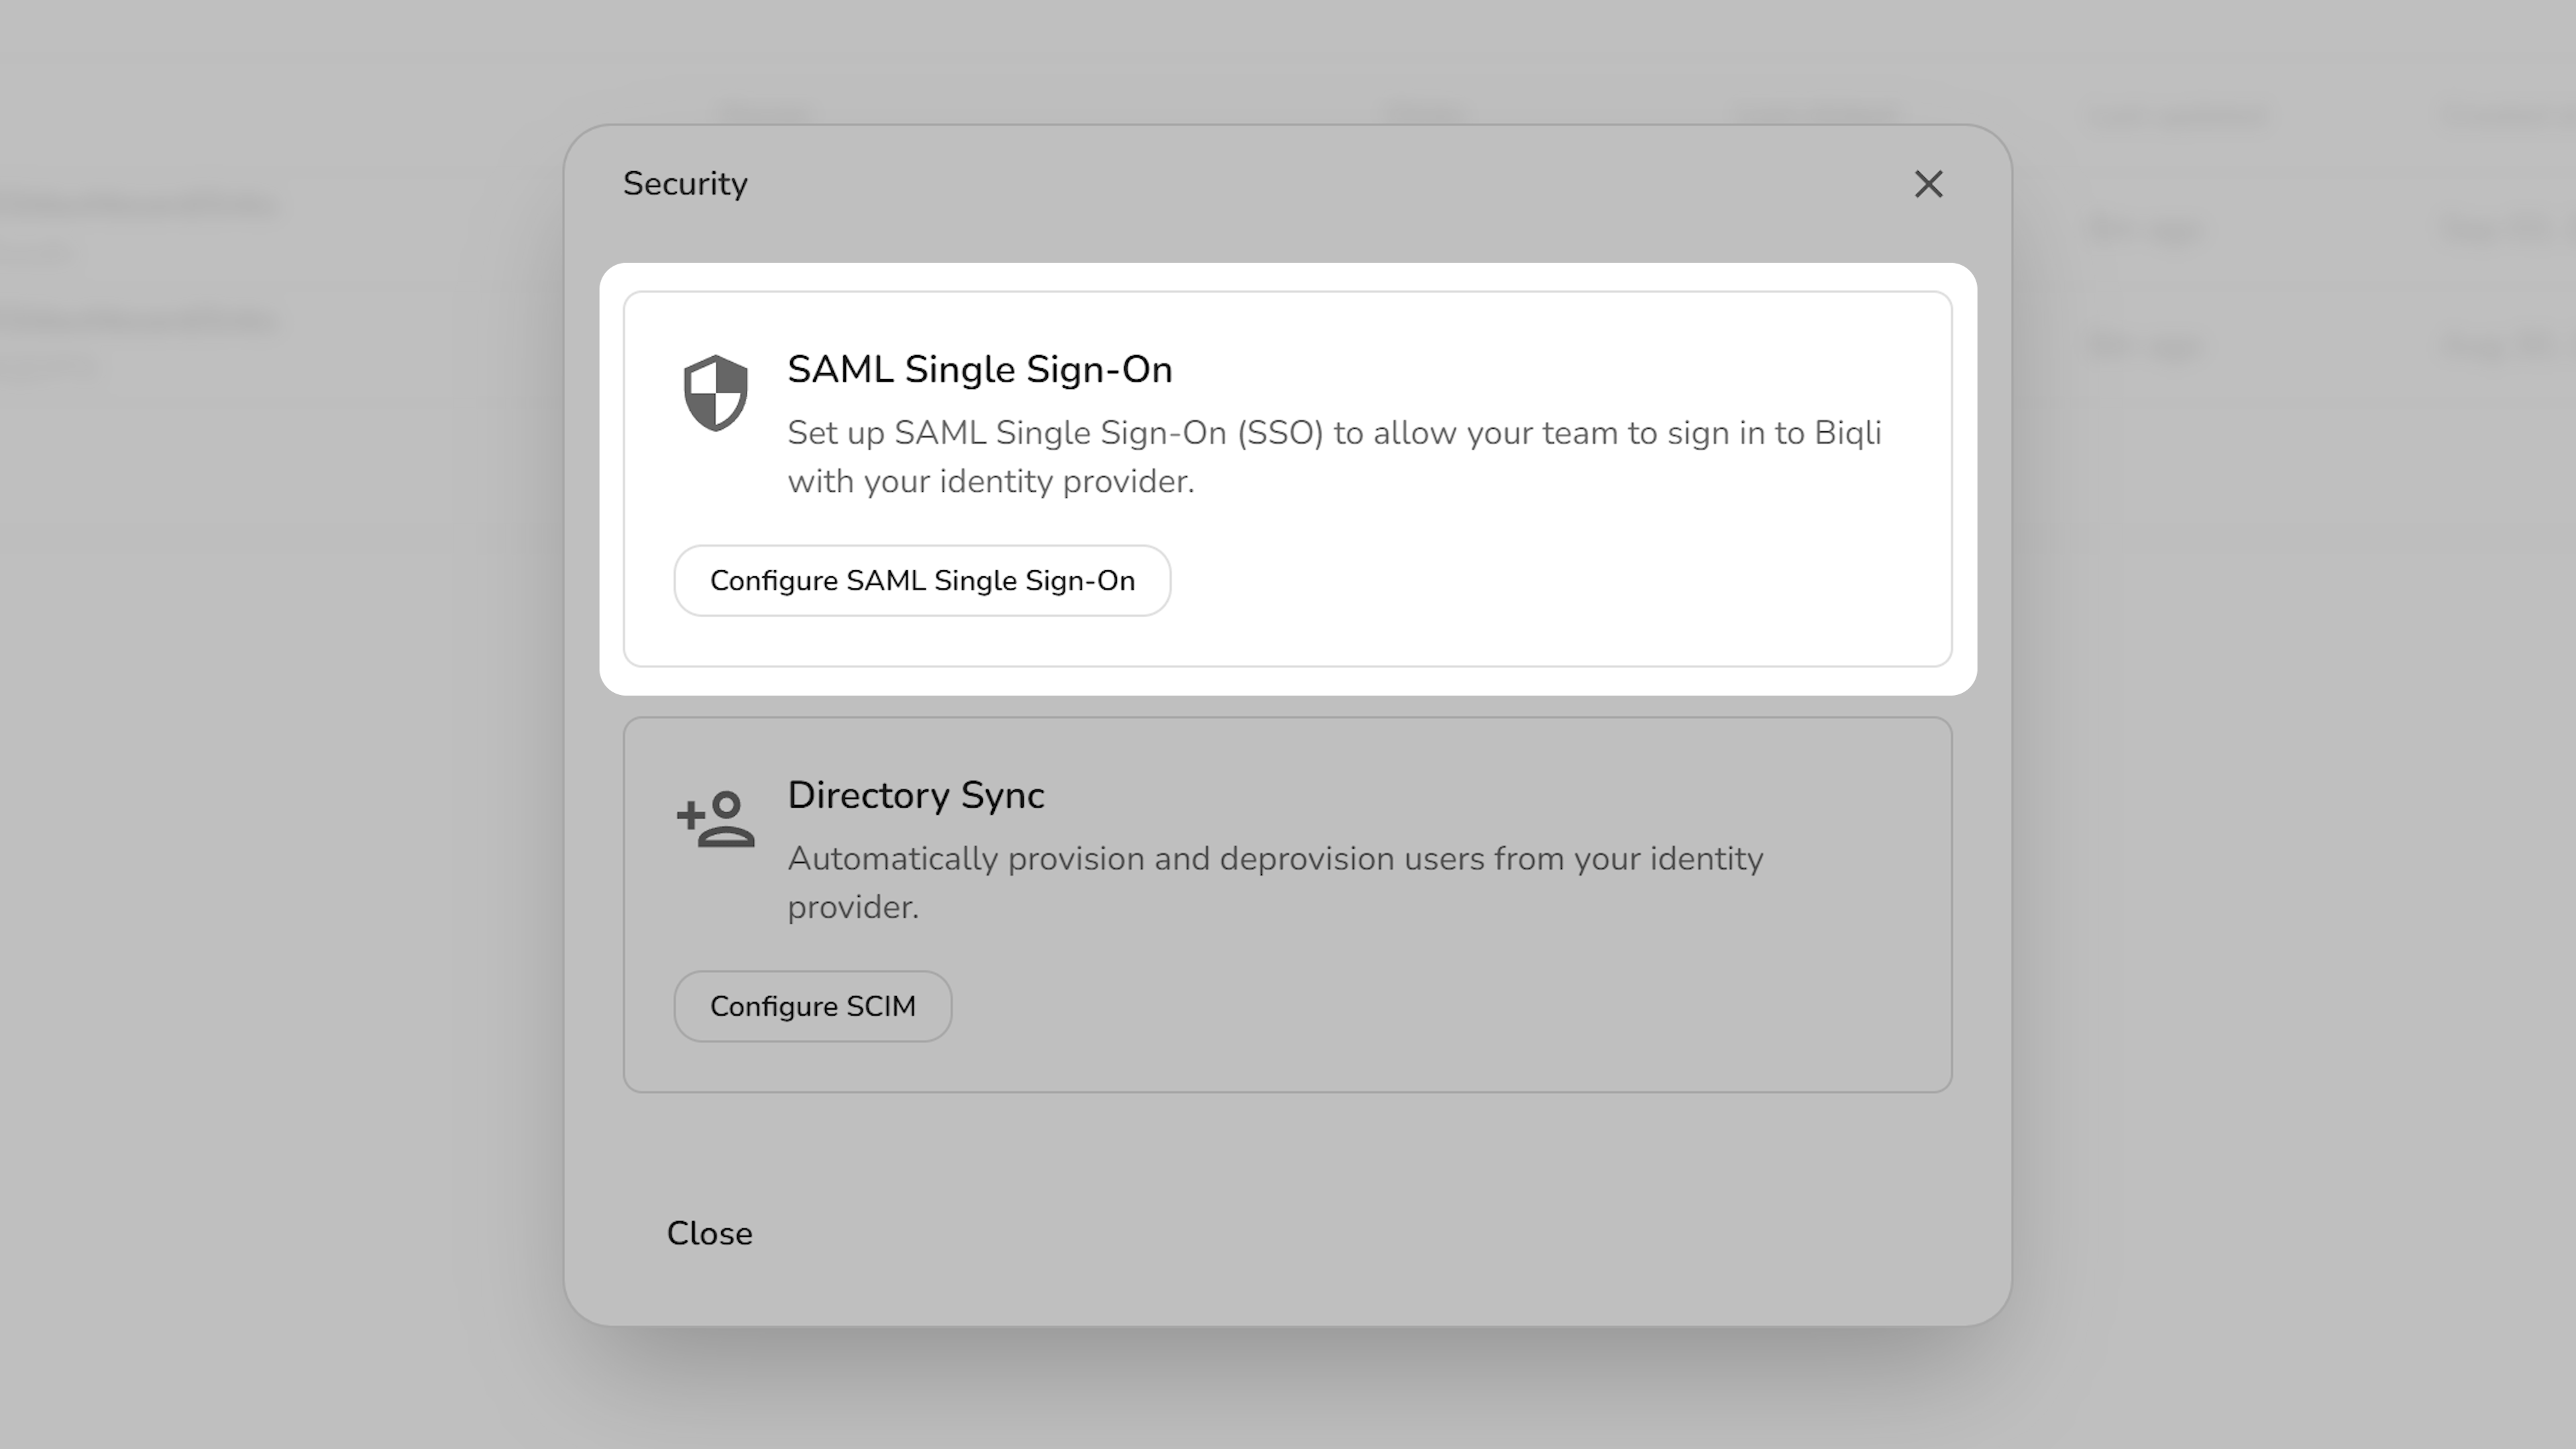 In the configuration modal:
1. **Select Identity Provider**: Choose **Google** as your SAML provider.
2. **Upload Metadata**: Upload the Metadata XML file you downloaded in Step 1.
3. **Test Connection**: Verify the configuration.
4. **Activate SAML**: Toggle on SAML authentication for your workspace.
5. **Save Changes**: Click **Save changes** to complete the setup on Biqli.
In the configuration modal:
1. **Select Identity Provider**: Choose **Google** as your SAML provider.
2. **Upload Metadata**: Upload the Metadata XML file you downloaded in Step 1.
3. **Test Connection**: Verify the configuration.
4. **Activate SAML**: Toggle on SAML authentication for your workspace.
5. **Save Changes**: Click **Save changes** to complete the setup on Biqli.
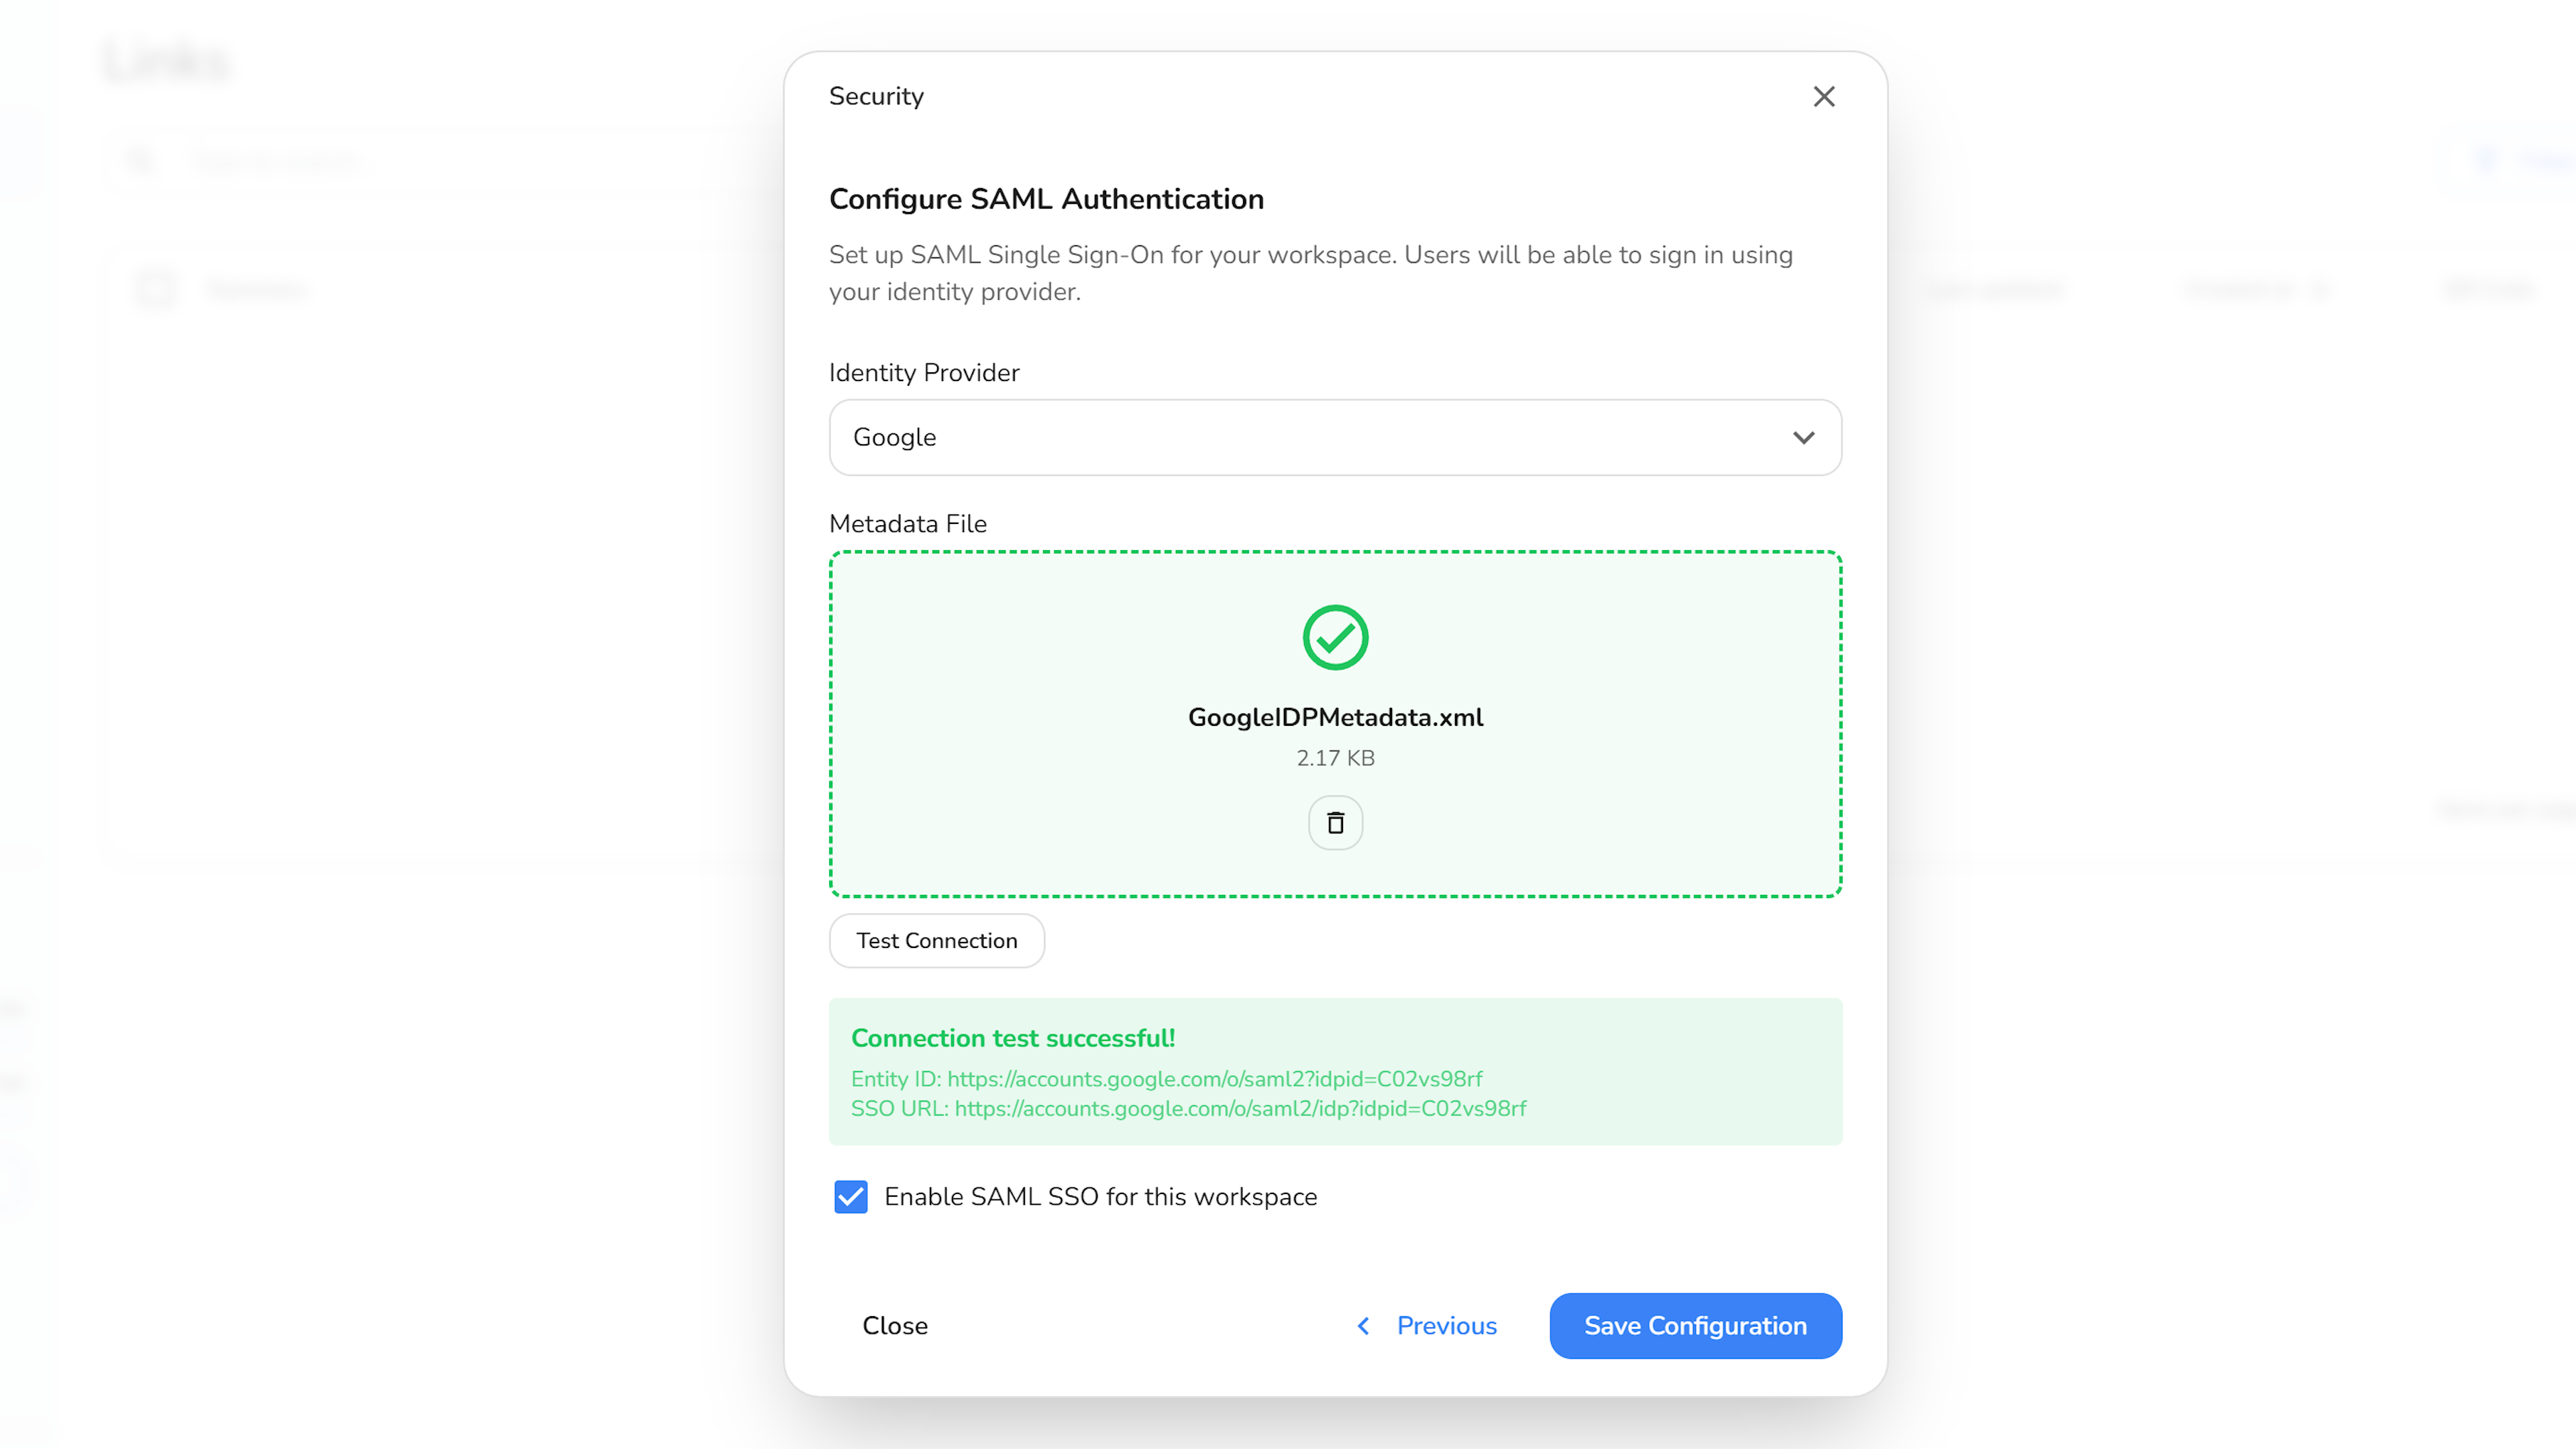 Once saved, your Google Workspace integration is ready and team members can log in using Google SSO.